‘nids part 273 – Tyranid Warrior and Warrior to Hive Guard Conversion – basecoats

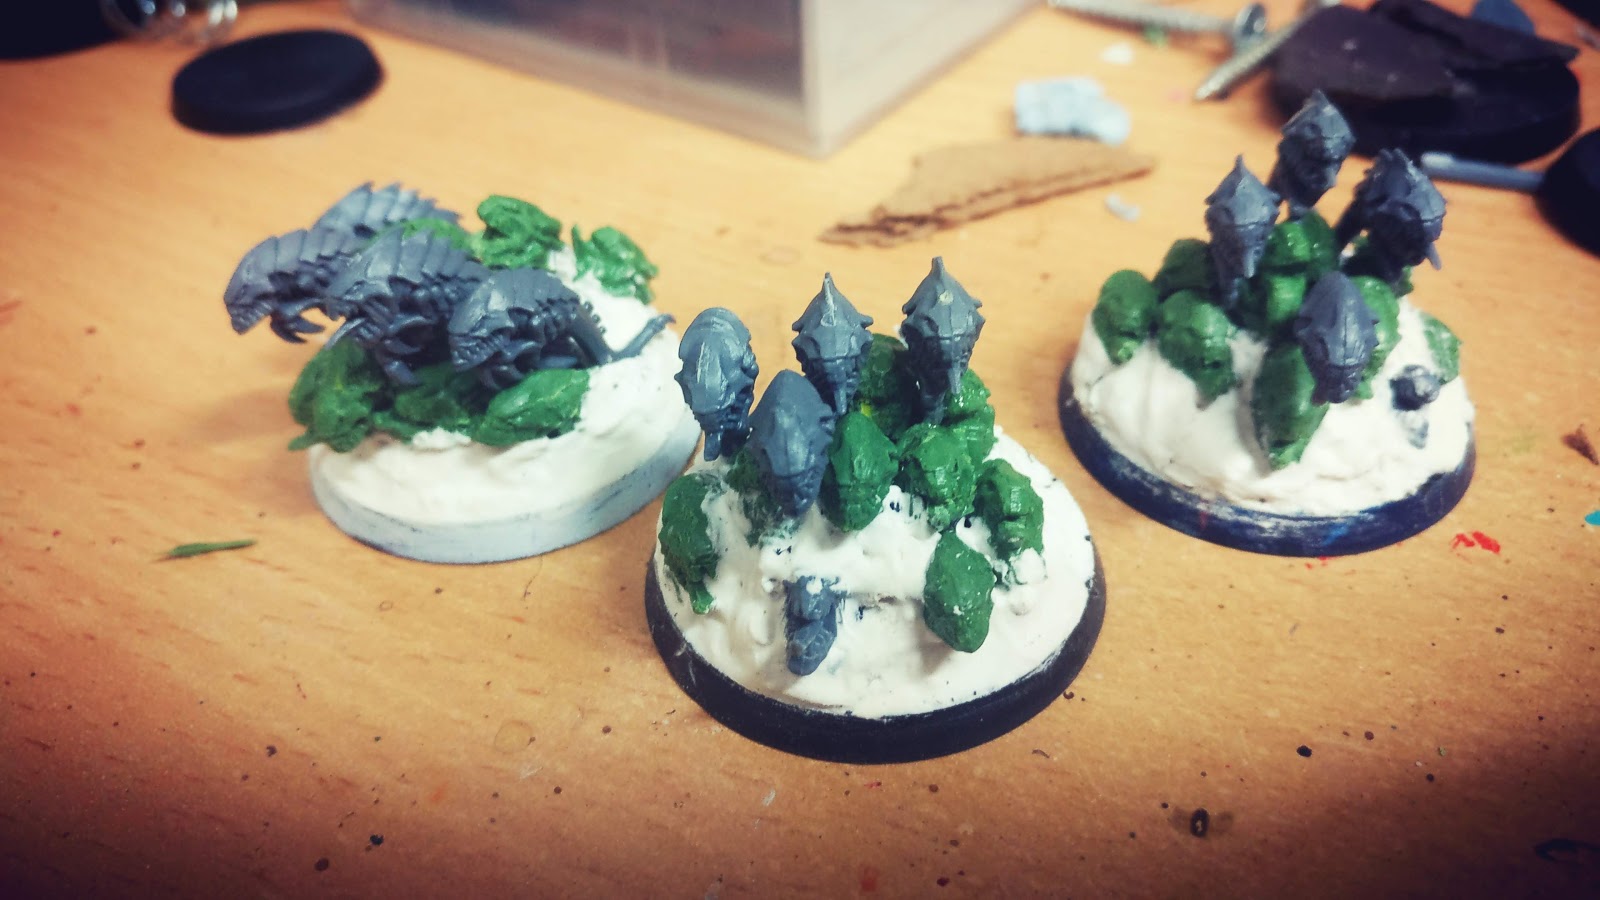
Built and based for a while now it felt about time to add some paint to my Warrior to Hive Guard conversions. Even if it was just a basecoat it’s one step further, one less thing to do.

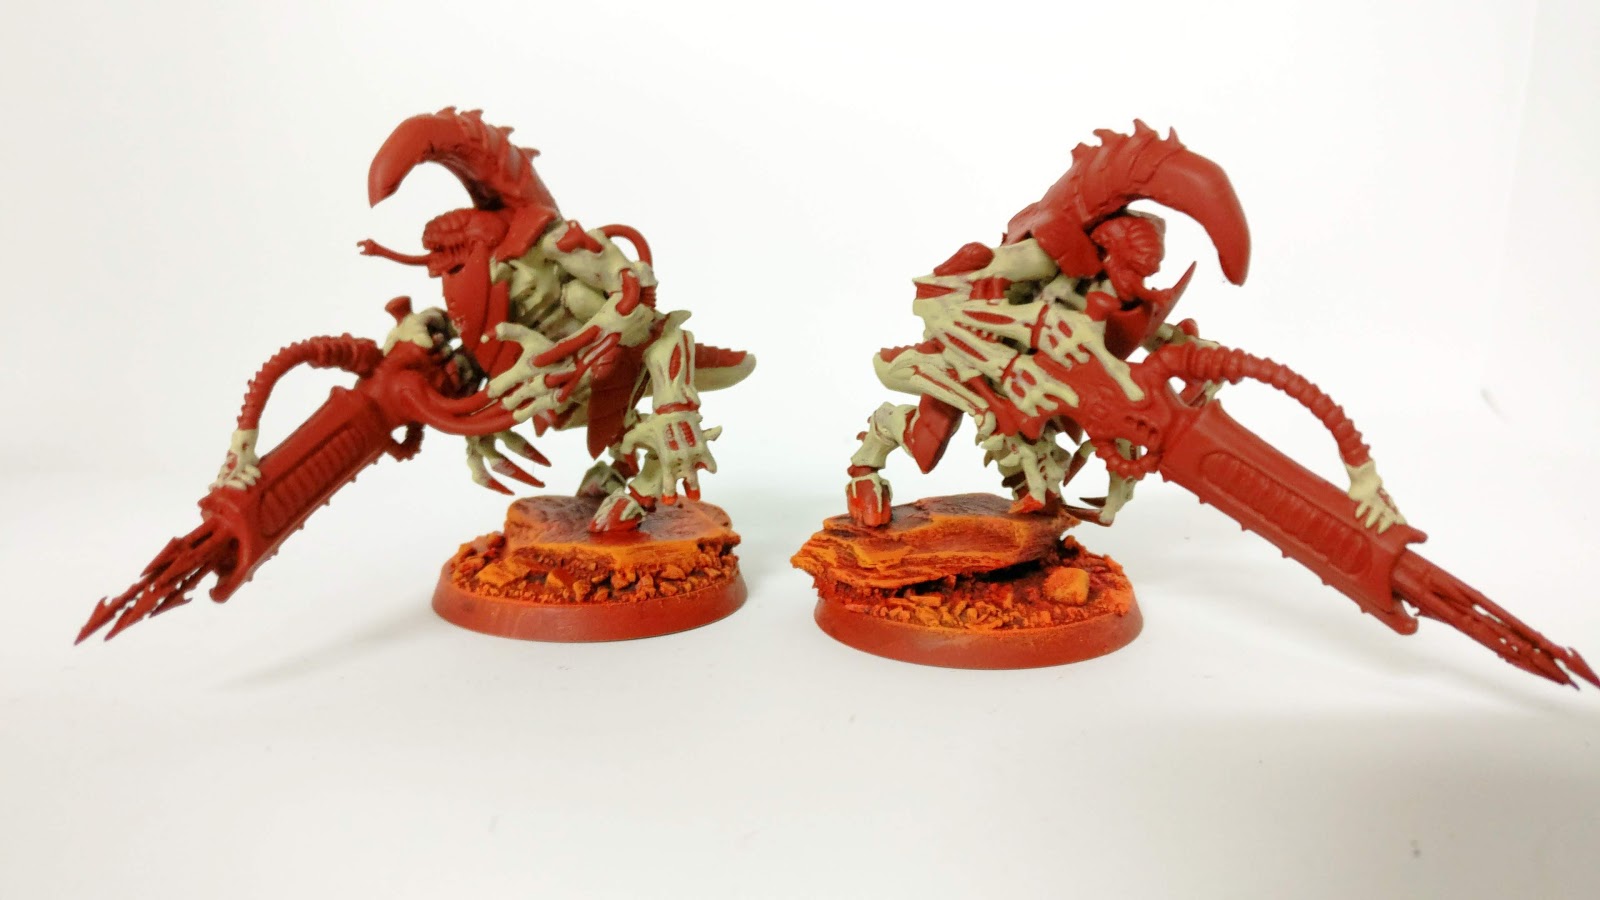
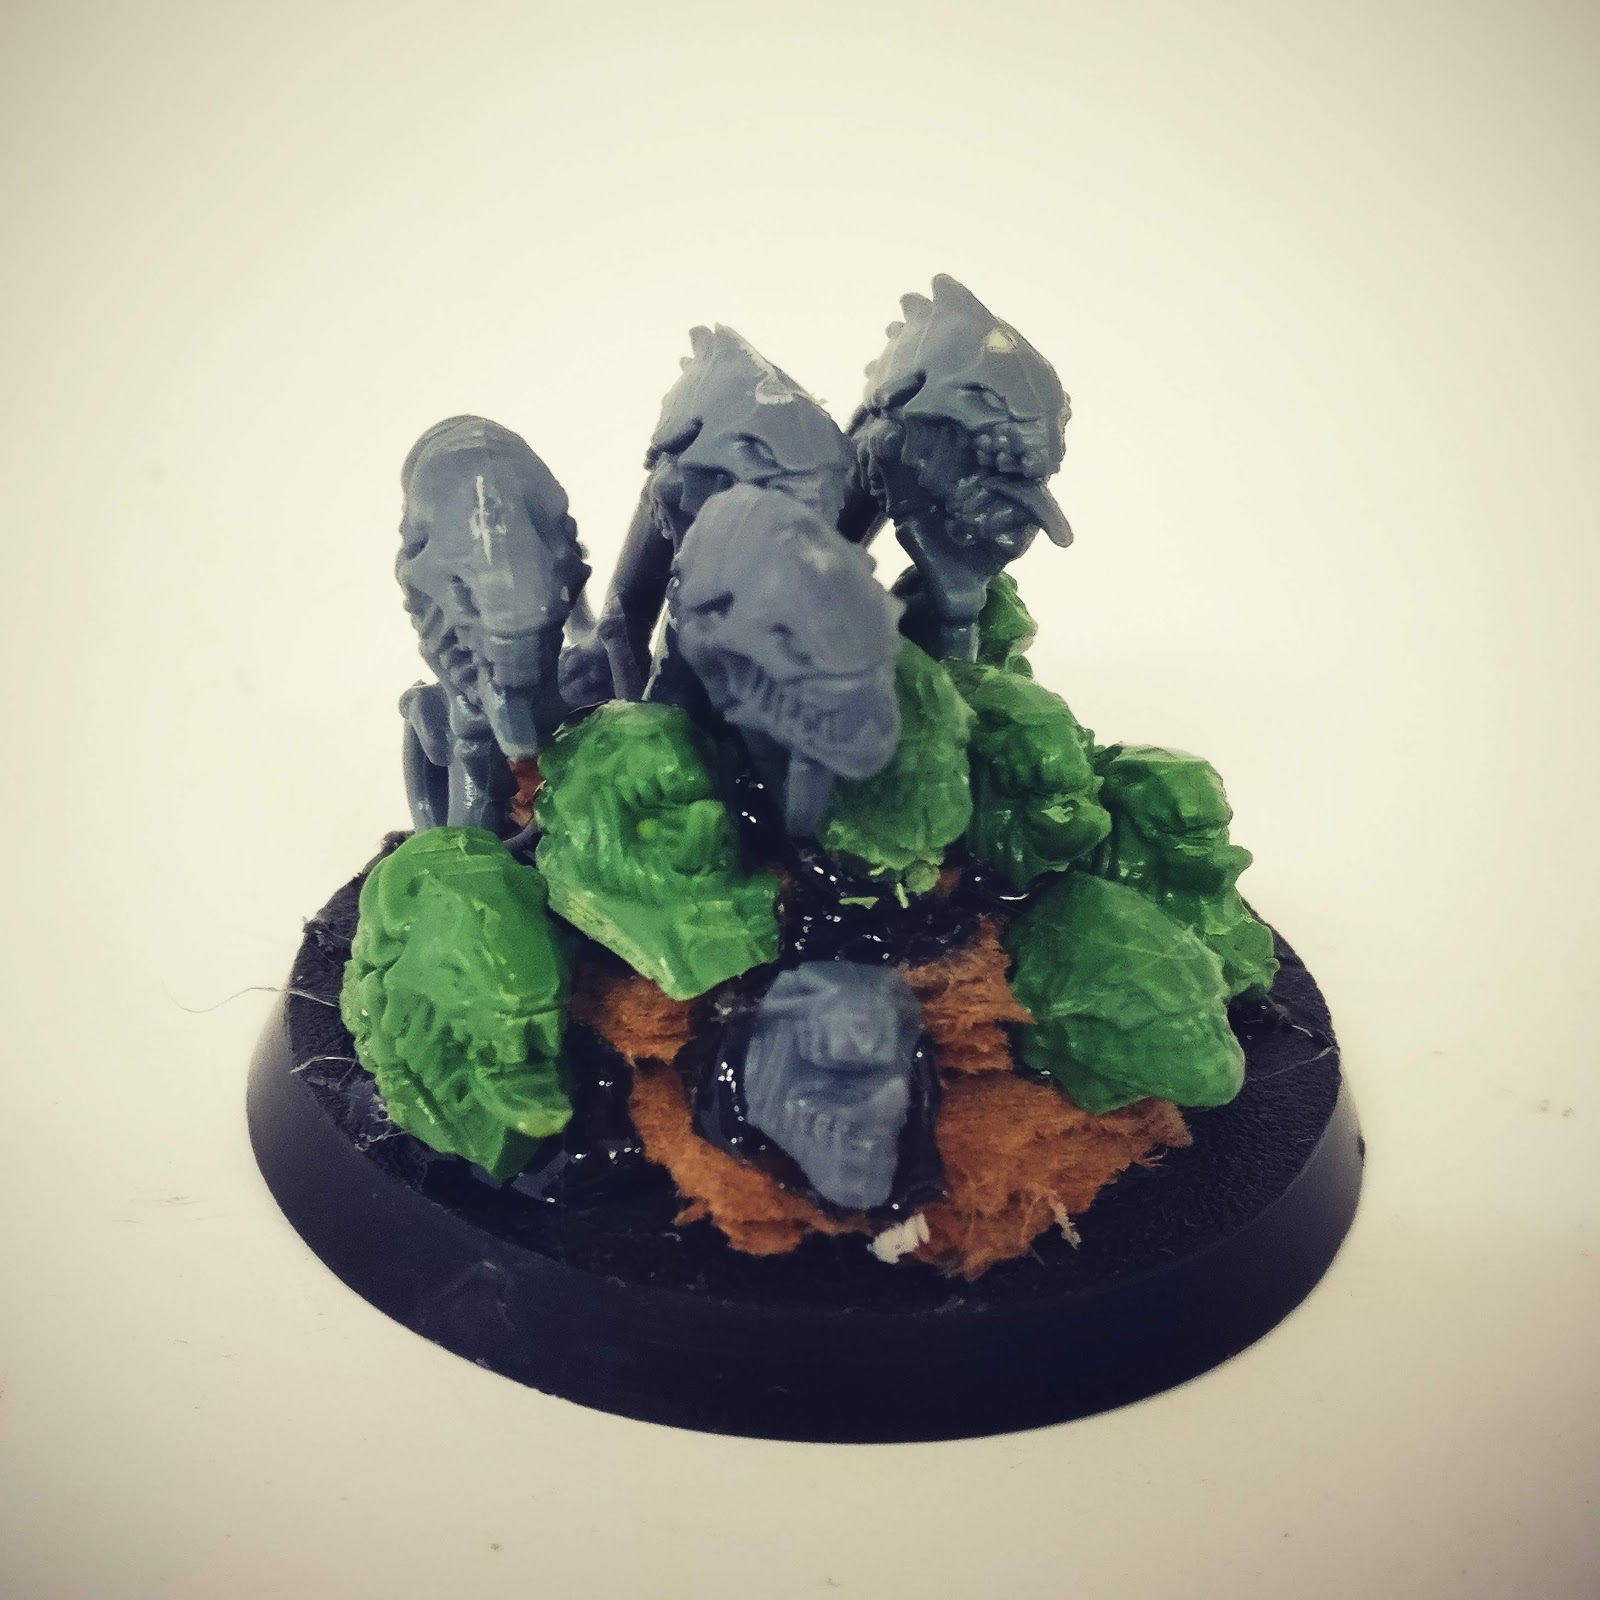
It’s a tedius job, something I used to make so much easier by undercoating them bonewhite and filling in the reds. Now I seem to start with the red – the least representative colour on the model and try to be neat with everything else, not to mention I cover up most of the red primer anyway!

As you can see the bonewhite basecoat is pretty ropey but I’m fine with that, it;s getting two coats of wash so doesn’t need #2thincoats In fact any paint showing through the base just adds more texture ultimately.

The Tyranid Warrior was up next. No doubt I’ll try and treat these as a unit for painting purposes. I’ve actually fished out my existing Warriors and Hive Guard and will look at any potential fixes. 

Certainly some base edges have become a little chipped but I’m also painfully aware that they’re still afflicted with Citadel Purity Seal frosting. Maybe not now but I will definitely one day re-paint the red fleshy bits that are are damaged and I know I can do the chitin much better now so I’ll probably repaint that.

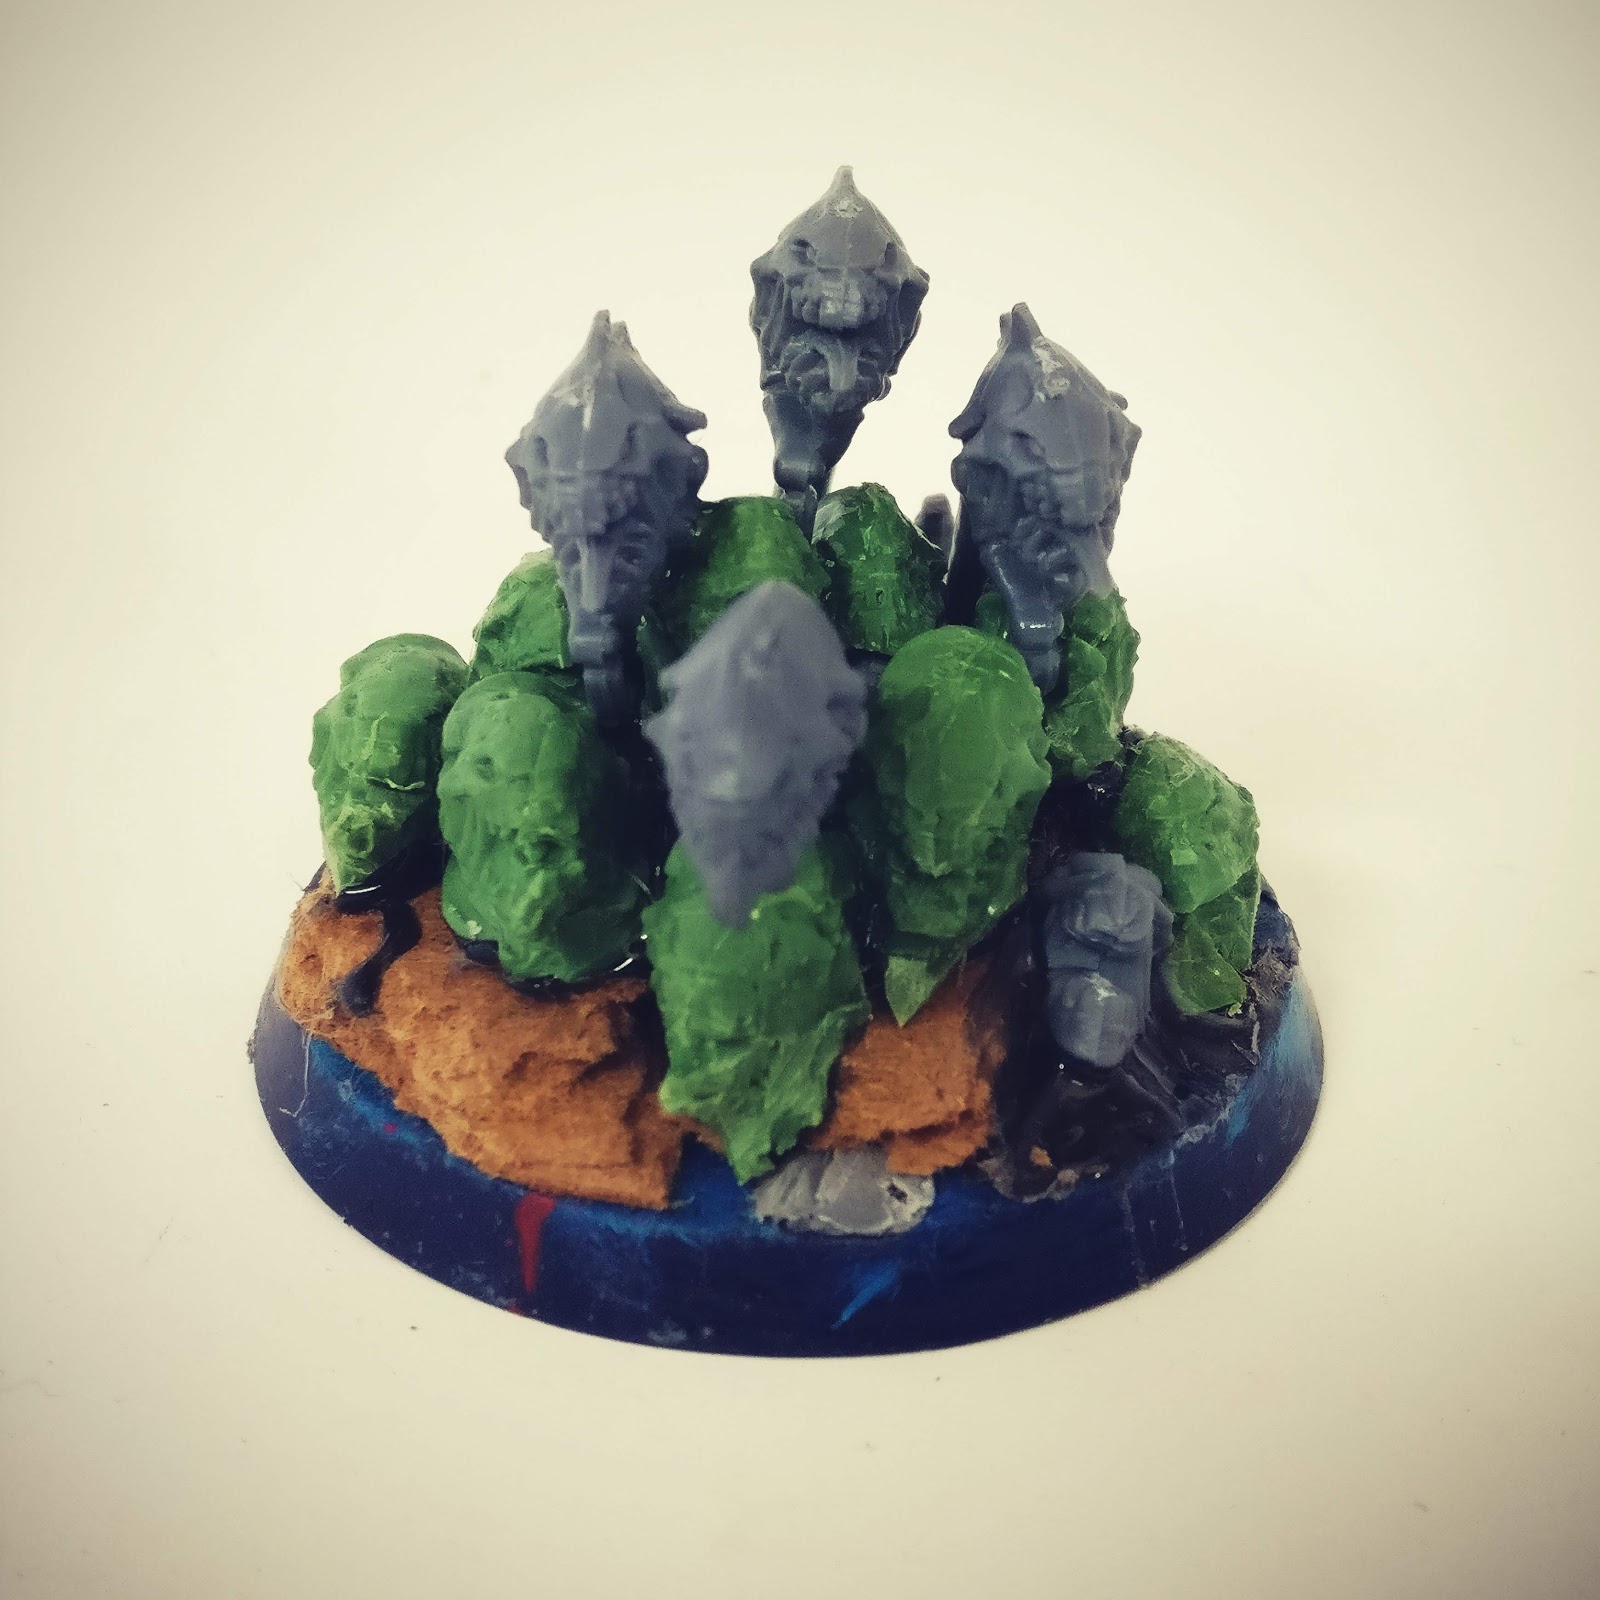
The bone colour only needs additional highlights but there’s no urgency just now. I’ve lined up the five Devgaunts to ‘bone up on’ next and then the Rippers. All of these are just inbetween things – tasks that need doing but in themselves are tedious so if I fit them in among other projects when I finally focus my attention it’ll just be the fun bits that actually feels like painting, not necessarily like putting paint on, if you follow. Otherwise I’ll be tackling my Blood Bowl Ogre next…

‘nids part 272 – Tyranid VSG part 3

Dreadtober starts tomorrow, but I mentioned the other day I had been sculpting the Tyranid Void Shield Generator and so thought I’d just slip this in before I can start sharing my Dread progress. I had been putting the VSG off, for over 3 years now, purely because I wanted to video how to do some of the tendon bits. I finally did the clip and I desperately want this complete, but among so many other projects Dreadtober included there’s quite a competition for my limited hobby time.

Here’s how I sculpt a tendon:

And static shots from the completed spine in the video.

The inner spine is [almost] complete though.

It’s not perfect by any stretch but after the gloss and Tamiya Clear Red X-27 it doesn’t have to be.

My next stumbling block is how it interfaces with the ground. I was going to use some of the wood chips I used on my ‘ground-bursting’ Trygon but I still need to add some lava stones to look like alien growths. It’s a fair bit of work and not without challenges, hence why it has almost caused my renewed efforts to stall…

The emitter node also needs adding to the pen tube so I can then add veins and whatnot before I then try and sculpt the inside of the battlements. 

The black mark is for one extra tendon that needs to be sculpted in place. I’ve got some concept elements for the battlements – which is an odd situation as in 8th edition the building rules are far more streamlined now with less room for interpretation. It’s still possible to position models in the standard Imperial VSG but nowadays this would probably be considered modelling for advantage. 

I mean I did specifically build it to fit a brood of Devgaunts in but that was perfectly legitimate with the prescribed rules in 7th. Anyway, I doubt it’s ever going to a tournament so it’s not really an issue.

Anyway, not sure when/if I’ll do some more on this, Dreadtober is my focus but I will have some extra hobby time between writing this and it’s scheduled publish date, so I might have one update soonish or none for six months to two years…😂

Terrain is everything – Ferron Fire Firs

My last update on these was April 2018. They’ve essentially sat in a box untouched until now. Other projects take priority and terrain often falls by the wayside. Frustratingly not a lot needed doing to complete them – the Red Planet BASE! and some additional highlights on some of the trees for variety.

I did my Red Planet BASE! highlights, I also did all the Genestealer Aberrants, Hive Guard, Rippers, Termagants, Tyranid Warrior and Redemptor Dreadnought while I was at it – you see that’s the advantage of the Big Build programme, it allows you to get them ready for basing.

I then did the extra highlights of the mid-yellow [lemon] and then threw on some white for super hot streaks of combustion. Hopefully they’ll fit in with the other set I’ve done previously, although the very reason for the extra highlights is variety so not sure how ‘fitting in’ is supposed to manifest itself as I’ve expressly painted them different…

Wraithbone chips next and then a quick varnish. I actually have once of those cheap spray-can car varnishes so I decided to give it give a go. It seemed the easiest way even if the soft cover makes varnish almost redundant. The red trees are from the first set I bought, where I didn’t paint the big trees because I thought they were too big – this was before LoS for Knights was needed, so I’m finishing these off too.
The clear lacquer did alright and the ‘bottle brush’ feels slightly more substantial know because of it. 
However, it is glossy, which for the trees I actually like.
But for the bases I don’t.
Protection wise I’m satisfied but I’ll be painting all the bases with my Winsor & Newton Matt Varnish. Not only will this add more protection where this terrain is prone to damage but also supply the finish I’m after.
It’ll be dull ‘drone’ work, that I’m not particularly looking forward to but it’s just the one last step and I can tick it off my To Do List as a great start to the new season – terrain ✔️, quantity ✔️, long time in production ✔️
I also picked up a couple of extra art acrylics, so I’ve got my infra-red spectrum going here. I need another can of clear lacquer to varnish up my first set of trees to the same level of protection but typically Home & Bargain is out of stock.

Terrain is everything – Sanctum Imperialis – TO DONE!

Aah the Sanctum Imperalis… It’s taken a while to get the opportunity to take pictures but I needed some to add to last season’s hobby review.

It’s a big piece and so it’s a struggle to fit it into my homemade light box but I got there in the end.
As you may recall this was a project not without challenges, in particular the ‘bold’ choice of full verdigris on buttresses, supports and skirting boards.
The red glass lighting also suffered from a lack of contrast that I repeated on my Ravenwing Dark Shroud – sometimes Tamiya Clear Red X-27 is too good.
But the colour choices were made to stretch me, to do something more challenging than just the weathered brassy bronze and as you can see the Ferron Proxima background finally gives it the context it needed.
On the full red/orange background the verdigris provides the ideal framework to break up the monotony of the red rockcrete walls.
With the cream interior adding another dimension.
I can’t wait to eventually see these used on my Realm of Battle board, although that could be a long time hence.
I had plans to add some creeping yellow flock up the walls and around the buttresses but didn’t get round to it.
I did get the occasional propaganda poster in though 😉
And the white background pics, which aren’t totally without merit.
At least it matches the interior a bit, there’s consistency and sense of reason that grounds the turquoise.
But as I’ve maintained buildings in real life are not always colour-matched and consistent.
They often have elements that are incongruous and garish. So whatever the result I committed to the aesthetic and executed it.
Better late than never the [last] Big Teal Stamp of Approval for 2018/19 and completing some terrain!

‘nids part 270 – Rippers – Big Build TO DONE!

On to basing up the Rippers I used some cheap filler to blend the ground in a bit more.

Then I got some thin slate and crushed it up to make more of a fractured crust they’ll burst through – more represetative of their tunneling rules.

Now, the red stuff is some Martian Ironearth that i thought I could just paint on and get the fractured earth effect. But the paint had started to dry out and it went on more like peanut butter. I really didn’t think it would crackle, so I panicked and blobbed on the PVA and slate. It obviously did crack and even pulled apart the filler as it shrank! But the slate worked out OK too.

I may even give some of my older Ripper bases a little paint touch up when I get round to painting these – the older ones look a little tired and it wouldn’t take too much effort just to bring them up to current standards, although I’m sure I’ll live to regret considering it…

I final coat of PVA and sand and they’re built

Wait a minute, look what’s just snuck up as well. I couldn’t just leave the Spinemaws in box. I have quite a few spare Infestation Nodes so I thought it would be nice to use une to raise them up. As the Spinemaws are all the same height you have to do something to get variety and for even more I glued the node on top of a 25mm base on the 40mm base. I then filled in some of the space with bits of hardboard and smoothed it all with filler again with a final coating of sand – so ‘stretch goal’ 😉

 Big Build – TO DONE!

I builds it, I gets the badge!

‘nids part 269 – Rippers – Forgeworld inspired conversion

I’m continuing my Big Build theme and finally plucked up the courage to do my next three Ripper bases in the style of the Forgeworld ones. As you can see they got built and are considerably bigger and more representative than my first press-mold prototype.

I had been struggling to work out how to build these up, then I just started gluing chunks of hardboard to a 40mm base with the press-mold Rippers coming out of the base [plus one Warrior face pushing through the ground].

All in I think there are 12 Rippers on the base, 4 of which are the plastic ones.

  The next base I tried to use some of my Ripper side pieces glued to a vertical strut but it looked really odd and I ended up with the three heads running up the spine of the strut to try and hide it. Hopefully it won’t be noticeable that those two halves are different.

I’ll need to blend them in with a bit of ground material as they burst through the dirt. I think there are 14 on this base.

The last one, I think there are 15 or 16 on this, including 4 plastic and one Warrior face again. I pretty much used all my plastic Rippers.

All I have left are the Spinefist Maw variety, the two other upright versions [one with the horn on its head] and a couple of the others, in case I ever need to make any more press molds. It’s unlikely though. The Spinemaw Rippers might make a base but it’s an odd one I don’t really need.

Now to blend them into the ground…

‘nids part 266 – Tyranid Warrior to Hive Guard conversion TO DONE!

I confess I’m back in avoidance mode at the moment, but I’m also going with the flow. The urge to build came over me and manifested as finally making 2 more Tyranid Warriors into Hive Guard so I can finally field a brood of 6. I originally did this conversion way back when and I’ve had enough parts to do these 2 for ages, although not all the same bits as last time. For these I’m using the blind Genestealer heads and I’ve some Tyrant Guard bits to create the armoured chest instead of the previous Termagant armour plates. I’d been delaying the kitbash because I was convinced one of the warriors was too good to be converted and I was sure I had a more damaged donor Warrior torso and legs somewhere. When I came to ‘dock’ the tails they were a little too short and predictably having docked them I immediately discovered the damaged torso was in exactly the same 3″x2″ bits box. Anyway, the damaged one on the left was duly docked and I’ll be trying to reattach the tail of the un-shown decent Warrior.

Poses and basing was next, I’d already created the Impaler Cannons [you can just see a completed one in the top right], and went about gluing the legs on, with the chest plate and head. I also added some thick texture paint inside the crest so it’ll look fleshy.

I had to leave this overnight for the poly-cement to set properly but even at this stage it was clear the two bases I’d prepped with slate might not work too well with how the legs were positioned.

So I glued some slate to two more bases and found a much better fit. With polycement now dry I could drill and pin a foot to the base to ensure the superglue join was strong enough. I then added the Warrior rending claws and and gun – heaven knows how I’m going to prime and paint this now! 😲

I think I kept the guns separate last time but this was such a hatchet job I wanted it all solid. To that end I even glued elements together, so where I could get a gun arm resting on a claw arm I dropped some liquid poly between the too for added stability.

As I left it to dry overnight I hadn’t quite realised how the guns were pointing downwards so much, nevermind. I’m still pretty chuffed with the result, I don’t suppose it’s as much of a necessity now what with the plastic kit, but they’re still comparatively expensive for 3 models and only available through the GW website so having a kitbashed alternative is still worth the effort.

So many elements of the kitbash are unused bits [although those Stranglethorn Cannons tend to be prime fodder for use in Biovore kitbashes – now that is a guaranteed improvement. I’d still like to see them next to the new kit for a size comparison, as these are on slate they’re a fair bit taller than my other 4 giving a lot more bulk to them so less ‘modelling for advantage’ not that I’ve ever been challenged regarding this kitbash.

Anyway, built and ticked off my list and I’ll prime it so it’s ready to be based and then have it on hiatus till I feel compelled to complete them, which shouldn’t take too long. Big Build – TO DONE!

I builds it, I gets the badge!

Terrain is everything – TT Combat Gothic Ruins MDF kit – the inner sanctum.

Now that the Sanctum Imperialis is complete I should probably be putting this ruin kit in that big pile of projects that were fun at the time but really too much to do just at the moment.
Well I thought there was no harm in laying down some brown where the verdigris would go, I’m not even bothering with Warplock Bronze, it just isn’t going to be seen. Wasn’t sure about the crenalated battlement being coppery…?
I did add a bit of gold into the mix so there was some metallics, not entirely sure I should have bothered with it on the windows – it’s just going to be a pain to do but nevermind.
And inside just a quick coat of cream paint.
Ready for the burnt umber next…
…unless I see sense and leave this and go back to something smaller! 😉

Terrain is everything – Sanctum Imperialis – Home stretch

By the time you read this the Sanctum Imperialis will be complete. All the finials have been painted,

as well as the buttons and lanterns.

Buttons and screens have been done internally too.

With just some select Tamiya Clear to be added after varnishing.

I tried to keep the button colour limited to warm colours, just didn’t want yet another set of colours, it’s already garish.

And, having bust a gut to meet the weekend deadline for the store painting challenge it turned out it is next weekend afterall! Still, having that deadline pushed me to finish so I don’t mind.

Now what…?

Terrain is everything – Sanctum Imperialis – Slow but grimy

This is becoming somewhat of a saga now. I’ve got all the stains to do and the shading but staining all these rivets is incredibly tedious and despite it solving my issues with the verdigris my motivation is through the floor – I think I need to do a separate ‘where’s my head @’ post to get that all off my chest/mind
But I persevered and used my Vallejo Sepia wash and as you can see on the left, where I thinned it the wash split exactly like Seraphim Sepia. However, I was washing it again with black so I was not disheartened, in fact the result is great.
I did a fair few panels before I stopped thinning it with water, it’s a bit harder to work it into the crevices without but I eventually learned my lesson.
There are a lot of rivets and areas that needed shading.
But the sepia followed by Army Painter Dark Tone managed to bring it all back down to an acceptable level.
The big ruin was a daunting prospect though and it took a fair bit of motivation to tackle all those rivets.
Question: do I paint the scrolls either side of the door like paper, or leave them as carved stone relief?
I desperately want this done, the left hand side needs all the Sepia and black which means there are only fine deatailing to do – wires, rebar, glass FX, buttons and varnishes. It’s very close but very much hard work to push it over the line. Just found out this needs to be complete for Friday, as it’s the last May weekend and the ‘large model’ category is due for this month. I had thought it was the next weekend but that’s 1st of June. So I need to crack on now!

Blog at WordPress.com.

Up ↑

Design a site like this with WordPress.com
Get started