Dark Angels – Deathwing Land Raider Redeemer – Mo’ Bone

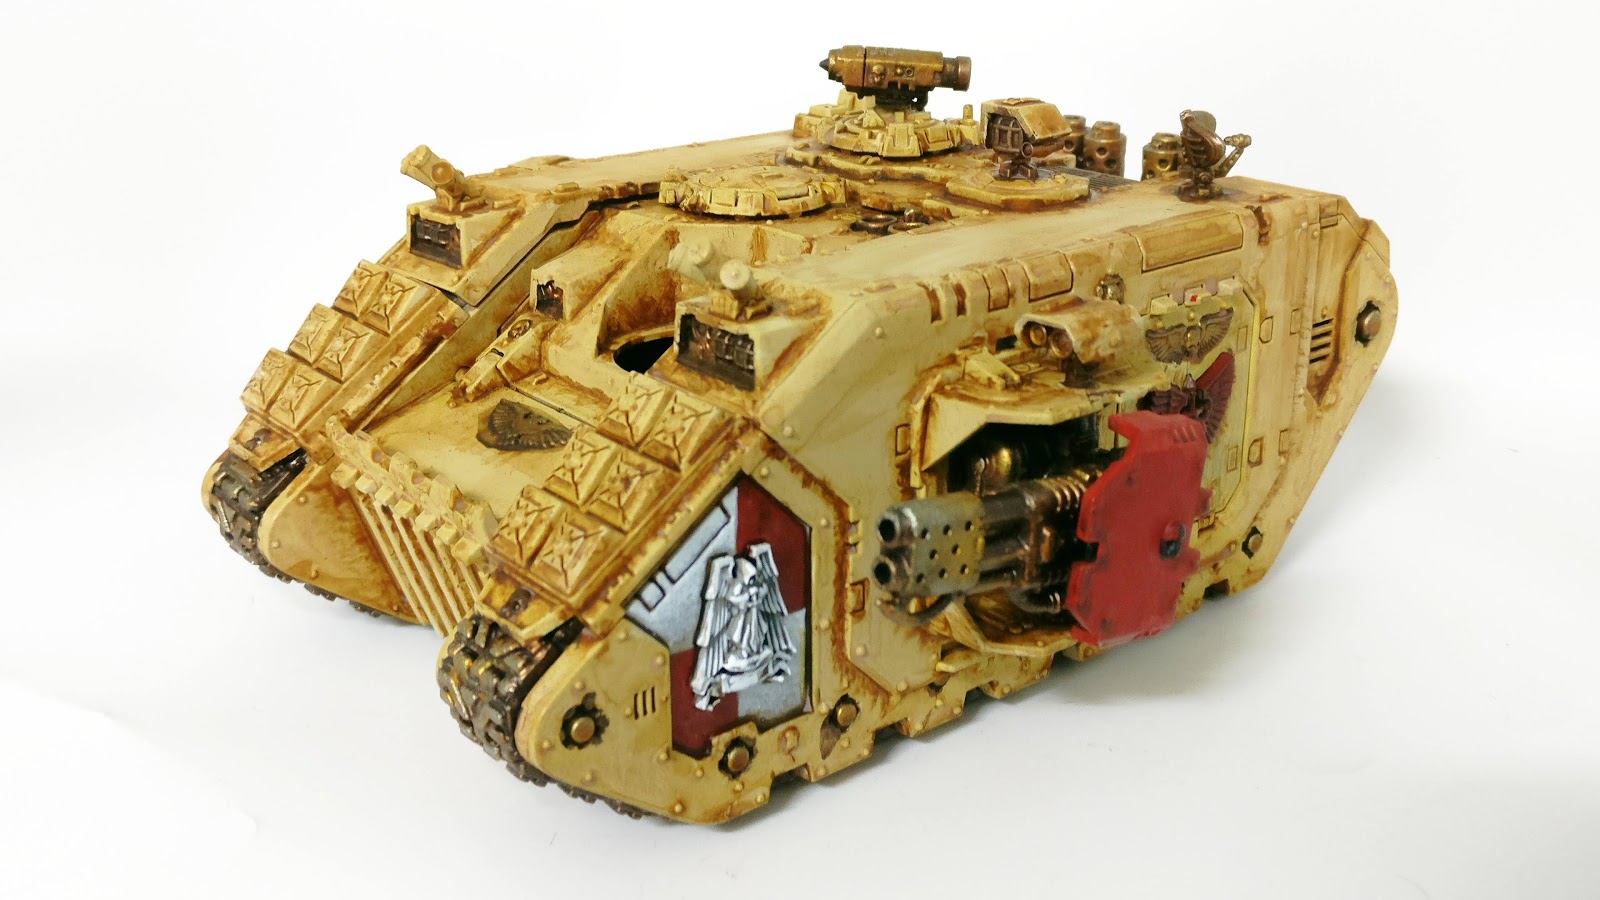
Afternoon #warmongers and #warhammercommunity I’ve been #paintingwarhammer Dark Angel Deathwing Land Raider Redeemer. If you recall I saw this video by Artis Opus showing how to paint a Rhino and said to myself – “why yes, that’s how I should approach the Land Raider”. The reality is I far from the results they achieved and although I was realistic in what I hoped to achieve and part way there I’m still feeling disappointed.
Now I know I shouldn’t judge it until it’s finished. I mean I’ve been here so often – salvaging models or shifting my perception as I add and refine elements.
This is still very much the scruffy stage and although there are some tones and textures I think have come out quite well I’m hung up on the fact I have drybrushed this in places. Now I know I shouldn’t look down on this technique – it can really work in places but usually I hide it with my texture paint.
But unfortunately I don’t have that crutch to rely on. The doors in particular don’t work for me, although they look far more yellow in the pics than they do in real life. I’m sure when I get onto the reds it’ll definitely help bring it all together.
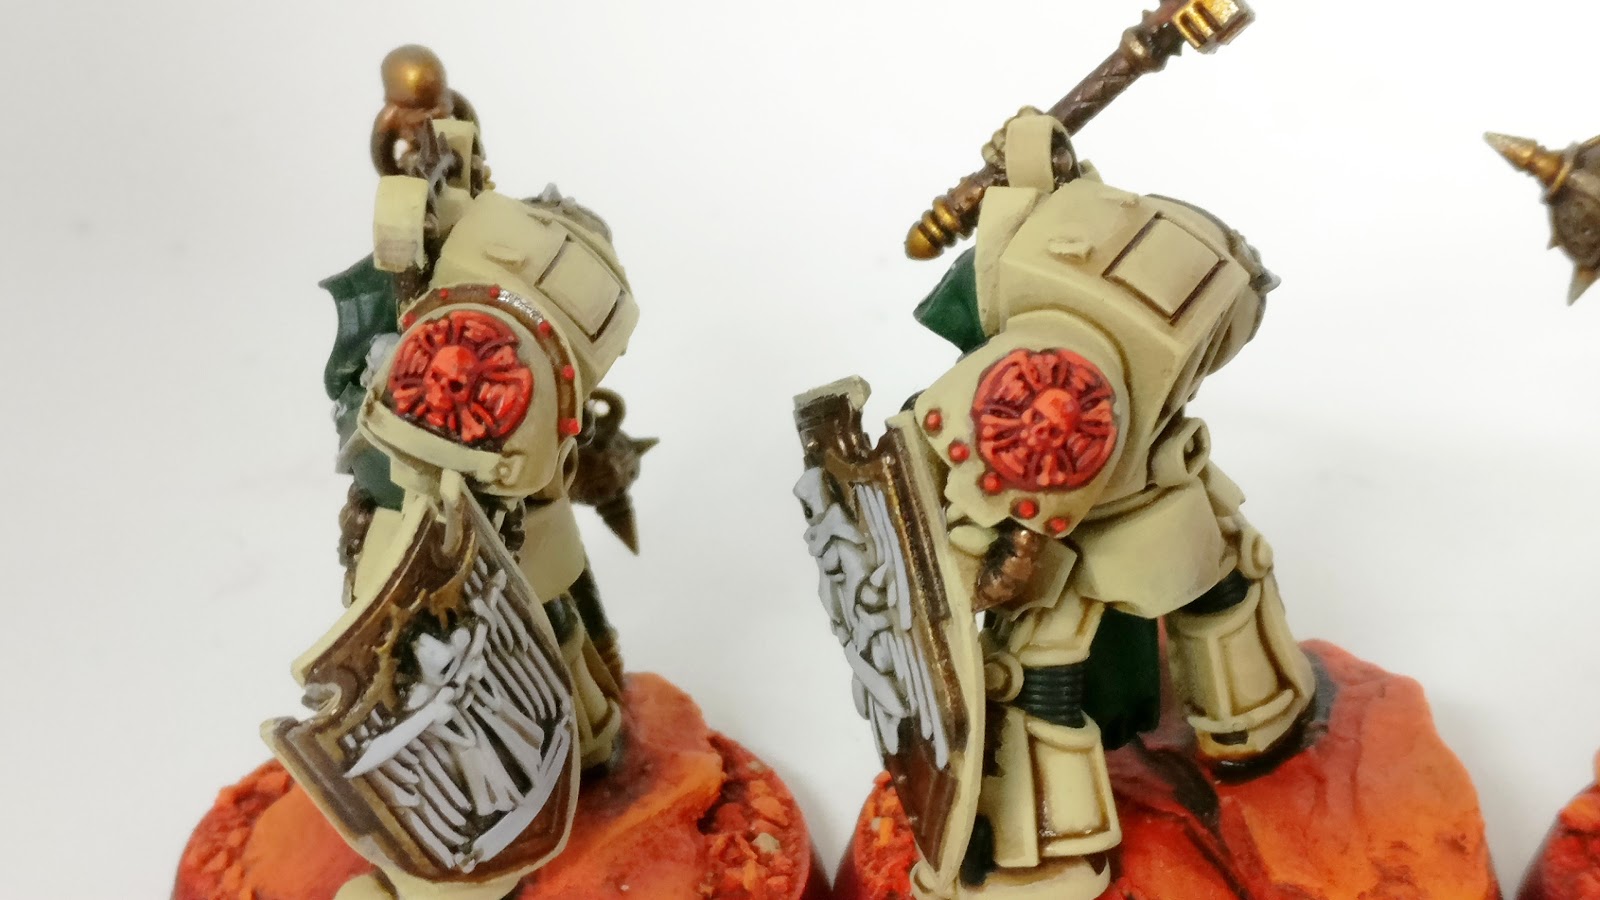
As you can see I’d tried adding the red rivets above, but realised there wasn’t any point as then next set of highlights covered some of them up so this side hasn’t had them.
I’m sure once all this ‘messy’ stuff is out of the way I can clean it up with some proper white line highlights in places and pin washes to define all the elements.
Then tsponge on some battle damage to further break the panels up and that should stop the focus being how the bone was achieved because there’ll be the whole to consider.
And if all the red weapon casings look cool and they’ll be a bit tidier then it should even things out.
I had seen a Deathwing Land Raider with an offset diagonal company badge across the back and sides but I can’t find it now. It looked really cool and I was considering trying something similar but with the badges on the door and bronze engine it didn’t seem feasible. Perhaps it’s a blessing I couldn’t find it. Anyway, I’m going to go off and do something else until I get my head straight enough to move this on. Why do I get so bogged down with these projects, I wish they could be easier sometime.

Dark Angels – Deathwing Land Raider Redeemer

Afternoon #warmongers I’ve been #paintingwarhammer Dark Angel Deathwing Land Raider Redeemer. I keep chipping away at all these different projects – a little here, a little there. If we go back to the middle of April we’ll see a rather anemic looking tank that I was steadfastly trying to hang onto the original bone colour. But I don’t paint that way and I saw this video by Artis Opus showing how to paint a Rhino and said to myself – “why yes, that’s how I should approach the Land Raider”

So I washed the whole thing in sepia, managed to avoid most of the defects in the crevices and I ended up with a decent base to start with. You’ll also notes I did the red and white quartered heraldry on the front, both left and right and even got the highlights done on the relief sculpture.

There’s still some washes to do on the tracks, weapons and the red elements.

It’s a bit one dimensional in places, I saw an amazing Deathwing Land Raider a while back with a massive Deathwing symbol diagonally offset over the rear and sides . I really wish I’d done something like that but I’ll persevere with what I’ve got.

I’m still highly wary of the next step, but this is a much more comfortable starting point. I need to not think to hard about it as it doesn’t matter in the long run. I just wanted a painted tank, it doesn’t need to be perfect so just need to crack on with it!

Dark Angels – A pair of Deathwing – TO DONE!

Afternoon #warmongers and #warhammercommunity I’ve also finished #paintingwarhammer a couple of Dark Angel Deathwing. These were thrown in with the Deathwing Knights as it seemed like it’d be easy to do it as one big squad. That was a mistake. This was a Thunder Hammer and Storm Shield conversion of the Dark Vengeance terminator sergeant.
This guy is from Space Hulk.
And alongside my previous Dark Vengeance Deathwing I’m really pleased the painting, although possibly very different in approach is still consistent in look, despite the time difference.
Probably not the best comparison shot as the new figure is in shadow 😉
Hopefully, this looks more consistent between the two new ones and old ones.
Still not sure about the skull, I tried adding some rust effect on it, yeah, I know it sounds odd. But, the Red Planet BASE means I can use orange rust wash to get a colour matched ‘effect’. Worth a try, I can always go back and fix it when I have more patience.
Just see his tribal stripes on the back of his terminator armour.
Forgot to do all the turquoise highlights on the Genestealer skull, maybe they bleach out with age…?
Should have done more damage and weathering on the green debris, but was losing the will on this so just wanted it done. Once again, I can go back.
However, I do regret choosing to give him his tribal marking on his kneepad as the back is rather empty without that splash of extra red.
So many purity seals though!
Converted Vs unconverted sergeant.
Check out the size of the Space Hulk Terminatore Vs the Dark Vengeance one. Now I know he has extra height with that base debris and he’s squatting slightly less but even so – this should be the size of all the terminators. 
Of course you could say “scale creep” and you’d be right, but that Dark Vengeance model is probably bigger than the Assault on Black Reach Terminator too. You can see he’s nearly as tall as the Deathwing Knight, which has a taller base but is considerably newer, so the scale creep between the Space Hulk marine and the Knight is minimal.
Anyway, two more done.
And my Big Galactic Stamp of Approval for being a good boy!

Dark Angels – Deathwing Knights – TO DONE! White pics

Afternoon #warmongers and #warhammercommunity whenI finish #paintingwarhammer I used to take a number of pictures – the quality pics with a digital camera and then some highly filtered shots on my phone – because they look cool. Nowadays the phone shots seem to suffice, thanks to my home-made light box, I mean they could be better but I think they’re OK.

However, although I believe the pics always look great against my original Ferron Proxima terrain mat I know that they’re an issue for some and white background shots are what White Dwarf like, not that I’ve ever been in White Dwarf, but one can dream.
So, my second lot of pics are the white background ones, in my hopes of being published and to appease those who don’t see the benefit of my contextual Red Planet BASE shots.
Given the focus on recording the miniature, rather than taking cool pics I have taken shots from more angles.
This way you can see more details. In particular I rather like the small verdigris stains that have leaked down the back of the terminator armour.
I spent a bit more time on the verdigris on the shields, multiple coats.
In no way have I reached the depth of colour Marc gets on his Iron Snakes, in fact it’s pretty flat and on the face of it not particularly convincing despite the effort.
But having observed a lot of verdigris its a reasonable representation as quite often its is flat and unassuming.
In fact the weathering can appear different from panel to panel, that’s the nature of a naturally occurring weathering effect. 
The mace came out pretty good, but still undecided about whether I should have applied an orange glow in places…
This shield worked quite well with the verdigris.
At some point I need to break out the other squad and start posing them. Man, I could be 50 by the time they get done!
Squad leader came out OK, kneepad showing my favourite red and white quartered heraldry from my first dwarven shields way back when [and Middenheim Marauders schem more recently].
The cloak is far from perfect but I think I just about salvaged it.
I guess fabric folds is just one of those things you need to practice and I don’t get to do a lot of that so it’s a bit hit and miss.
Oh and I still need to put some text on those nameplates but I don’t know what to put or if I can manage freehand that small…


Anyway, hope these additional pics get to show a bit more detail. Obviously it highlights some of the bad bits too but overall I think they transcend their deficiencies and ultimately I’m pleased with the outcome and my efforts to finish them off.

Dark Angels – Deathwing Knights – TO DONE! Red pics

Afternoon #warmongers and #warhammercommunity I’ve finally finished #paintingwarhammer Dark Angel Deathwing Knights. I originally got these in June 2015 at Blog Wars 9 and if you follow the link you’ll find my gaming crew gave me the vouchers towards it for my 40th birthday!
I then discovered it had 2 sets of Deathwing Knights [oh joy, another 5 still to paint] but no Ravenwing.
Luckily the legendary Games Workshop customer service meant they sent me the Ravenwing Command Squad separately.
So, it’s been a long time coming, but I could say that about a lot of my projects. 
But these have always been a challenge with loads of detail the required decisions, which always cause delay. 
Add in metallics and other projects they just got pushed back and pushed back.
Even when I committed all this time and effort to getting them done I feel I’ve had to make compromises.
I’m not happy I didn’t paint the ropes and knife scabbards the same maroon red of my other Deathwing – always check your schemes first.
Red purity seals instead purple feels inconsistent too.
Skin-tones are also one dimensional, I only base-coated, shaded and highlighted once. I didn’t even do any eyes – I tried but it went wrong so just gave up.
But the hoods make it difficult and they should be shadowed, I mean this guy doesn’t even have any eyes!
I wanted to do orange glow effects on the censer holes in the maces too, but I chickened out, I thought it’d go horribly wrong and just wanted them done.
\But none of that matters because, as I look at these pics I realise they look bloomin’ cool!
All of those issues don’t detract from what I’ve achieved, no one else will know and should I ever be inclined I can always fix them by painting the elements I’m unhappy with.
When I ever get round to the next set of Knights I can make those calls, and either match these up or leave them subtly different so it’s two identifiable squads – if that would be helpful – do people ever take two min squads over one max? 
Anyway, they look great, I’ve got some pics against a white background coming up next. hope you like what I did and enjoy some of the more PC desktop orientated shots above
Here’s my Big Galactic Stamp of Approval for getting these done!

Dark Angels – Deathwing Knights – GREENS and stuff!

Afternoon #warmongers and I am still #paintingwarhammer Dark Angel Deathwing Knights. It’s felt like quite a chore to be honest, and I know it’s advisable when it stops being fun to stop but these NEED to be done and sometimes it’s worth pushing through.

The green in particular didn’t feel up to the standards |I set myself.

The Orkhide Shade highlight did not go on well and my Valejo Goblin wasn’t great either. I tried some additional glaces to smooth things together.

And then went back in with some more black to shade things further.

I think I even used a black wash and some of my Army Painter Quickshades are coming out glossy [well I never really shake them so that could be my fault].

But I’m not bemoaning that fact as I know my Anti Shine varnish will cover up any matt/gloss discrepancies.
So although it was quite a challenge to get to this point and I was close to chucking it all in I think I’ve just about salvaged it to a standard I’m happy with.

And my odd 2 Terminators also got brought up to speed too.

I went back and painted the skull on the base grey, as I wanted a thoroughly bleached white skull effect. I mean I’ve had red Genestealer skulls on bases and now a white one and my Old One Eye skull is carbon black. I’ve never reallyu settled on anything that I’m 100% happy with, maybe the red one still has Stealer flesh on it while this has been picked clean and OOE’s is black because, well he’s OOE, who knows how he was gene-spliced to keep alive!

Anyway, verdigris next and we know how well that goes…

Oh, and they got featured on the Hobby Roundup on Warhammer TV as well, unfinished! Which is great but also a little sad because they will be better at the end…

Dark Angels – Deathwing Knights – BONE 2.0

Afternoon #warmongers and I am still #paintingwarhammer Dark Angel Deathwing Knights. I am persevering and the second lot of bone highlights have been done.

Again I have a pot of 50:50 mix of white and Bonewhite that doesn’t seem to run out, although it is getting a bit gunky in the bottom now.

I managed to put on a single drop of paint onto my Pringle’s mini-palette and a drop of Instar Water+ [that came free with my order, and will no doubt pay off to Instar]. I then stippled the mix on to get a textured blend, although clearly not quite as effective as I’d hoped in places.

I’ve no idea what Water+ actually does, it did make the paint more fluid, but without thinning it too much so the paint broke down. There were some areas where it seeped into the recesses, which I’ll have to fix, but it was handy to have.

There may be some pure white spot highlights I’ll do on these too.

The bone is definitely working, it’s not perfect and not quite the stippling I hoped for but it’s much more than I had hoped for after the washes set me back.

Knowing when to accept a model, even when it doesn’t quite meet expectations is a lessone we all need to learn I think.

Green’s still need doing here, although that didn’t quite work out as I expected on some of the others, hence why I hadn’t done this one.

But again it’s being patient with yourself, not too critical. I’m trusting that some additional bits will help to pull these together.

Alongside finished the greens, skin, verdigris, tribal stripes and lenses they should be busy enough that anomalies in the bone may be less noticeable.

Then again, looking at the shading on the shoulder pad – it looks odd, but the viewing angle will normally be higher than this and I’m sure it’ll make more sense.

I really need to decide what I’m doing for the Genestealer skull, perhaps need to go white on this instead of bone, even though my nids have red faces – but that’s when they have skin over the skull…

This might just have the best chance for the verdigris to look cool on those head wings.

Think the white purity seal ribbons/parchment will be the best option here. If I wash them like I’ve previously done they may become completely lost.

I’ll perhaps know better when I’ve done the script on them. Not to mention pick out the debris on the base.

Last we have my old skool Grey Knight terminator that has ha some bone highlights done. He’s mostly up-to-date, although I don;t know if those red claws are working.

I actually have to do all the metallics on the back here. Most of the bone was done back in the 90’s on a base of yellow, with a very poor black ink wash. Then I used brown paint in places, it was really only the right shoulder pad that had to be done, hence the difference in how they’ve been shaded [well the left one isn’t…]

A mish-mash of old and new styles of how I paint there and once again compromises on what I want. The most frustrating thing about all these is that I will be super-elated when I complete them, but that feeling will last for around 24 hours while my frustrations and disappointments have been going on for months [years even]. That’s why it’s an addiction, most of the time it’s suffering to meet your own standards and then you get that ‘hit’ after completion and each time it’s harder and harder to achieve and lasts shorter and shorter. 
Which is why I need to be grateful that I will complete them, because the fact they are done is something else, something different. You can’t take away the achievement, even if the high fades. The miniatures remain and when this figure – over 25 years old is done that’s one hell of an achievement, regardless of finish…

Dark Angels – Deathwing Knights – CRUX!

Afternoon #warmongers and I am still #paintingwarhammer Dark Angel Deathwing Knights. I had applied my highlights to all the reds – mainly using my vermilion art acrylic. In some areas I regretted it as I subsequently looked at my Dark Vengeance Deathwing and discovered I had highlighted them with a mix of Khorne Red and white to get a different red. Not to mention the purity seals are purple… You’d think I’d learn to consult my existing figures or this blog before I do something.
Anyway, the Crux Terminatus was something that needed 3 sets of highlights, using the exact same Red Planet BASING colours as the base. My Deathwing’s Crux are made from the same stone as Ferron Proxima, it’s a nice call-back and ties things in a little bit more
I was really quite pleased with the results and it’s nice to see elements that have been done to completions. I still have post-it notes with these sub-tasks that I’m removing from my task lists, which is also rewarding.
I also applied the final set of white highlights to this shield and Purity Seals, you can see the difference to the grey one on the right. Not sure about washing the seal parchments as I usually do, at lieast I do on the green-wing my last Deathwing were all white… Can’t wait to add the verdigris to the bronze/brass 
The shoulder pad also got highlighted. I’m always surprised how much I like this approach to white. I mean it’s far from perfect but Valejo Stonewall Grey > Agrax/Strong Tone wash > Stonewall Grey > White. I think even though it could be considered a ‘dirty’ grey it actually comes out really clean looking, which sounds contradictory but that’s the only way I can explain it.
Anyway, I’ll get all the white’s done, possibly 2 a session if I’m lucky, which will leave me with the green and final bone highlights on my next sub-tasks…

Dark Angels – Deathwing Knights – SHIELDS!

Afternoon #warmongers and I am still #paintingwarhammer Dark Angel Deathwing Knights and I finally caved into gluing on the shields. I may regret it, it might be too early but I’d highlighted the bone on the shield and just wanted to have them as a whole instead of 10 discrete pieces 
I had tried highlighting the inner shield but the wash was not helping, the end result I just drybrushed, with stiff fine bristled brush, so I could really work the bone in and I think it’s a pretty smooth blend all things considered.
I still have his cloak to do, which leaves me with the quandry of how much I highlight in the back here. If anyone has read David Eddings Belgariad the simple answer is I’ll know it’s highlighted even if no one will ever see, but technically it’d all be in shadow anyway so highlighting it would be wrong…
I also need to do a bit more shading – like the inset shapes on the arch above his hood.
I will do that before the final bone highlight so I don’t end up spoiling anything with wash splodges on the highlights.
I’ll also need to consider how much tribal markings I add. These are highly detailed miniatures, adding on patterns might just make them too busy.
But the carapace, leg plates, butt plates and thigh plates might be the best choices as the back is pretty plain looking. Afterall this will likely be the view I get so I don’t want to get the most boring one.
All the greys need a Valejo Stonewall Grey highlight and then white, not to mention skintones.
At least you can see some depth from the washes on this shoulder pad. I also painted all the rubber joints. I don’t think I even highlighted these on the Dark Vengeance terminators last time round. No doubt that’s another debate I’ll need with myself down the line.
A lot of those rivets’studs are really shoddy looking with the washes/highlights. I wish I could be neater but we are where we are now – c’est la vie.
Steady progress, I’m actually getting there. I know I have still lots to do but I can feel momentum now, I can feel these are ‘inevitable’.
That’s not to say I’m not dipping into other things – I’ve made a little more progress on my Adeptus Titanicus models – the Titans are almost fully constructed and glued together and the metallics are just waiting for touch ups and then I wash the whole lot. But, I also want to do my Land Raider at the same time but as that represents a significant effort I don’t want to interrupt the Deathwing just yet with those tasks – it’s about balancing projects, motivation, resource and workload.

Dark Angels – Deathwing Knights – BONE!

Afternoon #warmongers and I am #paintingwarhammer Dark Angel Deathwing Knights. Having been disappointed by my last wash it took some significant willpower to finally get back to these and thankfully it has paid off – in getting me motivated at least.

It turns out it takes me around 40-60 minutes to do the first highlight on the bone. Not sure if I should be embarrassed about that but I can’t hide the fact. 
In part this made painting all 5 that little bit harder because on the plus side I knew how long it would take, on the negative side that’s 5 nights/sessions work… 
And that’s not including the 2 or 3 extra terminators I’m doing at the same time as the knights!

A lot to do and as my pace is so slow it’s also frustrating because this highlight covers so much of what had just been added in the wash and the original primer/basecoat.

I wish I was either a little braver to keep more of it or less impatient and applied wash more sparingly – a line wash where needed.

As it is I’ll probably go back in and apply a line wash to achieve better shading.

With 5 days work under my belt, but still the shields to do I’m also predicted the second set of highlights will take the same time/effort.

But thankfully, despite all the negatives, I finally have the motivation to crack on and complete these.

Even though the 2nd highlight takes up less area it requires more finesse so whatever time savings I make in reducing coverage is made up in being more careful – actually painting.

I need to do all the reds, greens, grey/white, skin, verdigris and glow FXs on the mace’s. So much to do it, feels like the opportunity to get stuff done in lockdown isn’t quite getting there for me because this is so laborious and slow, but in actual fact these haven’t been awaiting completion for 4+ years for no reason.

And here’s the other terminators I’m doing alongside.

This was the Dark Vengeance sergeant, that I kitbashed as Thunder Hammer and Storm Shield, when they were highly popular for Terminators and before we got Knights which always seemed better. Still, he looks cool.

And my odd Space Hulk Terminator. You can still see some of the Blood Angel iconography . I cut some away but left the rest as I’m confident they won’t detract form the model if I don;t draw attention to them  – painting the blood drops as gems for instance

He’s got a load of purity seals that’s for sure

I also have an old school metal Grey Knight Terminator with lightning claws that I’ve done a little bit on but don’t know if I’ll finish that, we shall see.

Blog at WordPress.com.

Up ↑

Design a site like this with WordPress.com
Get started