Dark Angels – Assault Squad – MOAR SHOTS

OK, the ‘good’ shots were a bit poor. Luckily the phone cam shots came out a bit better. These first few are in the light box. I’ve two 1500 lumen daylight LED bulbs now so it’s pretty bright.

And a bit of filter jiggery-pokery make sit quite dramatic.

I’m really pleased with the finished models, they have so much character for an otherwise generic squad.

The use of the Sanguinary guard legs adds so much and I love the idea that for the Blood Angels these are for their elite and crafted in gold where here they’re used by a standard Assault Squad in their traditional green 🙂

These were the simultaneous day shots, so again the colours are a bit ropey but better than the digital camera.

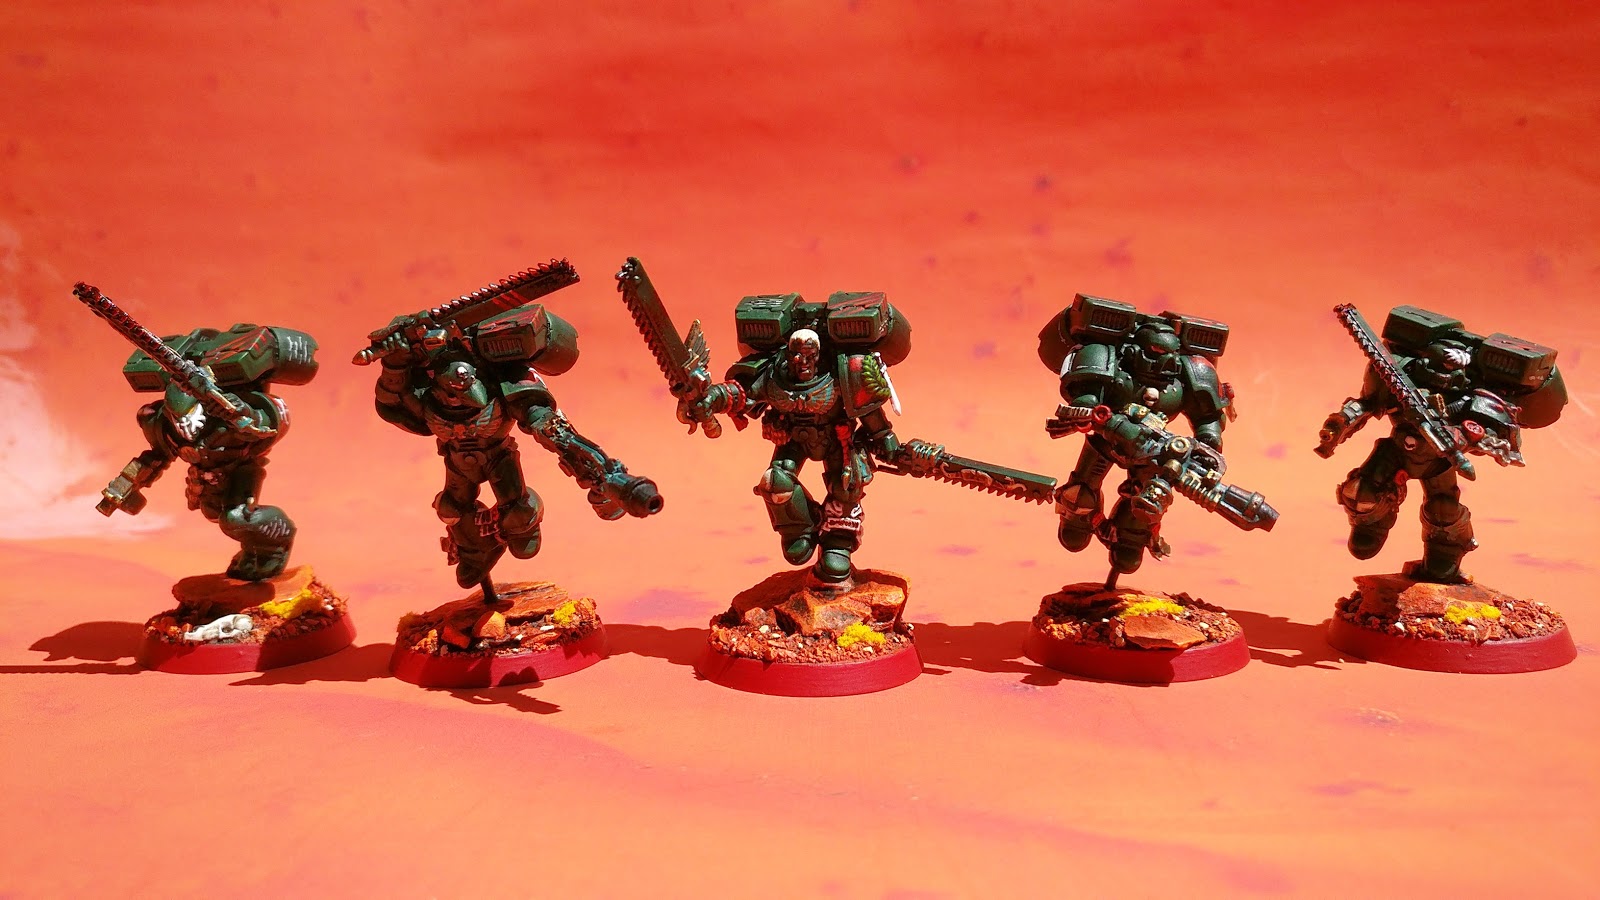
The 90° rotation of each model, yep there’s a shed load of pics to follow, get a cup of tea!

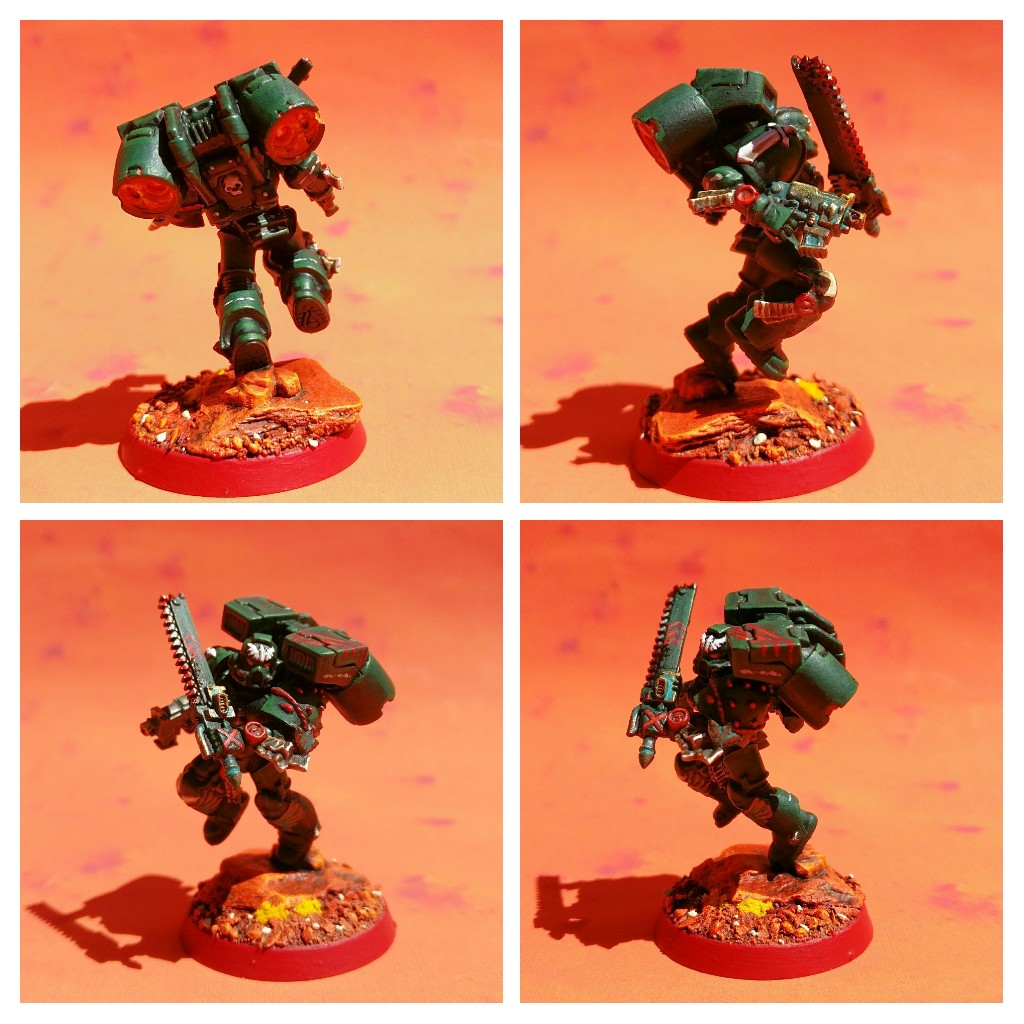
And individuals as well, in case you want to look in detail?

Moar filter shots.

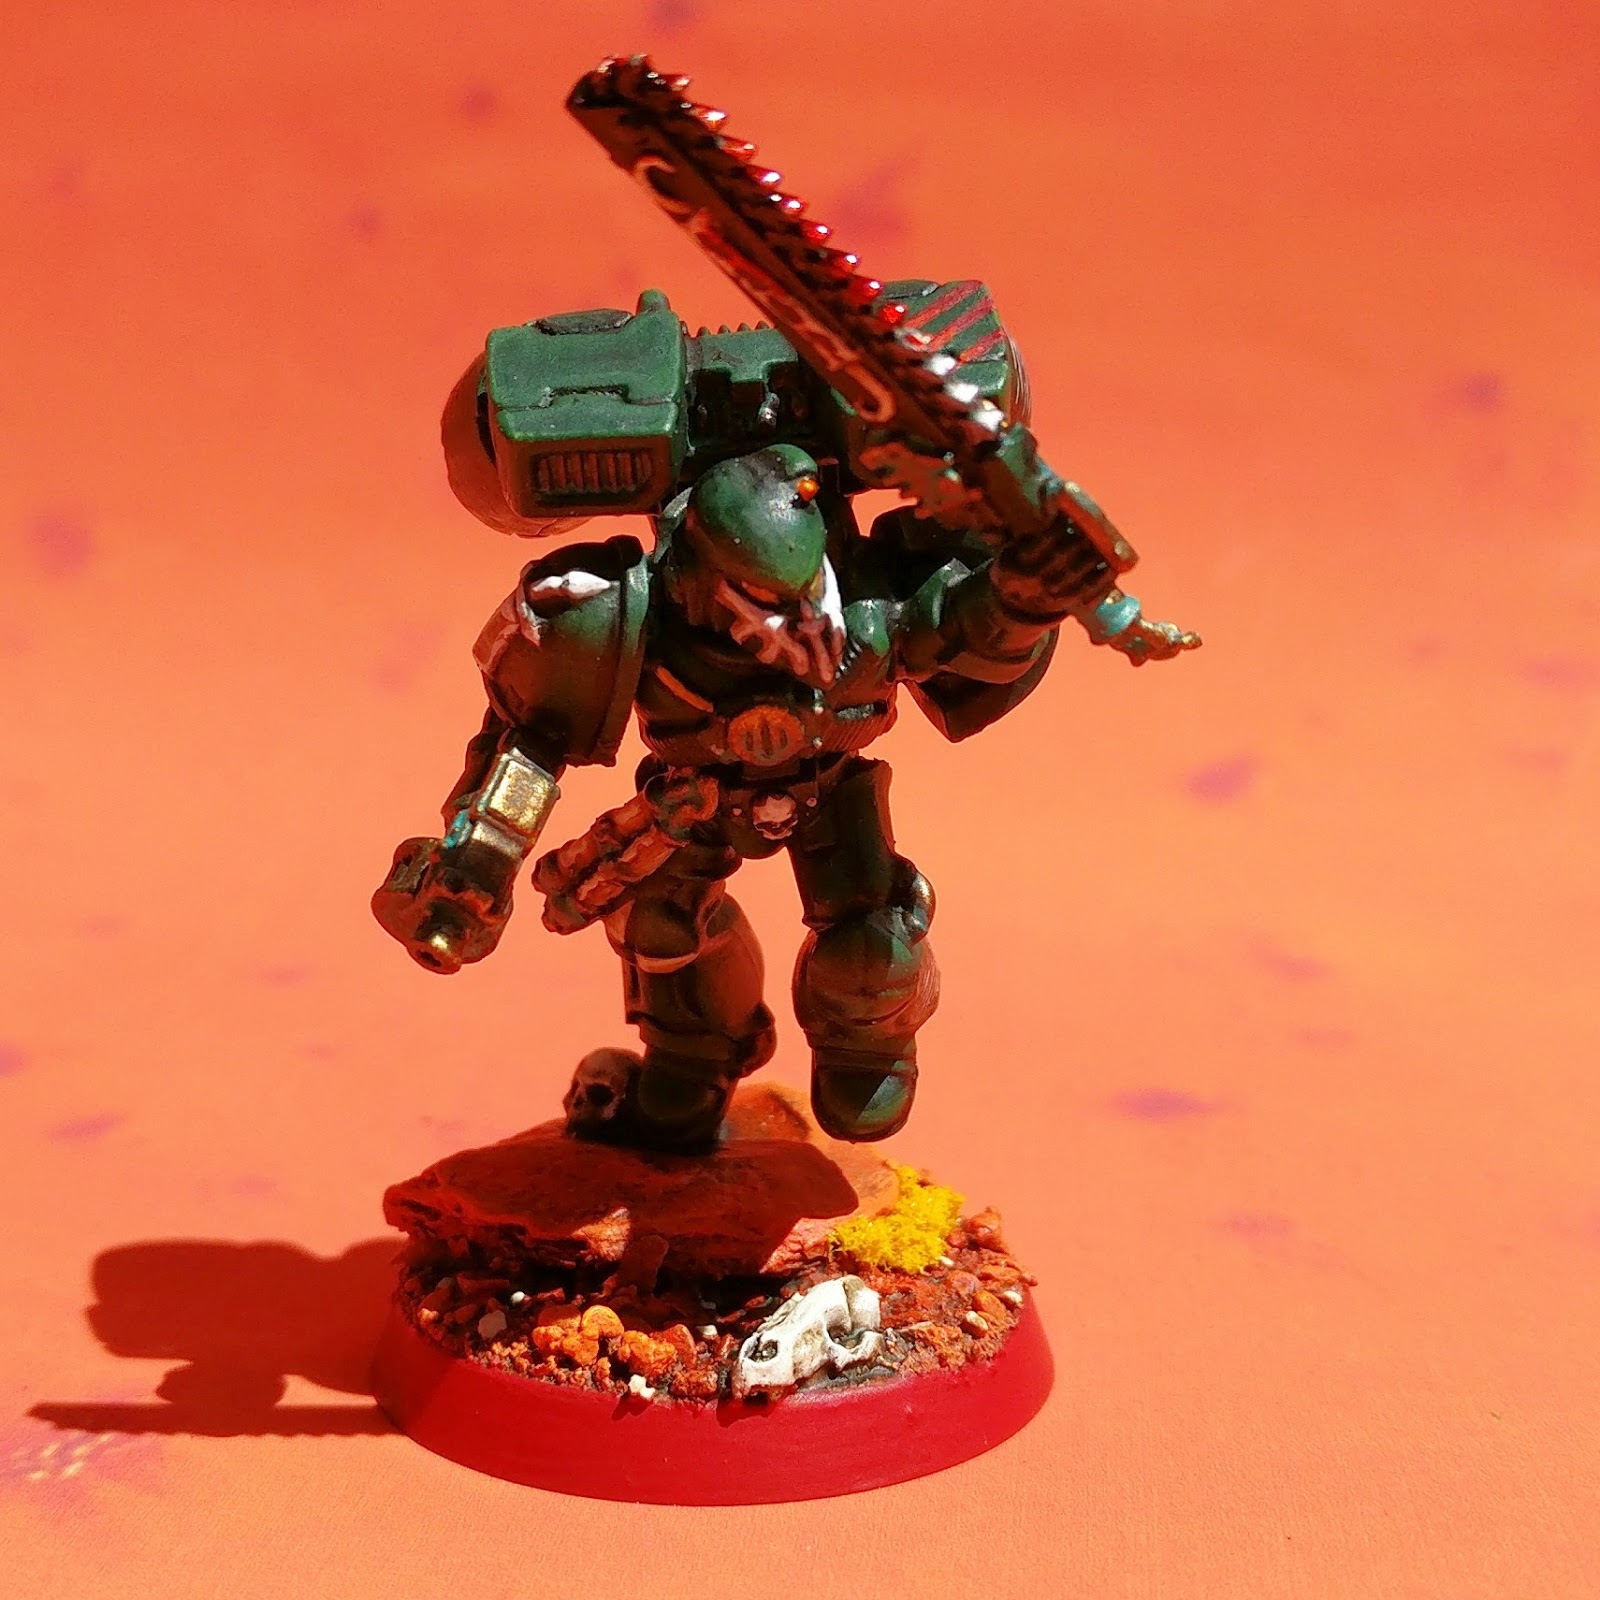
I’d been quite worried about the dark skin tone on the sergeant, I always do, and his human eye but I really like how they turned out. I think I managed to create a different skin tone altogether than my previous efforts which is good as making it up every time means there’s more diversity

Given just how busy the models were with detail I kept the litanies to a minimum. With all the purity seals and tribal making it just seemed too much. The company numbers were a bit of a variety too – each of the three came out OK but ranging from tiny to ‘mahoosive’!

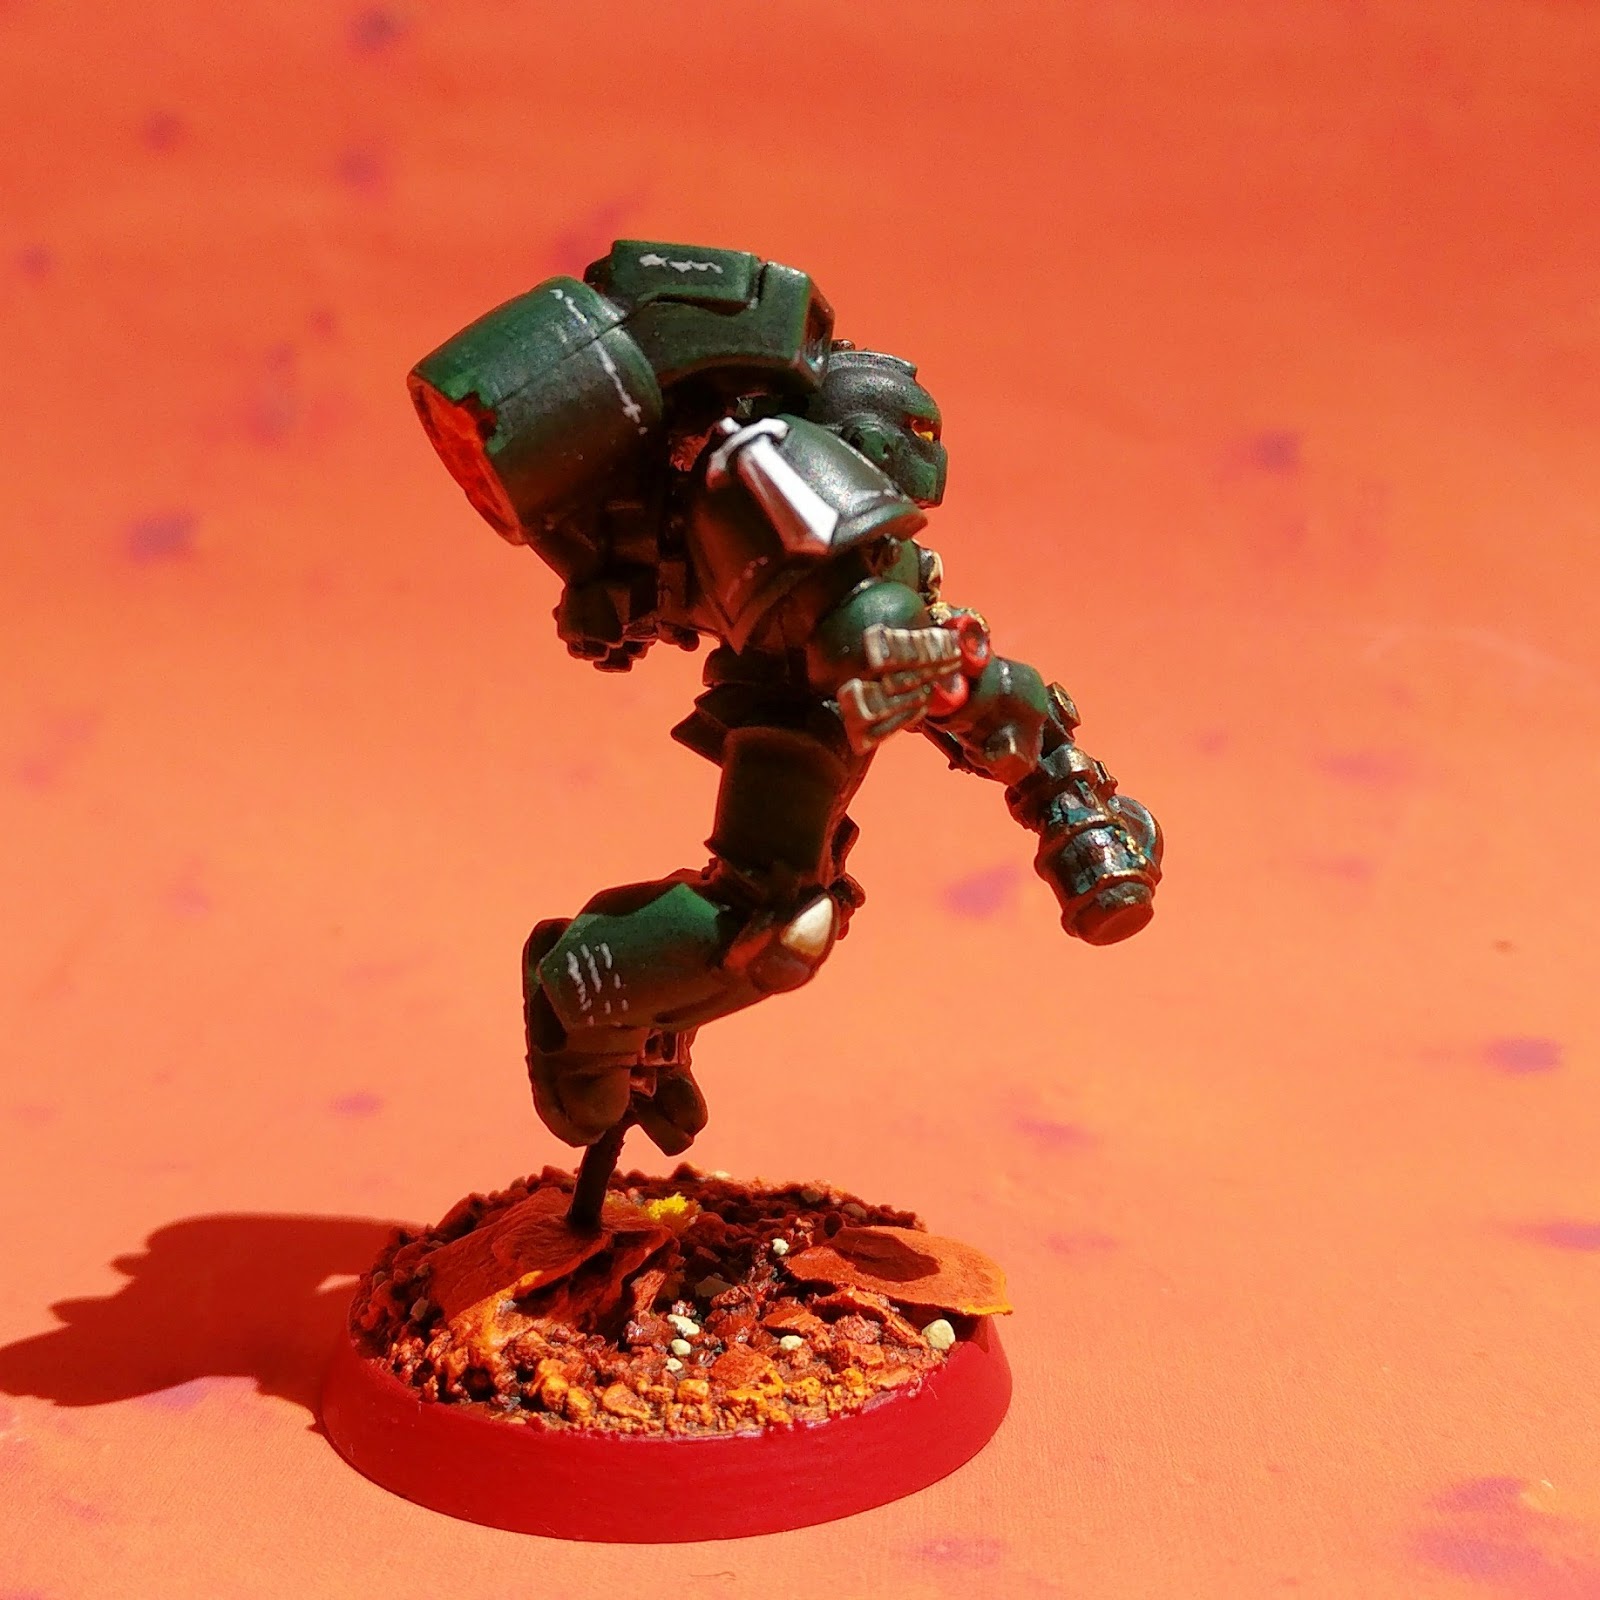
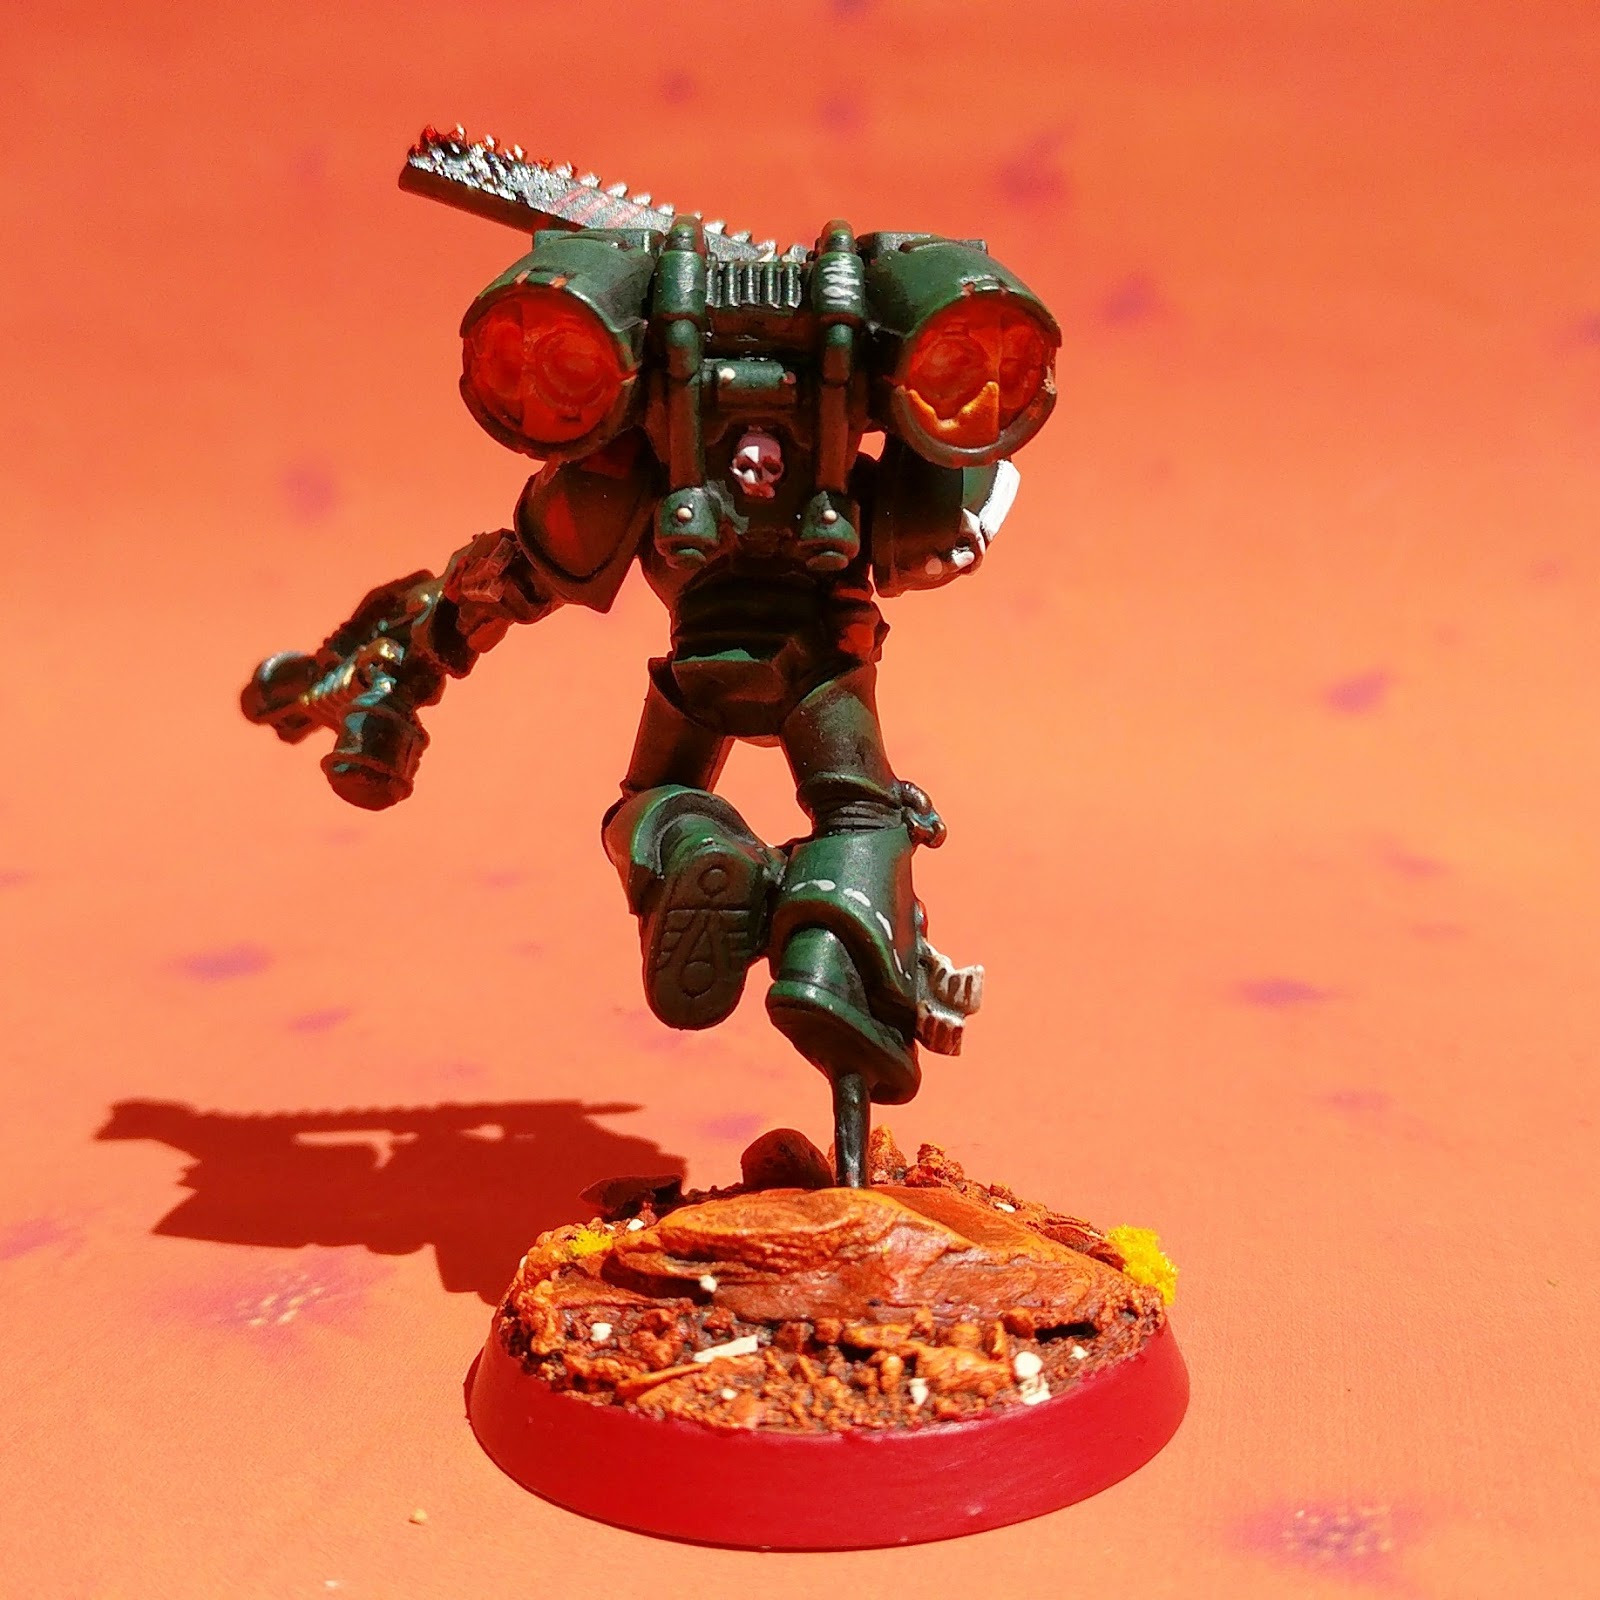
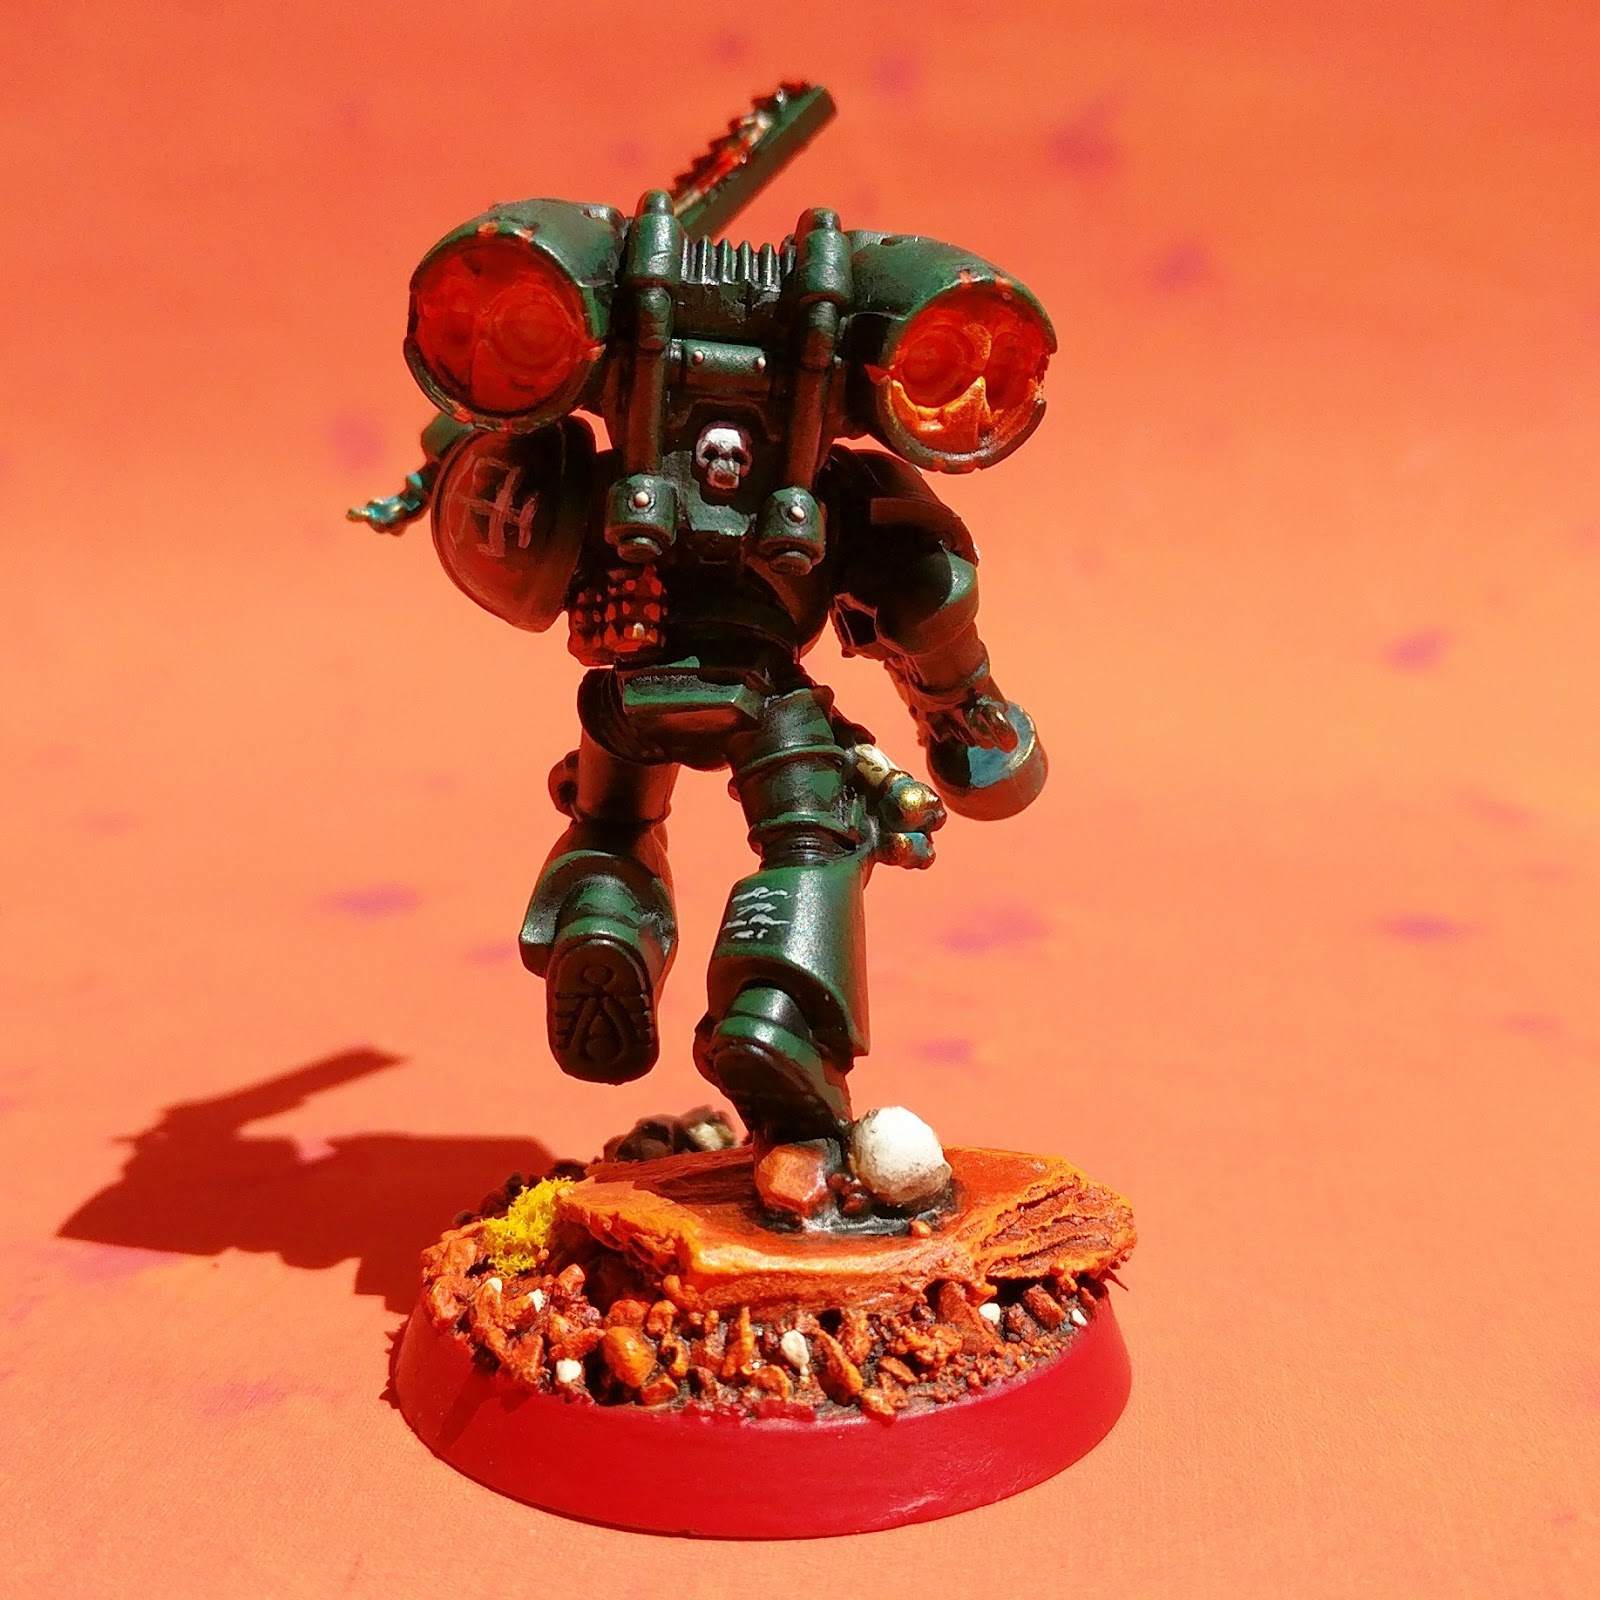
Here’s the clearest look at the jump pack glow effect. Not entirely sure of it’s what I was after but there are some bits I like and most of the gaming views won’t get to see them anyway so it’ll more than do.

Again the Blood Angel chainsword really helped here allowing me to put an Assault Squad marking on the hand where his Heresy era shoulder prevented it. And yes the squad do not feature the Dark Angel chapter badge, just the white blade and on the wrong shoulder. At this minute I cannot explain it but that Heresy shoulder pad I think is the key to their fluff.
Perhaps they removed their chapter ‘wings’ until they’ve captured the Fallen half of their squad and only then will they add them back in and return their Chapter shoulder pad to their left?

Although the second from the left with his re-purposed Space Wolf left shoulder pad probably isn’t going to switch it to the right 😉

Still love the genius of those quartered knee pads perfect for the 5th company 🙂

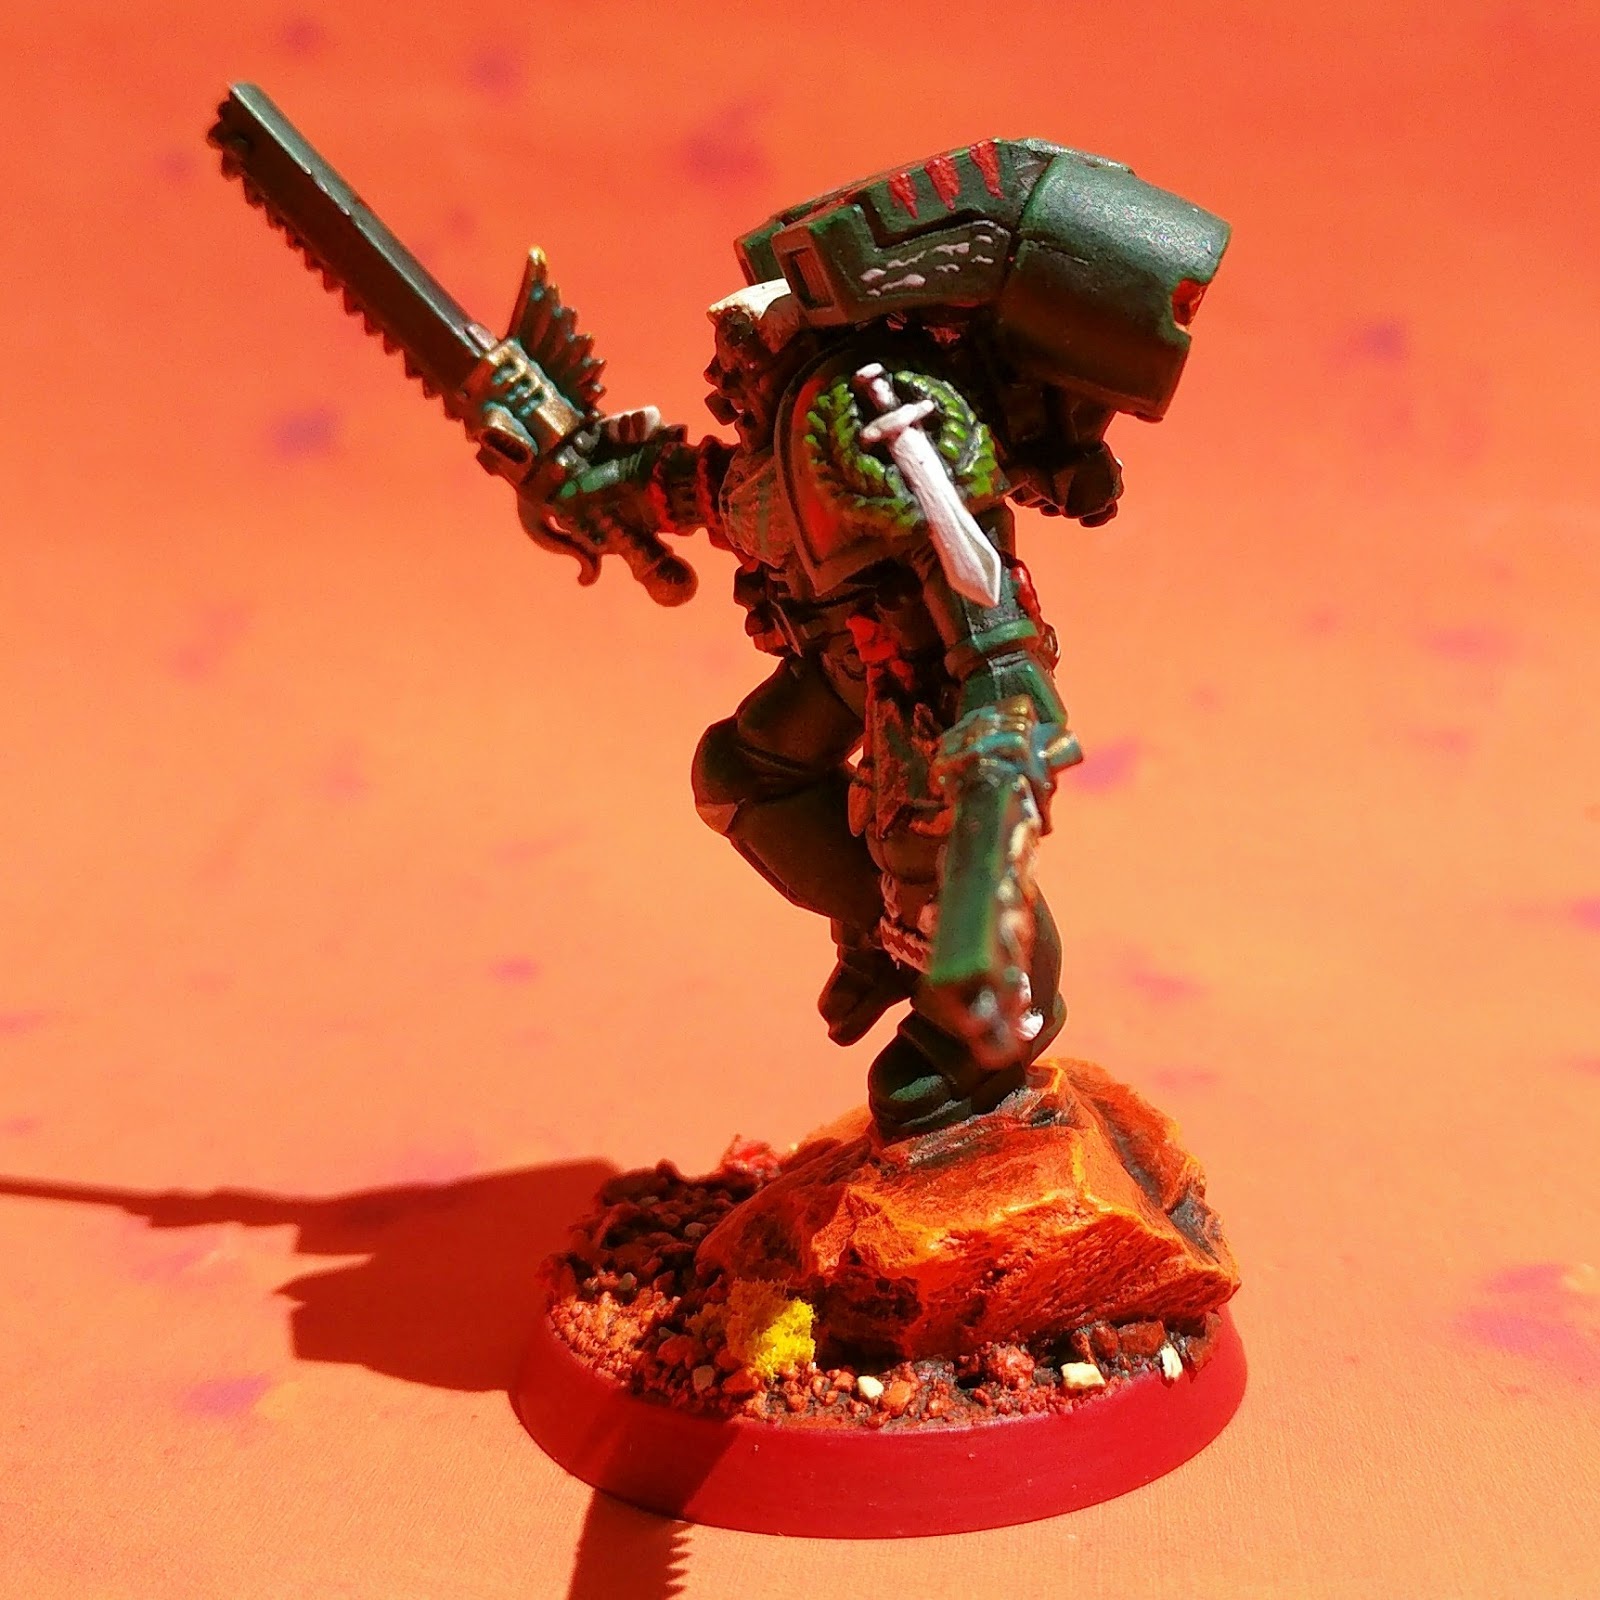
This guy is such a bad-ass.

OK, enough already, next up lets get back to some hybrids, see you next week 🙂

Dark Angels – Ravenwing – MOAR SHOTS

You lucky beggars, yet more pics of my Ravenwing. To be fair they do look a bit better thanks to added ‘instant win’ filters.

And also I should get two stamps of approval for these guys as both the bike squad and the Knights are separate entities on my To Do List.

I’m just going to shut up now and let the pictures do the talking.

Wheelie!

And in the light box.

In the light box in front of a piece of leather with focus blurring.

Dark Angels – Ravenwing – TO DONE!

First up my Ravenwing Command Squad, we’re still technically 7th Edition so that’s a Ravenwing Champion, Standard Bearer and Apothecary, I think one of them becomes an ‘Ancient’ in 8th.

Goodness knows if these unit still exists in the new ‘index’, with so much information now available I’m purposefully not buying Imperium 1 as I want to just get my head round the nids and the game before I tackle what’s happened to the Dark Angels.

I was disappointed to discover my Tamiya Clear Orange X-26 has started to congeal, so I couldn’t paint displays as I would normally but no bother X-27 came to the rescue instead.

The Standard turned out much better than I expected.

Sadly not a close up of his Sword of Caliban but the Champion came out alright too.

Elements of the Apothecary disturb me greatly. I flip-flop between liking the white and great disappointment. The vials turned out OK in the end but it’s the triple helix and how it interacts with the surrounding weathered brass that leaves me cold

The banner came out OK, mainly because I bottled writing Ravenwing on the third scroll and wrote Caliban instead 😉 I think the diamond pattern came out OK in the end too.

Not to mention the chubby Aquila on the top pennant.

Can you spot what’s missing here? Weathering powder on the tyres – mainly because this was the last to be complete I weathered all the others as a group before I finished and varnished the Apothecary.

Ravenwing Black Knights.

The Knight on the left may well need a back pack ornament at some point. I only realised I’d used fancy back packs on the other three too late. Funnily it does have a hole pre-drilled in the top to take a pin to secure it on, I must have forgotten. If he ever does anything noteworthy I’ll honour him.

Still not convinced on the headlamp OSL but I think first glance and en masse it’s OK, it just doesn’t stand stand scrutiny.

All the Knights together.

Knights and the Ravenwing Bike Squad.

Obviously it would have been nice to see these and my existing six bikes, the Land Speeders and Dark Talon.

Sadly I didn’t take those pics it was very much just trying to record these 13.

Bike Squad on their own.

Wheelie!

Not sure why this guy has the AdMech shoulder pad

Particularly as the ‘techmarine’ head is used on the left here. No rhyme or reason but I may well use those bits to make a proper Techmarine on bike further down the line.

Months of work and I appreciate your patience just as I know you appreciate how much of a mammoth task this turned out to be for me. The bike squad have been on my table for just over six years, there’s an early post than this with the bike bases I bought. The Ravenwing Knights are virtual newbies with just over a year in production. It’s been an incredible slog to push through all the difficulties they’ve presented, overcoming those challenges inherent in bikes, the issues with black, with the way I do metallics and painting 13 at once so I really do deserve this Big Purple Stamp of Approval!

Dark Angels – Ravenwing – just checking in

You’ll have seen things were quiet last week, I was supposed to be in Majorca for a family holiday but for one reason or another we had to cancel. Luckily we’ll get our money back but I still took the week off and I was actually able to finish the Ravenwing, so this is the last updat before the ‘to done’. As you can see the Knights were first up but the Apothecary and the standard bearer would be the last to be finished thanks to the extra effort involved with all the other details on the model.

And Sergeant Adam.

Not sure why I took these, perhaps to illustrate the freehand text, not that its particularly good 😉

Once again trying to capture the warpaint on his face and just a hint of the power sword.

OK, so not much to share but I’m just checking in again and setting up the full reveal later this week.

Dark Angels – Ravenwing – Hobby nest and basing

Rob from 30kplus40k shared the horrors of his workspace the other day so I also felt the need to reveal just how cluttered the man cave has got in this panoramic shot of over 180°. This is what happens when you get so wrapped up in a project that everything else goes to wrack and ruin. I really can’t wait until the Ravenwing are done and I can tidy this place up. Part of me can feel that will power and motivation draining away as I reach the end, to be fair to myself though I have been pulling 12:30 finishes to get them moved forwards so it’s understandable that fatigue is starting to be a factor.

My last effort involved basing the six standard bikers. Five of these were mounted on the daemonscape1 bases I bought just over six years ago! The remaining bike was on a Secret Weapon Miniatures base that was most similar to the other five. You may also note the original Dark Vengeance Ravenwing model on the far left that I’m using for reference. The newer bike’s highlights are a fraction lighter but otherwise it’s a pretty good match I feel. My previous reservations about just how large my palette of colours had got are slightly relieved here as I think they look reasonably narrow in tones, the Knights might be another thing though…

I think there’s still a little work I need to do on the headlamps, as well as Bonewhite chippings on the bases. As you can see the OSL on the headlamps is dubious in the least but it does match the original one for the most part, so at least they’re consistently bad across the group. Also some of the angles I’ve base them on are a bit annoying. I wanted them to look slightly dynamic, how the Dark Vengeance bikes are posed but the drilling and pins on these haven’t always produced the desired effect. I did do one of the plasma dudes wheelying though so there is definitely one that’s cool 😉

This is Brother Adam the ‘dandy Huntsman’. We went to see Adam Ant the other week, he’s not my bag really, my wife was a childhood fan though and it was a Christmas or Anniversary present I’d got for her. I’d wanted to do some more warpaint on a helmetless model and this seemed like the easiest/most appropriate option. I’m not sure it was the best choice of model as the hood obscures things so it’s not immediately obviosu what’s going on but doing this justifies me not painting the eyes, so it had to happen. Ultimately it’s not rubbish so I’ll take it.

You can also see the three red tribal stripes on the stabilising vent on the back pack. Three have these markings, in case I want a unit of three. The other three have markings on their right shin pads. Alternatively I take any upto six with the straight back banner to identify as a unit.

Mounting the seven Black Knights/Command squad next…

Dark Angels – Ravenwing – Banner Up!

One of the extra elements I have to do for the Ravenwing is their banner. So far I think I’ve done a half decent job although I’m dubious about my ability to render some of the fine details, particularly that rather scrappy diamond pattern.

The colours are suitably high contrast and vibrant, which is a shame as I like the earthy tones on the shaded scroll work but my own painting style won’t allow me to leave it as such.

And so I’ve added the highlights and pseudo-fabric texture. Not looking forward to rendering text in here, recent efforts have not been what I consider a success.

The rest of my efforts have been directed at bringing the Plasma coils online. Two sets of OSL highlights here.

Yellow is going on next and then white, which seems like I’m adding yet more contrast and colours to the mix.

You can also pick out the green on black effect on the Ravenwing Champions Blade of Caliban. Another element I’m pleased with but question whether I should have chosen a different colour as the palette on these just keeps expanding

As much as I’m happy with the Plasma effects part of me wishes I’d stopped even earlier at the pre-verdigris stage below. The palette was considerably more simple but the addition of the Verdigris, again something that works in itself  has taken it from a limited palette to a riot of colour

And I’ve since added in the red headlamps and glow which is another level of colours again. I’ve also managed to match the opacity of the original Ravenwing bikes I painted, y’know the ones I wasn’t 100% [probably not even 50%] happy with.
I’m sure they’ll look great in the pictures and en masse once complete, an that is one of the rules not to pass judgement until they’re complete but I can definitely see an alternate reality of Ravenwing where I stopped sooner, less is more deal. As it stands I’ve gone for more is more! Still, it’s all consistent so we’ll see how it turns out, they’re nearly done now, here’s what’s left:

  1. Various targeting lenses

In addition individual models will need:

  • Apothecary – vials, tubes, symbols
  • Banner bearer – banner… oh my lord

And then the ‘finishing’ bits:

  • finish the bases
    • bonewhite chips
    • Khorne Red/Heavy Red edges
    • Mount the models [some drilling involved here]
  • Matt varnish
  • Tamiya Clear
  • Weathering powders
  • Gloss varnish [where needed]

Dark Angels – Ravenwing – Verdigris started

The filters on my Camera360 phone app are usually only used to make the images more clearer, except for the cinematic To Done pics that use more aggressive/creative filters to make them look awesome, However, when I took this picture last night I had to use it as my WiP shot. I’ve finally layed down some Verdigris. This is a big deal, a real milestone that will herald the near completion of this project. [You’ll also note the slightly untidy company number 😦 ]

I was once again concerned the Verdigris would spoil all the metallic efforts so far but once again these fear were unfounded as application enhanced it and I was sensible enough to leave some bits well enough alone. Obviously I decided to finally add the Champions shrin thingy on the back too.

Thhis is really starting to come together, which is a relief as I feel like I’ve been working on them forever. Now as happy as I was at finally getting the patina started I could only do this one before I felt enough was enough. I started flitting to other elements – the company numbers on all the shoulder pads that are brass – they really needed doing before any Verdigris is added. I also did some bits on the banner and some of the purity seals.

All the bikes have obviously had their second highlights done. I was convinced they were too light, I might still be right in that view but wasn’t convinced knocking them back a bit with some sort of glaze was worth the effort. As you can see this group look pretty cool as they are.

And the other six, hanging out. With the Champion taken to the next level I’m hoping the remaining 12 can be patina’d up at least three at a time. That’s a daunting thought, four nights of just getting that done maybe I’ll be able to kick things up a gear and finish it in three?

Then it’ll be all the fine details. They are fun to do, feel disproportionately time consuming but really do add a lot to the models so ultimately worth doing – I certainly wouldn’t have them any other way.

I know this is dragging on, I’m getting closer every day though

Dark Angels – Ravenwing – Shade to black

Quick one, I’m currently shading again. All the less than stellar initial black highlights and Dark Reaper secondary highlights need to shaded to tone them down. It’s taking between 15 and 25 minutes per bike but I’m committing to getting four done a night [3 nights work]. Surprisingly it’s not an unpleasant process as it’s not fine detail so feels more relaxed, less confined. it also helps that by adding black I’m creating smoother transitions and making the black more dominant instead of the lighter highlights. Here you can see the ‘before’, in particular note the staged highlights on the shoulder pad, elbow pads and wheel arches.

Here’s the ‘after shot. Immediately the shoulder pad looks almost black but I assure you some of the highlights are still there and a final line highlight will be added so it will still look OK. You can also see the elbow and wheel arches highlights are much more defined, perhaps too much but again I think the final highlight will mitigate this, not to mention the additional tribal markings and litany scripts to break up the flat areas.

I’m progressing now though and although there is that significant task list to complete these 13 Ravenwing, I actually think there’s sufficient momentum to get these done. The only obstacle is an upcoming family holiday at the end of the month but I’m confident they’ll either be completed by then or so close to completion that the hiatus won’t stall their finish upon my return. Either way they’ve turned a corner and although not on the final straight, the final lap may be imminent.

Dark Angels – Ravenwing – Stat in black

The inertia of the black highlights has been overcome [for the moment at least], although it might be difficult to tell in these pics. The purpose of this post was really to document how long these took, my thinking being if I understand the timescales involved it’ll be less intimidating in the future. Unfortunately I’m not sure if I’ve remembered it correctly but a rough outline should do. I initially thought I’d first highlighted three in one evening but it turned out I’d only done 2. So I believe the progress for each session was thus for first highlights:

  1. 2 bikes
  2. 3 bikes
  3. 2 bikes
  4. 1 bike
  5. 3 bikes
  6. 2 bikes

Essentially an average of 2 bikes a night, although I may well have misremembered days 2 and 3 and actually done 5 in one night thanks to a concerted effort, surely not?!

With that first hurdle out of the way I started to apply the 2nd highlight – Dark Reaper and you can see these 3 bikes have been highlighted. Adding in the Ravenwing Champion that means 4/13 are done. With 9 left I’m estimating another 3 per night if I can be consistent.

Interestingly, I noticed one front wheel mud guard edge had not had a first highlight and I just went straight in with the Dark Reaper and I think it looked pretty cool. I may well go down this route with the Deathwatch – higher contrast highlight, with no intermediate making the overall base lighter [and the process quicker]. Which leaves me with these remaining elements [those crossed out have since been completed between writing and publishing this post, yay. Bold items are elements that are big milestone hurdles – potential momentum killers, boo!]:

  1. 2nd highlight – Dark Reaper [3 days estimate – indeed it was 3 days]
  2. 3rd highlight – pale blue spot highlights [2 days?, actually 3 days, 3,4, and 5 bikes but I think I did them wrong as the highlight looks too pale, so I may need to do some remedial glazing to fix]
  3. Black shading – to make them black again and smooth out the 1st and 2nd highlights [3 days, potentially as I managed to shade 4 in one session, around 75-90 minutes, leaving 8 remaining.]
  4. Handlebar screens and buttons [
  5. Grenades
  6. Leathergoods [1 day]
  7. Eye lenses [1 day]
  8. Ravenwing symbols – white [1 day]
  9. Final highlight – bonewhite cloaks [included inbetween other elements 0.5 day?]
  10. Verdigris [4 days – day 1 – 1 bike, day 2 – 5 bikes, day 3 – 5 bikes, day 4 – 2 bikes ]
  11. Plasma [and we know how fun that can be… 3 days]
  12. Red rivets [1 day]
  13. Tribal markings – red stripes [
  14. Purity Seals [
  15. Litany scripts [
  16. Company markings – numbers [2 days?]
  17. Various targeting lenses

    In addition individual models will need:

    • Apothecary – vials, tubes, symbols
    • Champion – power sword
    • Sergeant – power sword and face!
    • Banner bearer – banner… oh my lord

    And then the ‘finishing’ bits:

    • finish the bases
      • bonewhite chips
      • Khorne Red/Heavy Red edges
      • Mount the models [some drilling involved here]
    • Matt varnish
    • Tamiya Clear
    • Weathering powders
    • Gloss varnish [where needed]

    To Done! As you can see it kind of explains why I felt this was a big deal [and that was before I’d even got this far] but it is 13 bikes all at once, more than double what I did the first time which was in fact double what I’d intended to do initially. I had the first list as standard bullets but switched it to numbers so I can see how many tasks remaining which gives me a rough timescale, 22 sessions at least, not including the unique guys and finishing them off. Maybe structure and ticking stuff off is what I need as previously timescale estimates have always prompted me to beat them and with a holiday in May I’ll still be doing these in June at this rate, yawn!

      But for now I have structure and I have a visualisation in my head of the process involved. With this clarity I have renewed confidence and even if it takes longer I can’t imagine this project will see me into July which should leave with 2-3 months to complete something else [Assault squad? Deathwatch] at least before the end of the season.

      Dark Angels – Ravenwing – Detail work

      With renewed vigour I return to the Ravewning but can I overcome the black? Well, no! The first level highlights still fill me with no motivation whatsoever, so I try to come at them from a different angle – what can I do that’ll move them on, feel like progress and put me in a position where I can tackle the black with more confidence? Essentially I outflank the black! I decided to start picking out some of the details – all the Ravenwing symbols, purity seals, cloaks etc.

      I remember someone once saying when painting ‘start on the inside and work your way out’. This approach is contrary to that advice, laying the detail work on the top of all the black. Now there’s a chance the subsequent black highlights might spoil these details but it’s a risk I’m willing to take. As you can see I also painted the rolls on the back of the bikes red. Originally these were supposed to be green but I thought it was adding another colour to the bikes and extending the palette, which I thought was unnecessary [in this instance]. Black was too much, Rhinox Hide potentially – but didn’t want to mix materials with the leather goods already used so I went red… OK, so why red? I see these rolls as bike covers. When the Ravenwing are on the hunt although they forgo camouflage they might need to obscure their bikes while in the field and Ferron Proxima is red afterall. It might be a bit odd, but I’ll see how it goes and if I do another unit of bikes with them I’ll try green so you can differentiate squads.

      Some of the Black Knights were also brought up to speed.

      Including the Ravenwing Banner with it’s basecoats – this is near enough a unique job in itself!

      And some more of the Knights. Annoyingly I kept on finding purity seals without red wax or grey paper, skulls on back packs or scrolls on legs in no contrasting colour. I’d go through all the bikes, pick out a detail move onto another one and find I’d missed something, fix it, move on and then find another detail overlooked – it was really annoying. So I’m now at a point where the black is inevitable, where completing that will almost leave them finished. There are plenty of little extra details to do [that Banner not least among them] but once the black is out of the way they’ll be so close I’m hoping it’ll ensure the black no longer feels like a hurdle. No avoiding now – I need to push on through!

      Of course I can always nip back to the Assault Squad should I feel the need 😉 As you can see I picked up some of the same details on these, again making best use of the paints on the brush. And much like the Hybrids the whole tone of the squad has changed thanks to this injection of new colour. Also completing steps here and there will make them easier to finish when they get my full attention tlater on.

      And that leaves me currently in a better headspace, not all my chickens have hatched, so I won’t count them just yet. I’ll certainly feel better once the first black highlights are done and then I can focus on the Dark Reaper ones. If I get a timescale I can predict how much effort is involved but I’m sure it’s no more than a week to 10 days to get the black all done [which means they may very well be done by the time this post is scheduled 😉 ] Fingers crossed!

      Blog at WordPress.com.

      Up ↑

      Design a site like this with WordPress.com
      Get started