Warhammer Underworlds – Ylthari’s Guardians – Grime of the ancient forrester

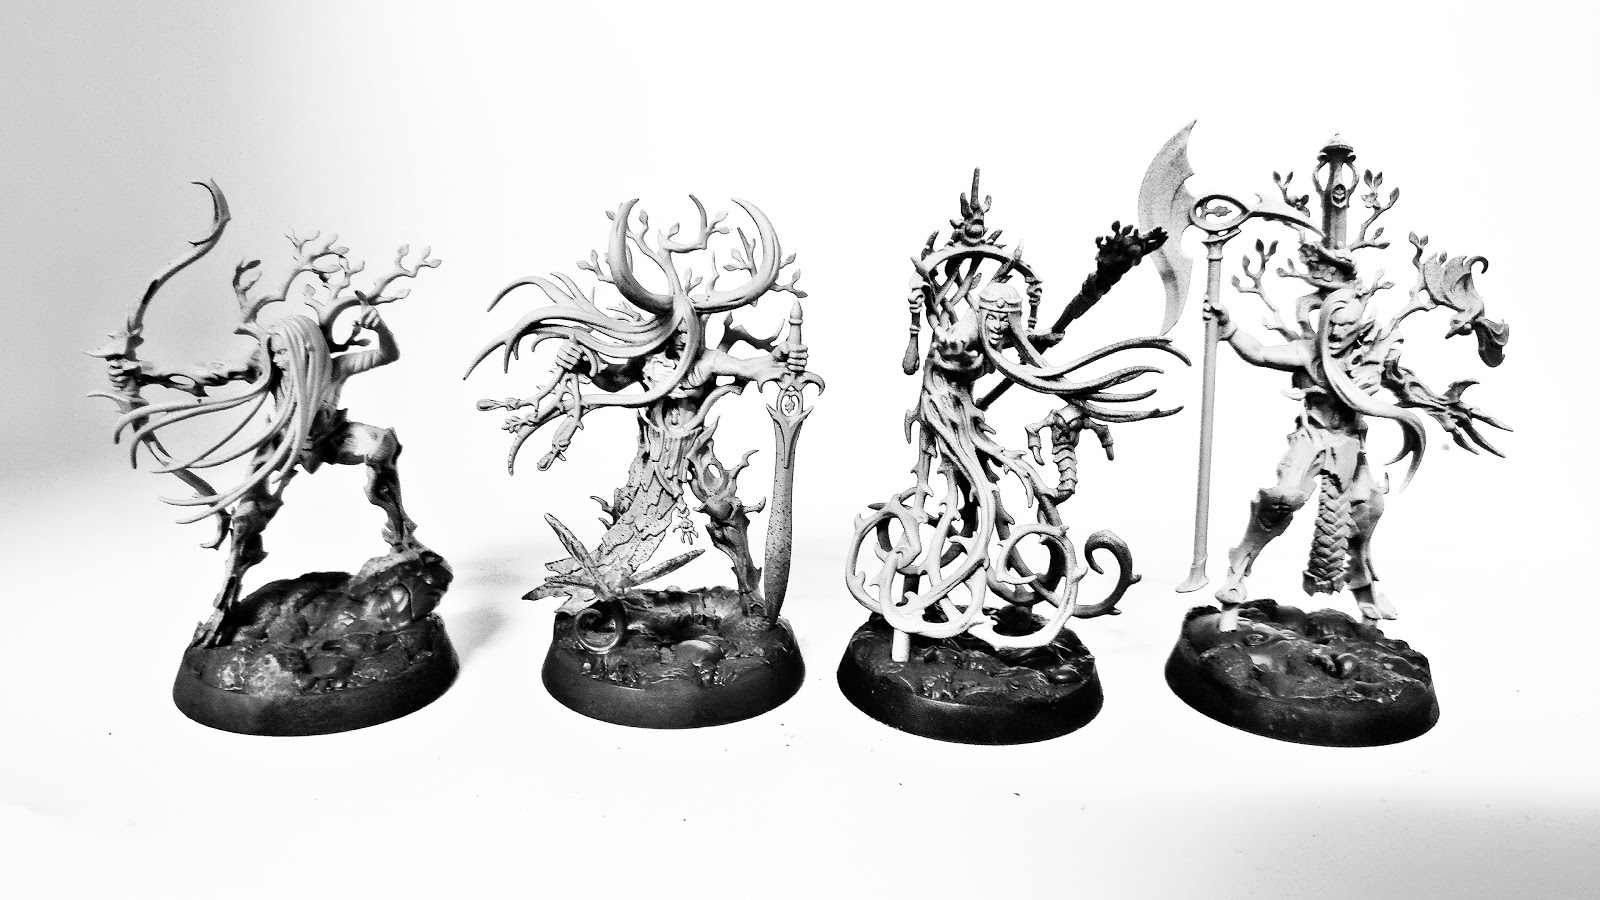
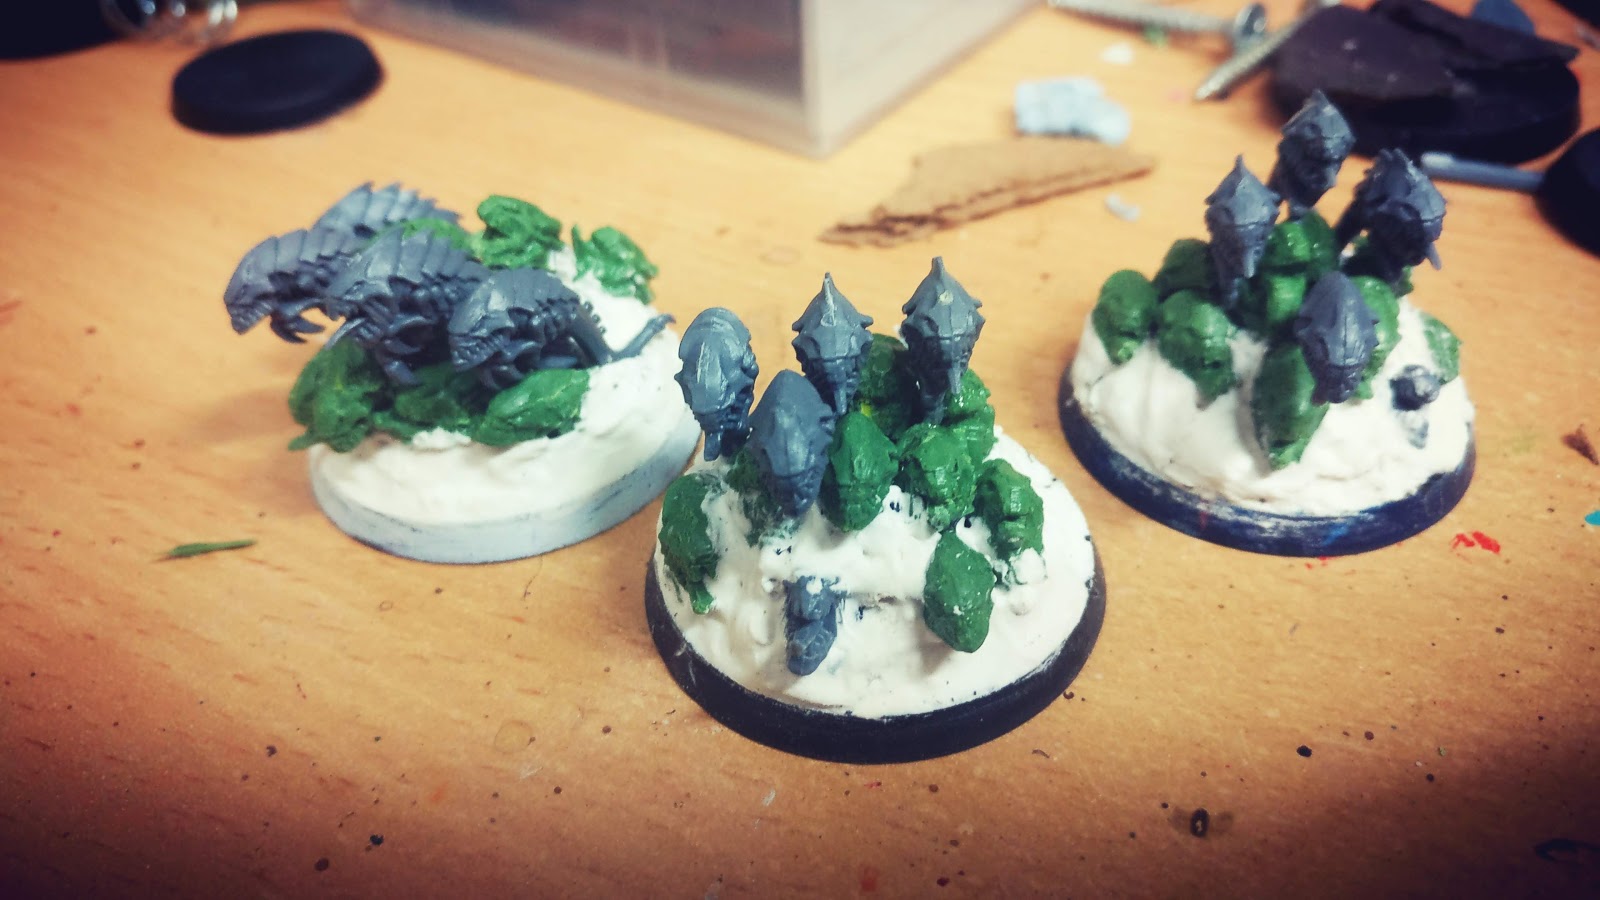
We left these guys particularly pale and interesting. Despite the pre-shading and zenithal highlights I was far from happy with where they were going. I had envisaged a reduce palette that was indeed pale but my natural desire for high contrast and the lack thereof in the white compelled me to add more shading.

I mixed some Waywatcher Green Glaze and Army Painter Soft Tone together and washed it over the recesses and anti-zenithal areas. The green gave me a hint of ‘mossiness’, despite the fact the moss is orange on their bases! That extra tone has made so much difference in the models.

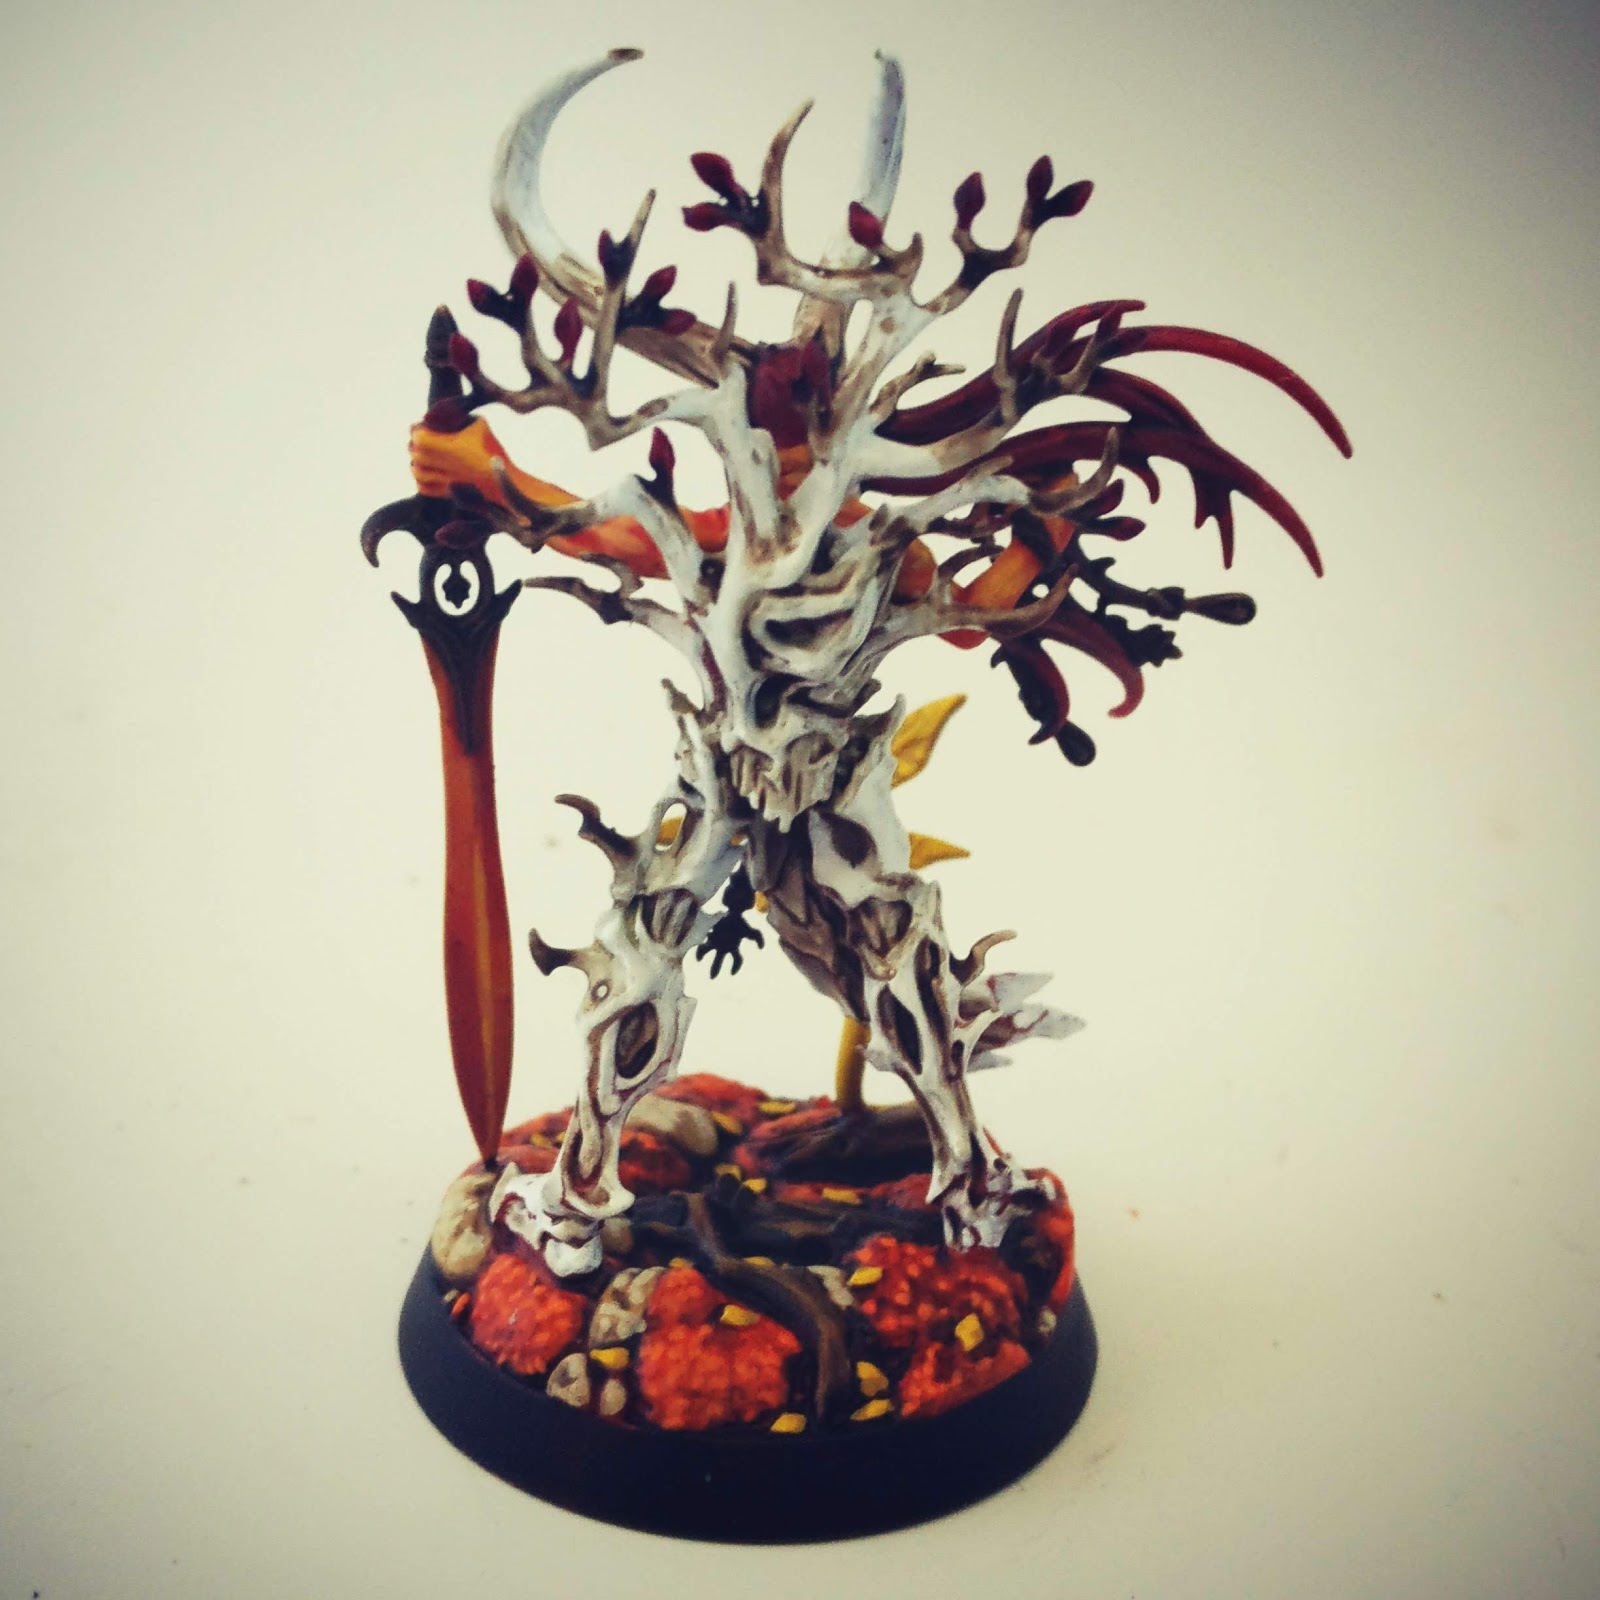
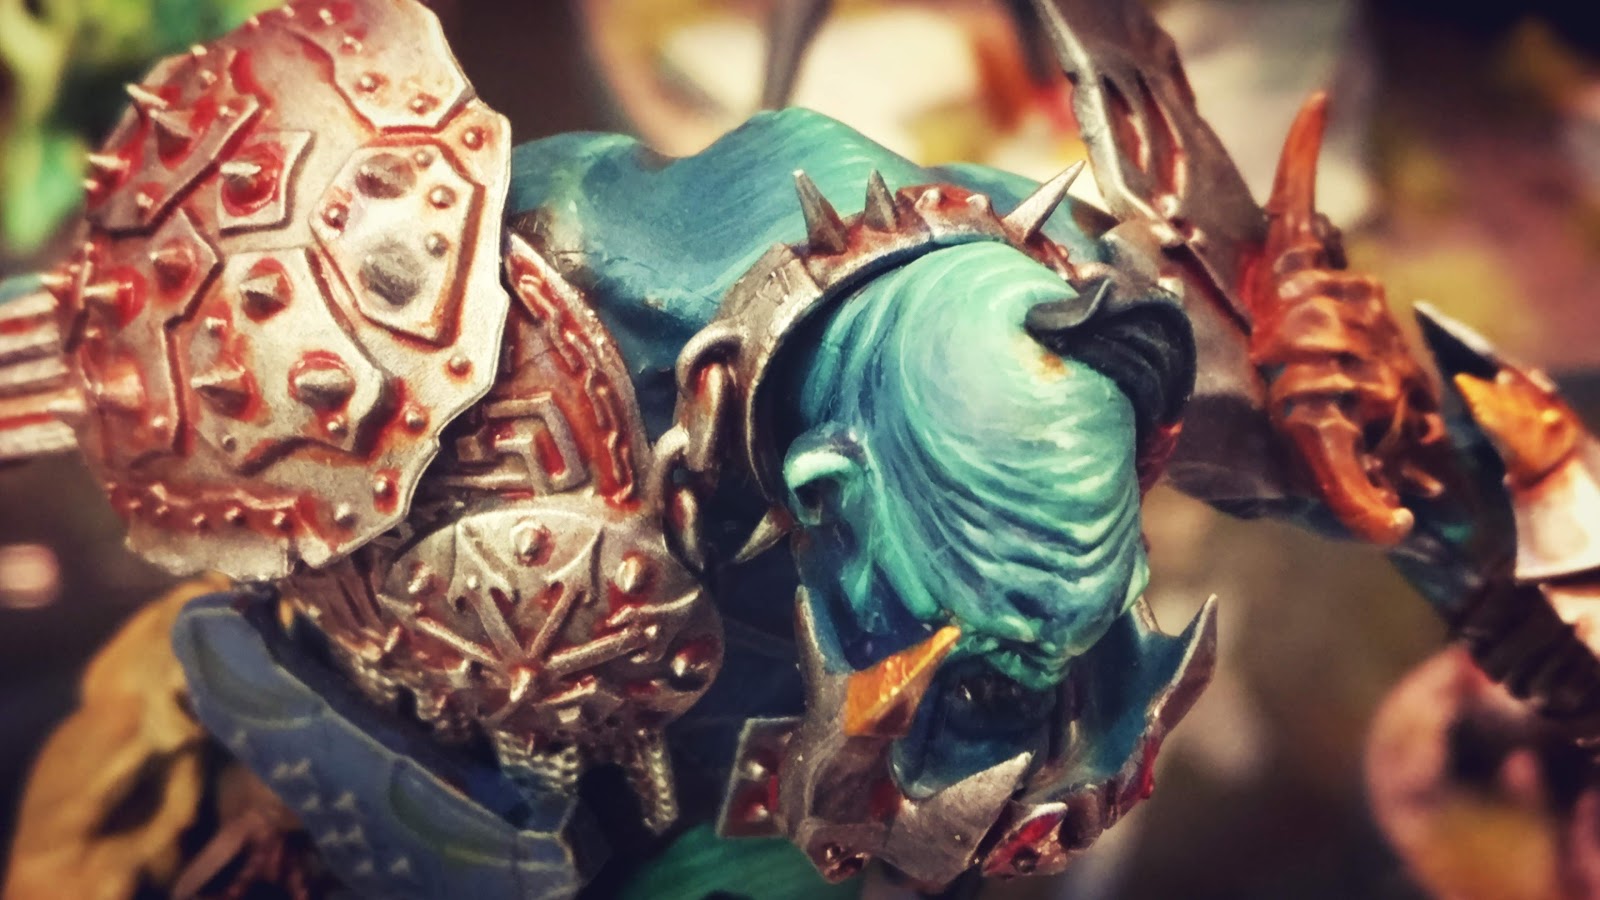
The ‘amber’ blades have also been highlighted [that white sparkle got a bit messy] but the Bloodletter Glaze has worked a treat and is a good alternative colour replica of the original green version [I think]. The fact these glazes have been replaced by Contrast equivalents is rather annoying as I was under the impression they don’t mix with water/washes. 

My ability to blend those colours has really helped and you can see the subtle effect on the weapon haft that will require 3 new Contrast paints to achieve in the future

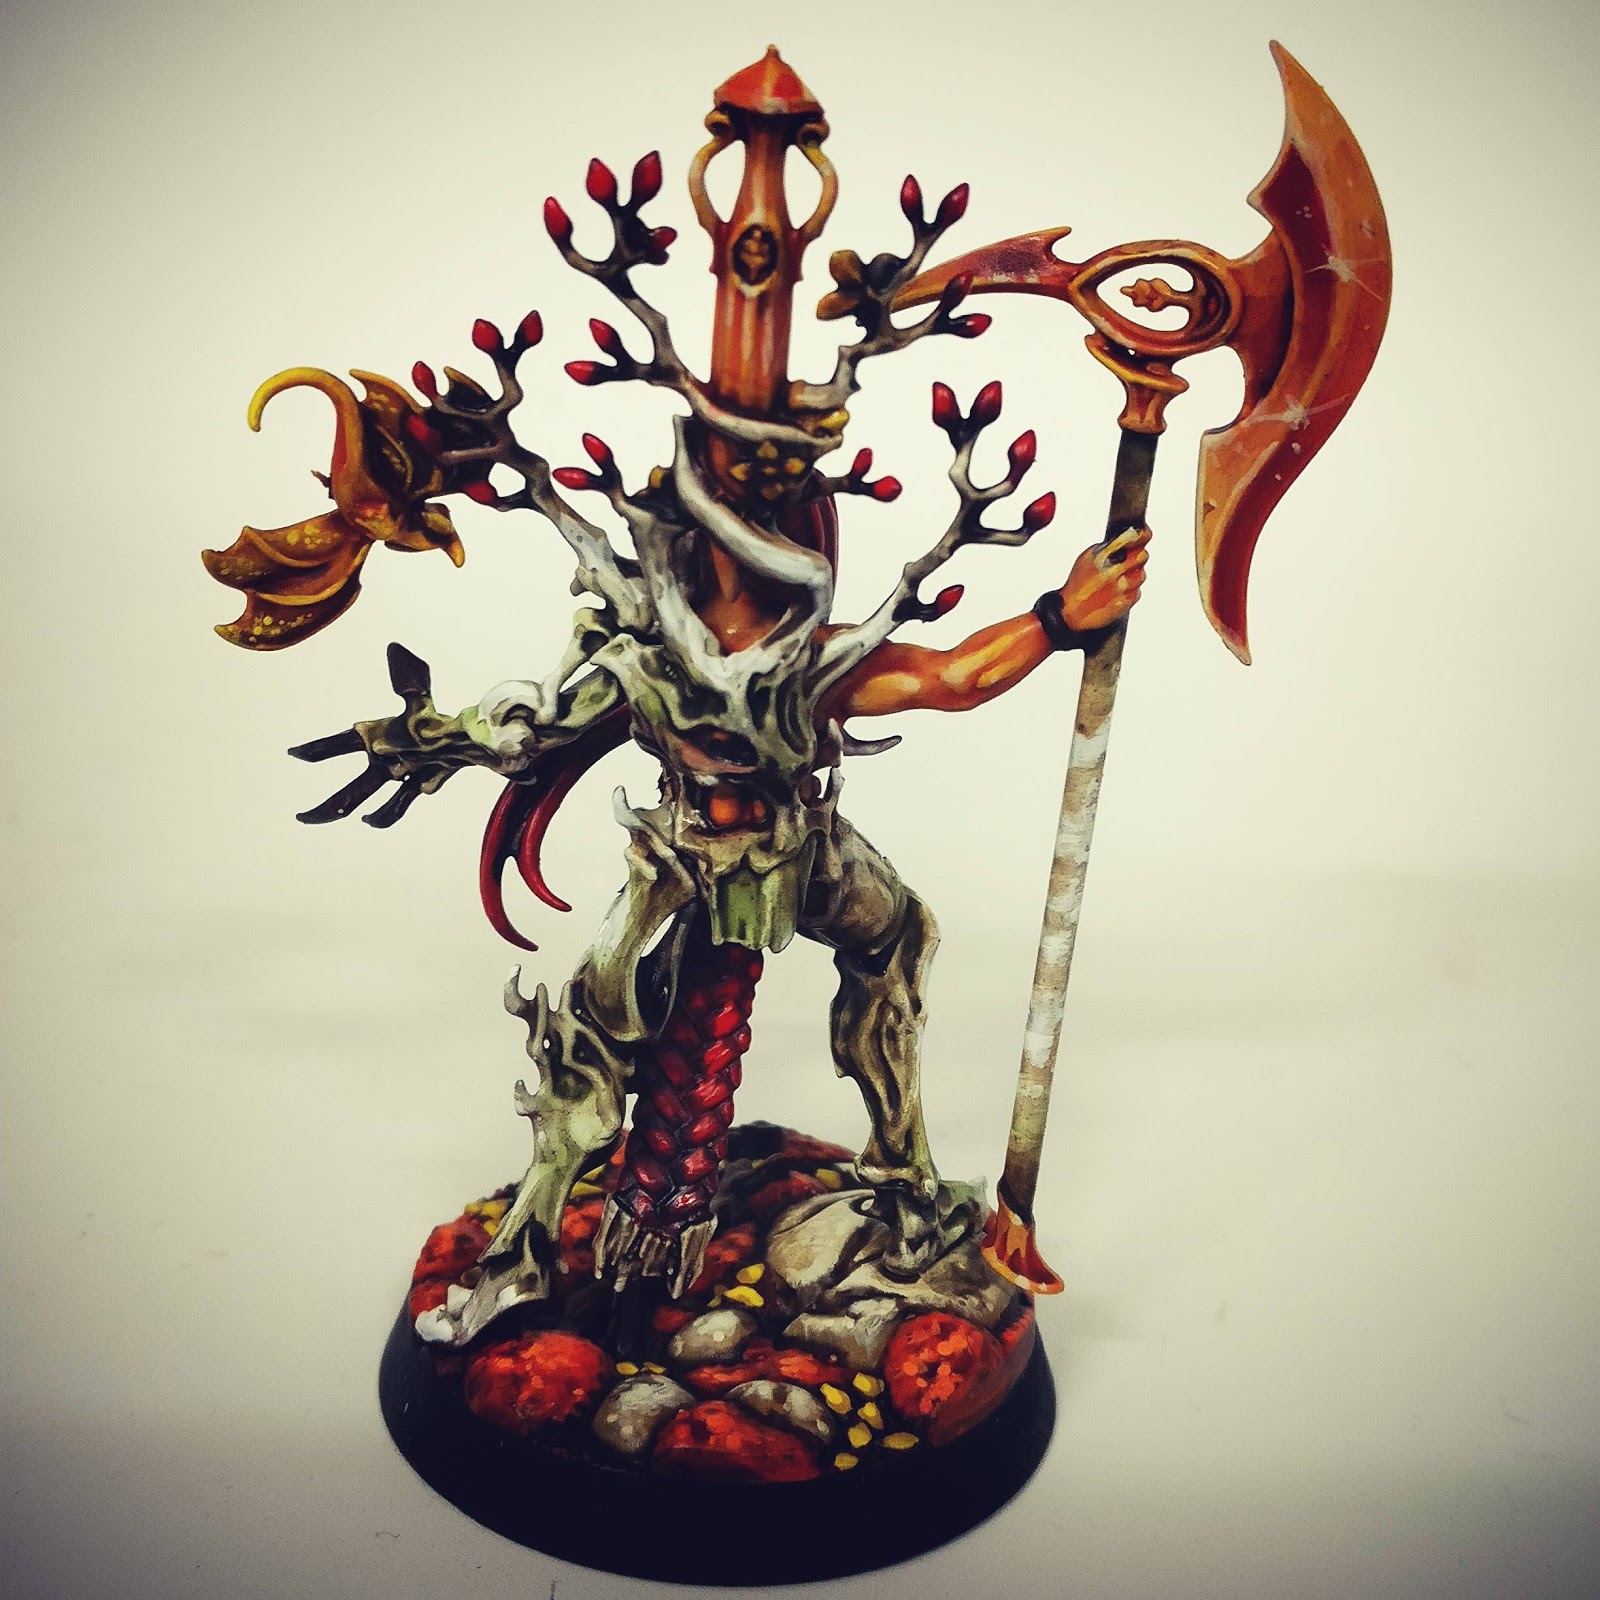
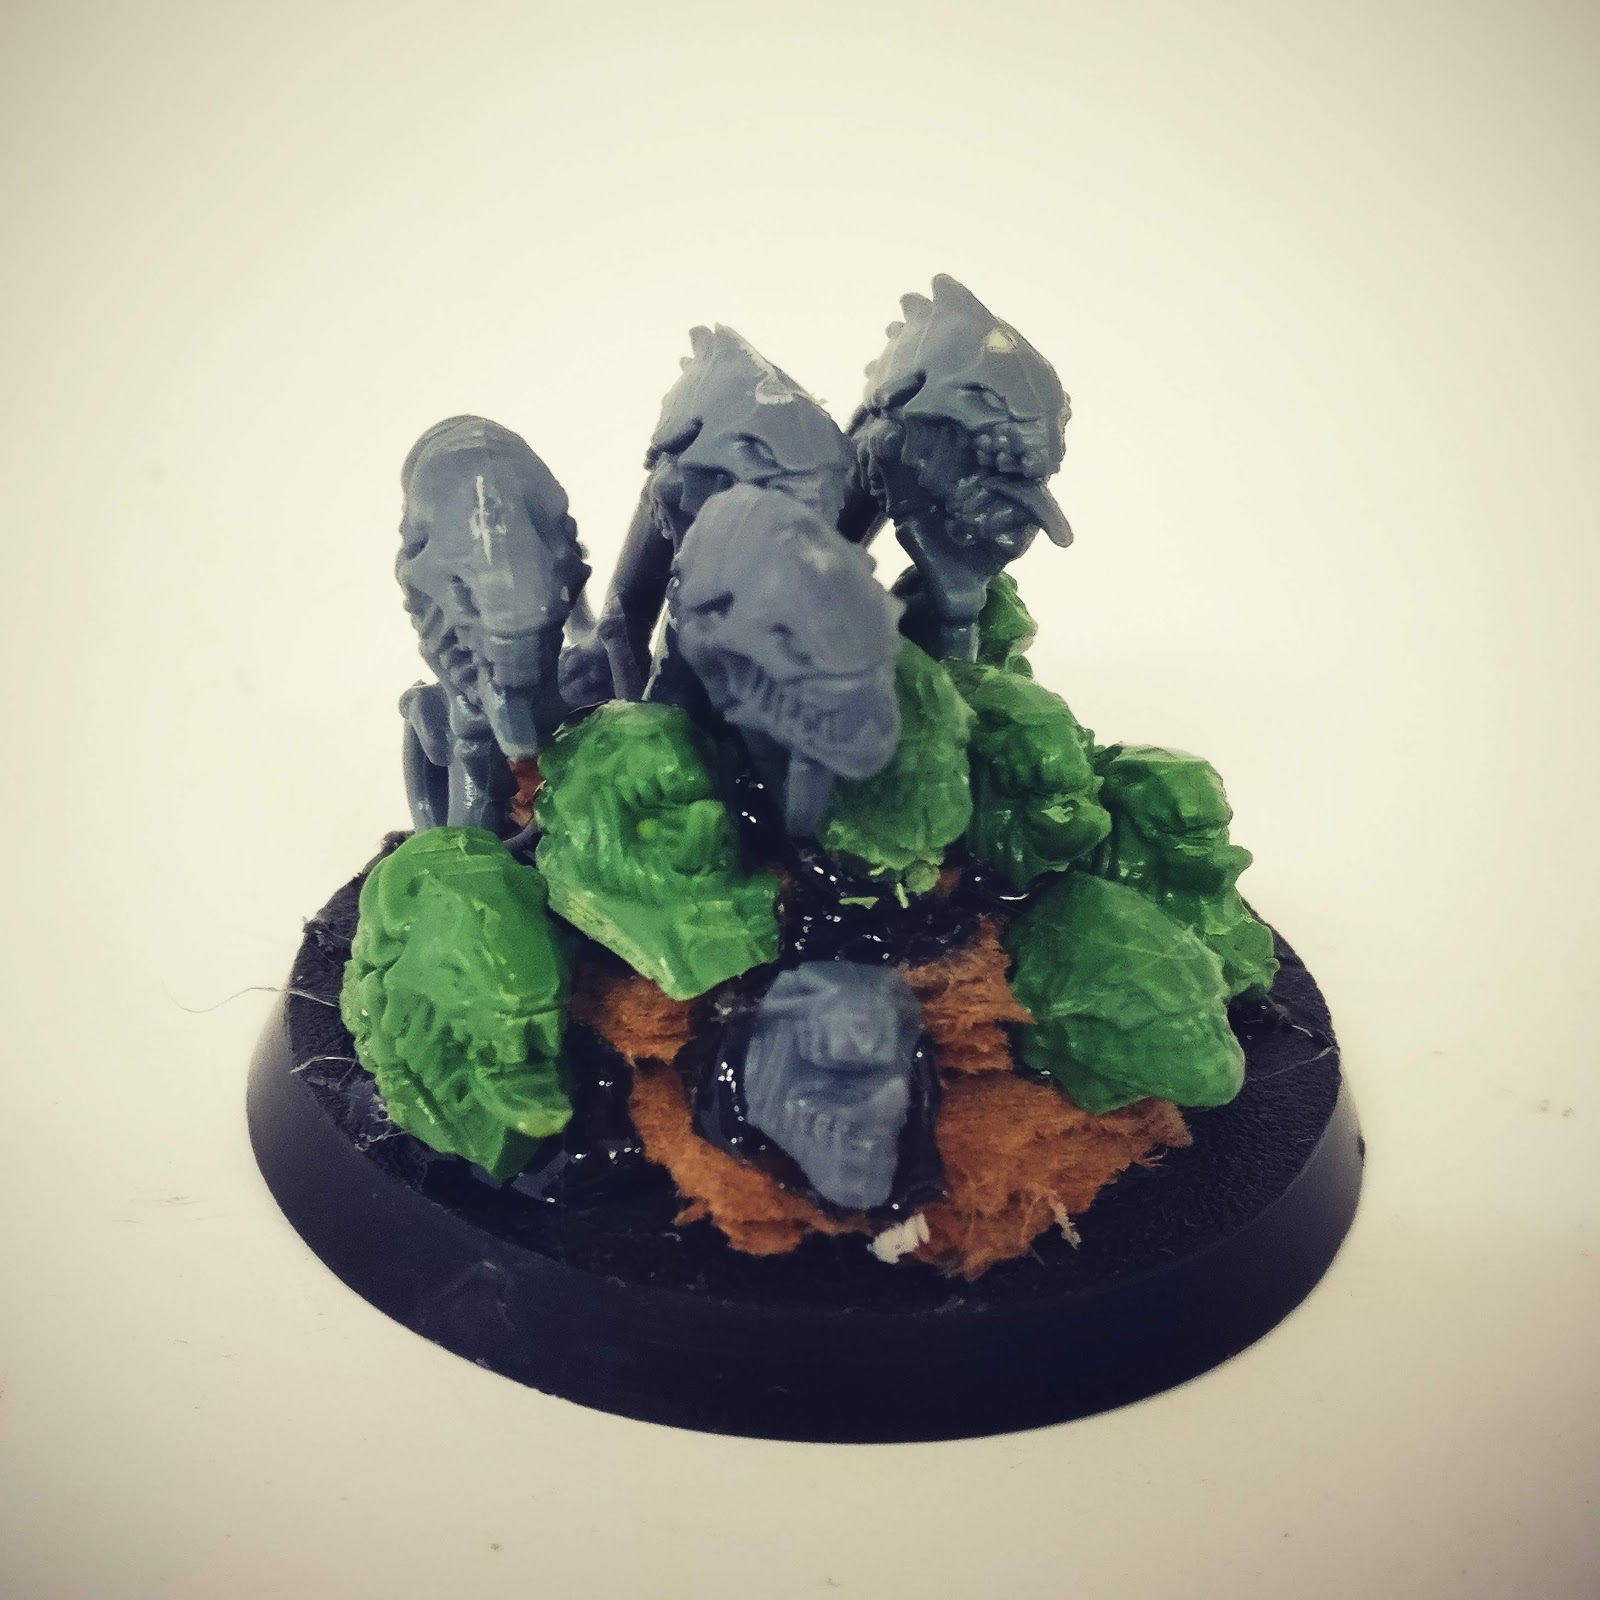
The yellow tree sprites have also come out OK. I had no idea what I was going to do with the originally but the yellow was a sensible choice and they could all theoretically be psychic manifestations hence why despite their different physiology they’re all yellow.

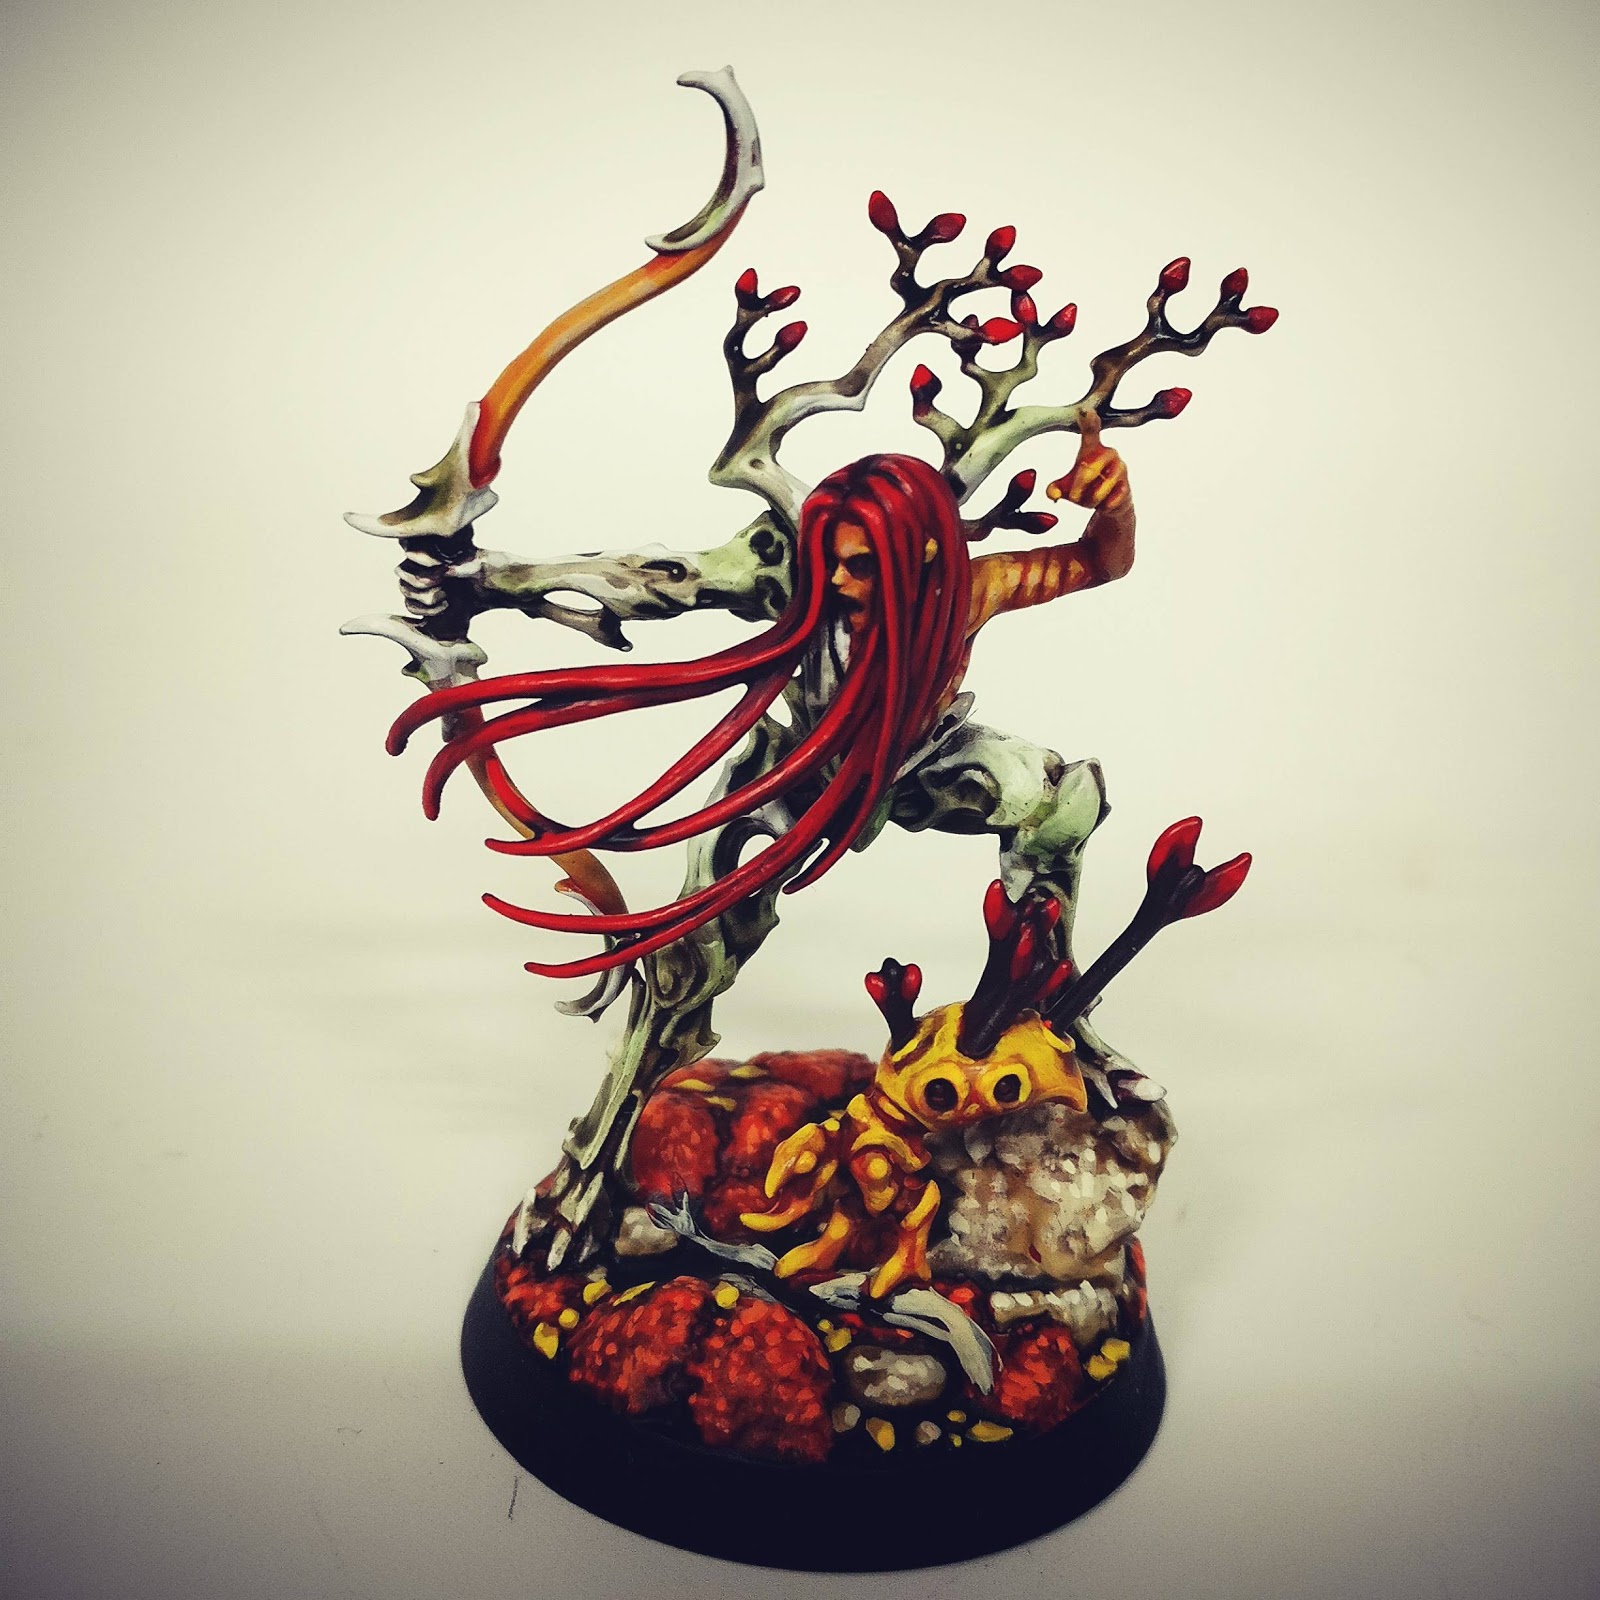
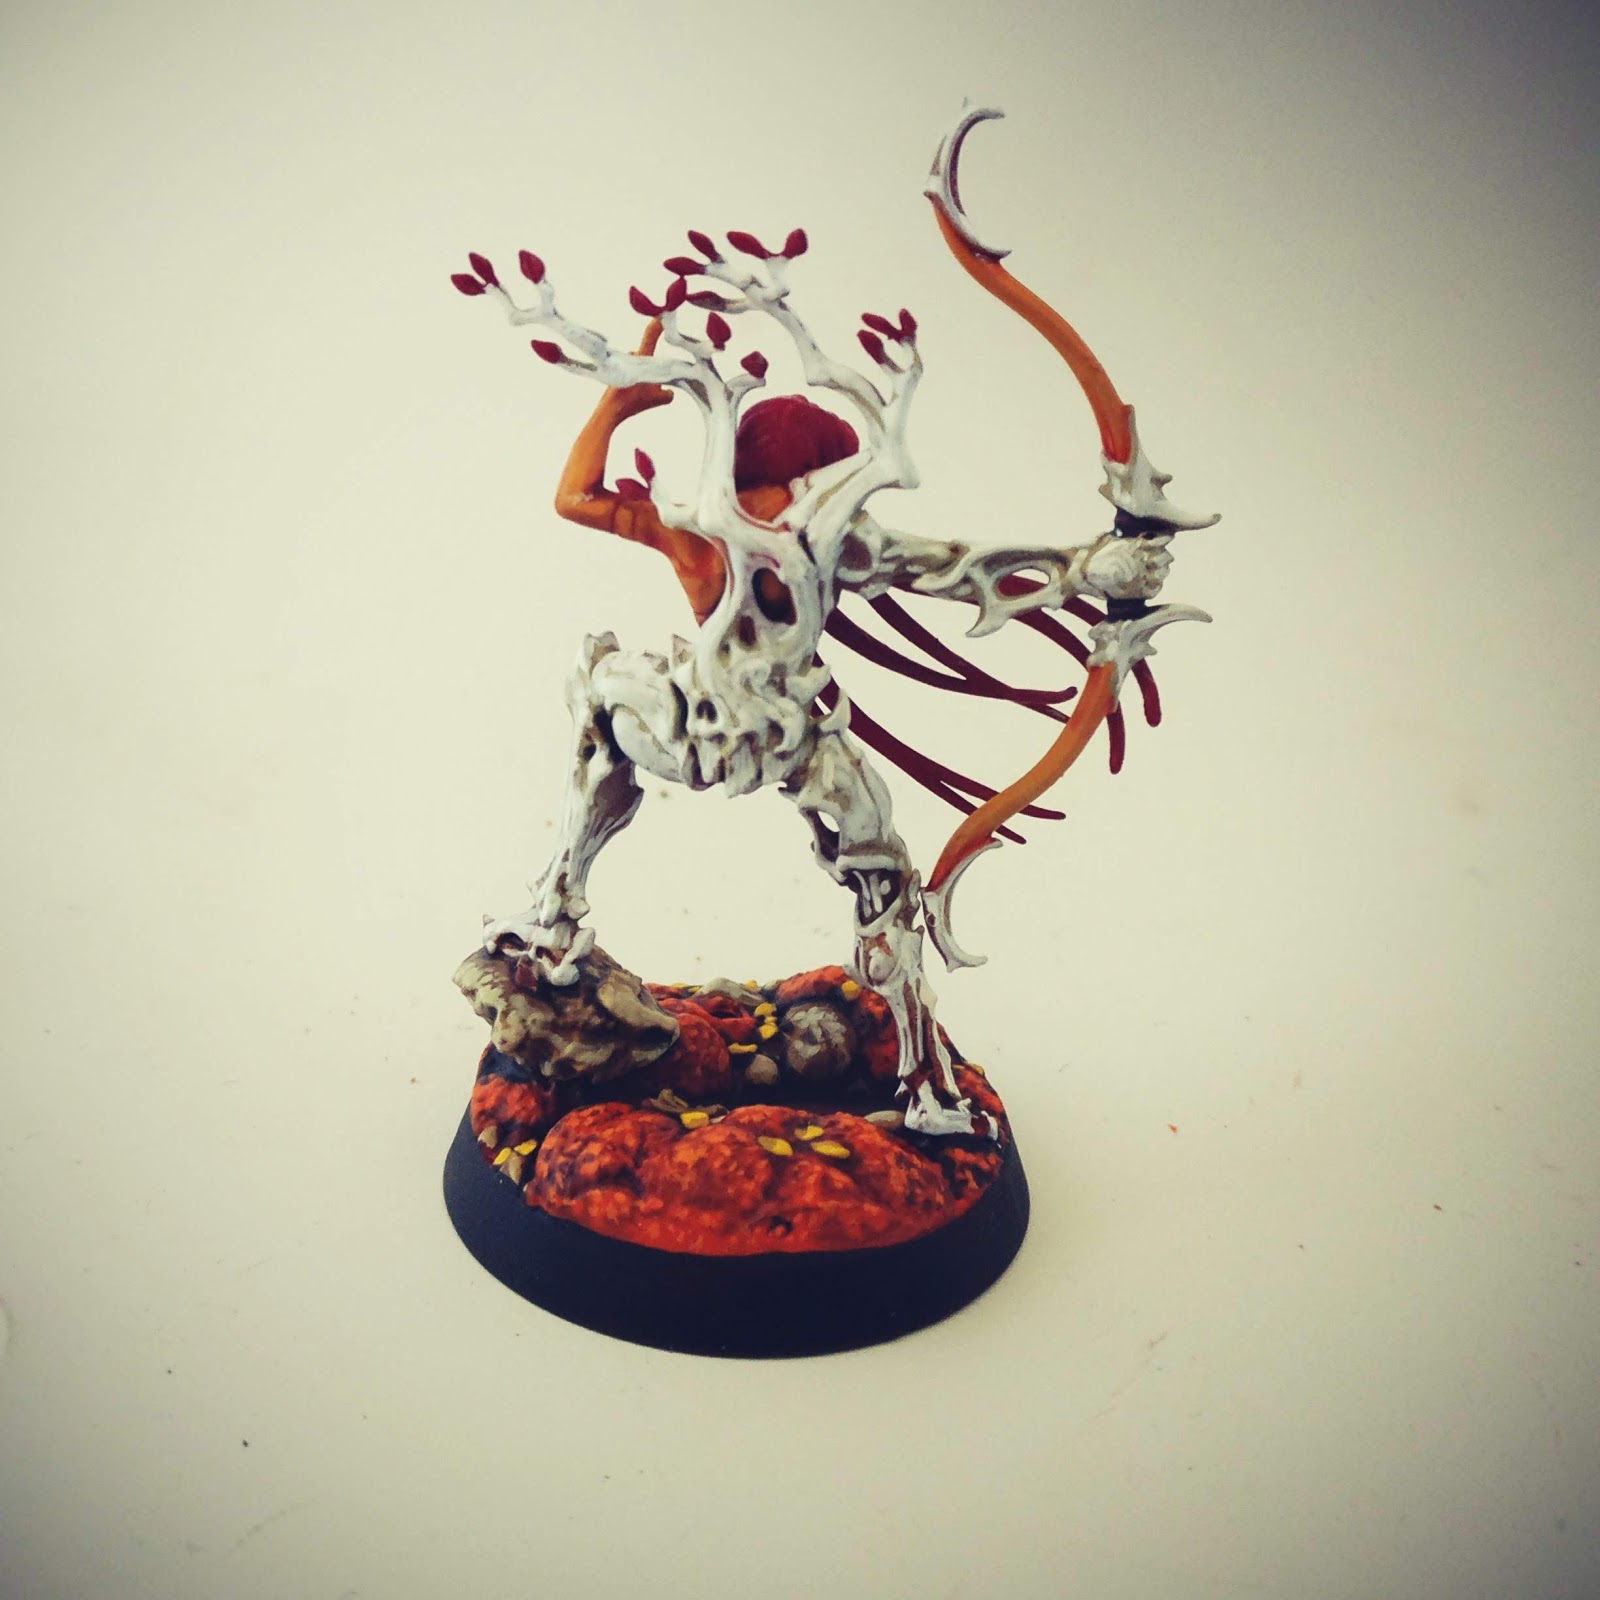
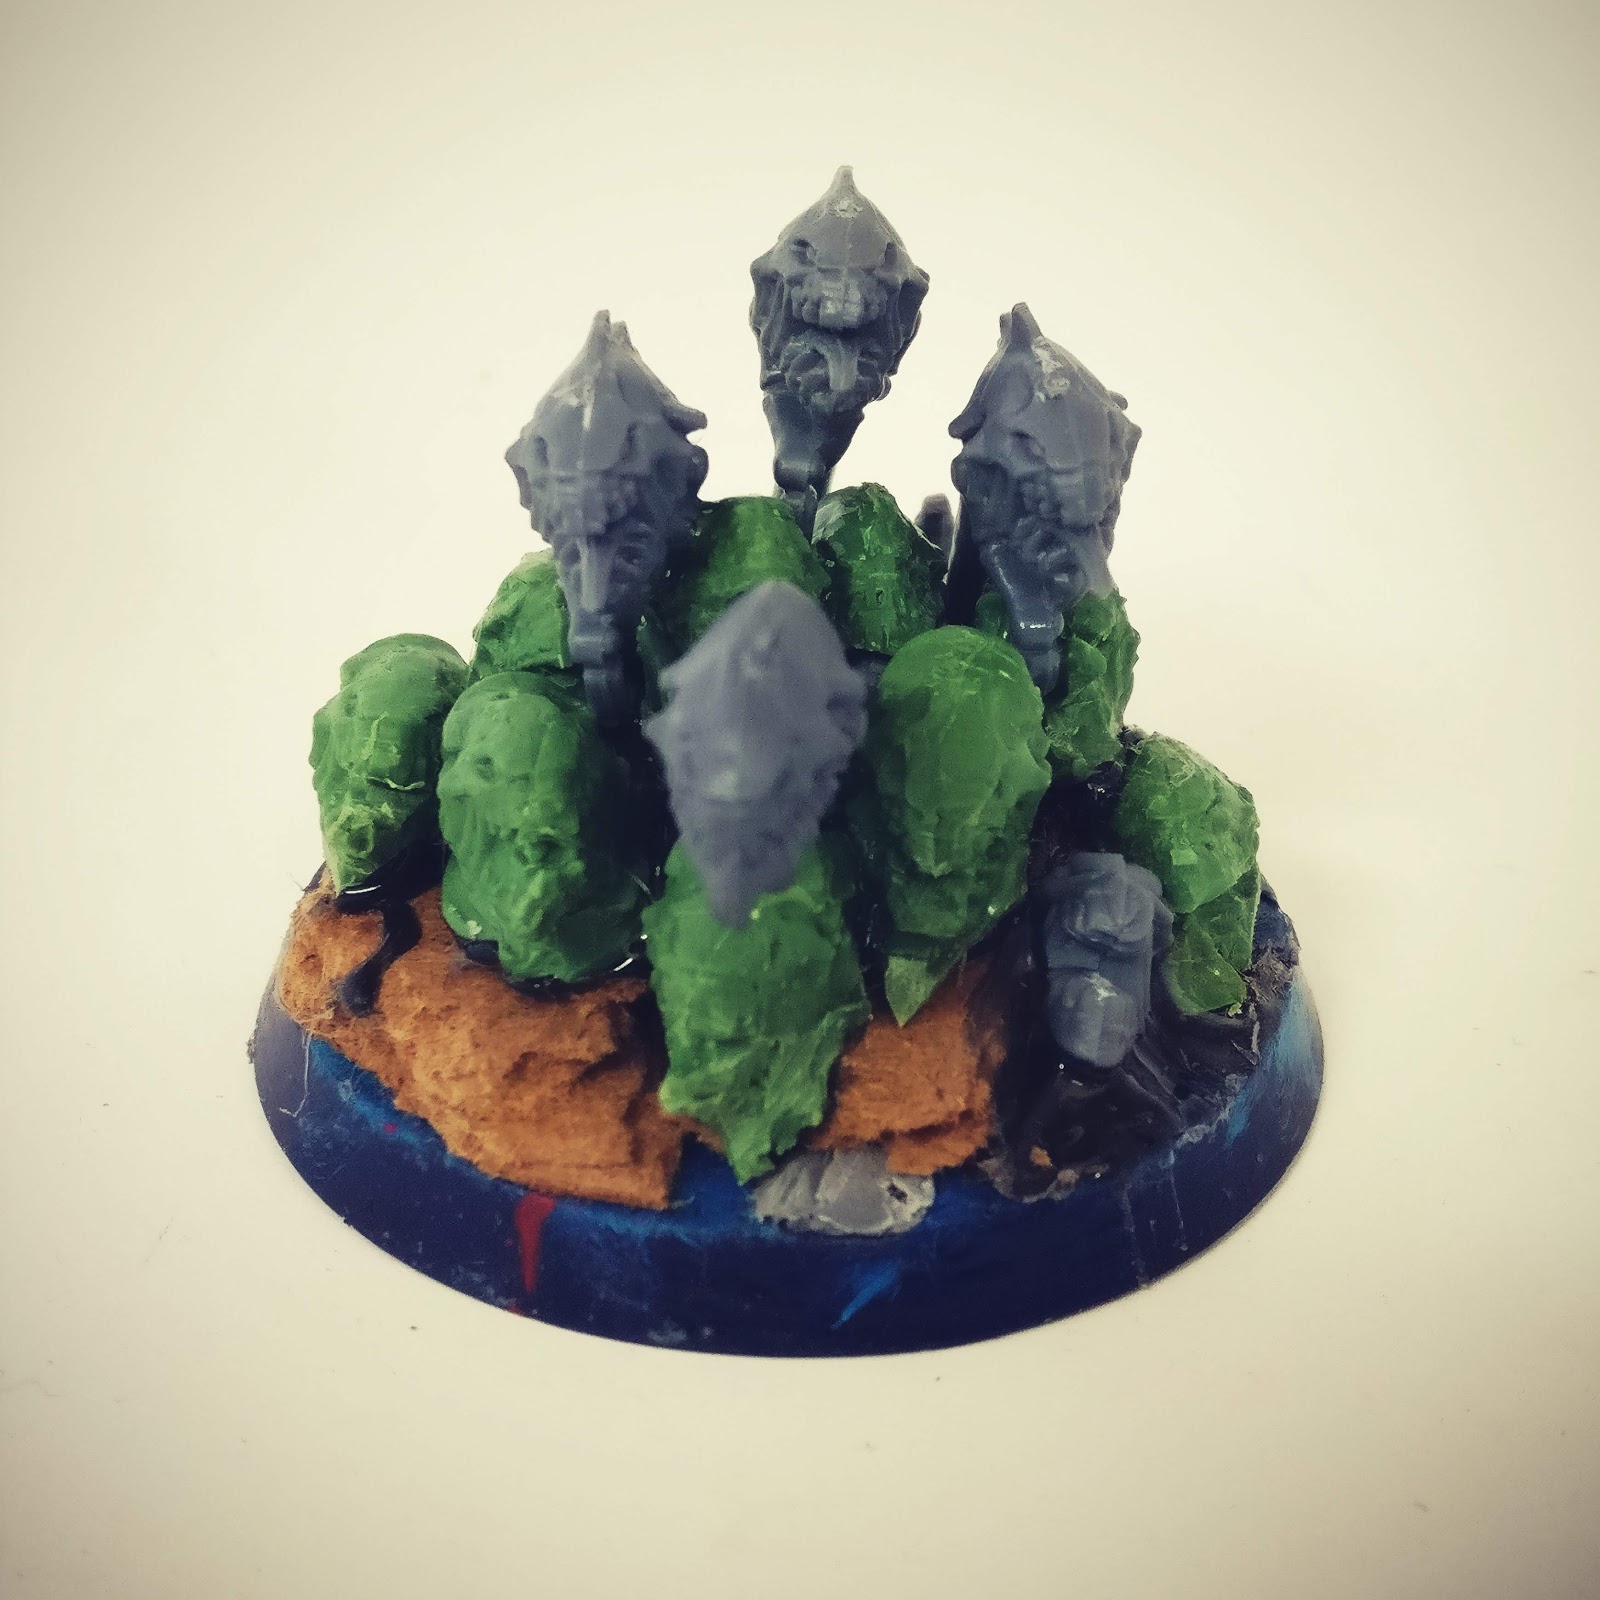
I think this is my second favourite sculpt out of the four. I like the Halberd dude most, then the Horny guy and lastly Ylthari herself.

That said the washes have helped me to come to terms with her vine legs, I mean it’s far from perfect but I’m hoping some subsequent highlights will help define all the details a bit more and bring it altogether.

I also need to highlight all the dark wood elements too.

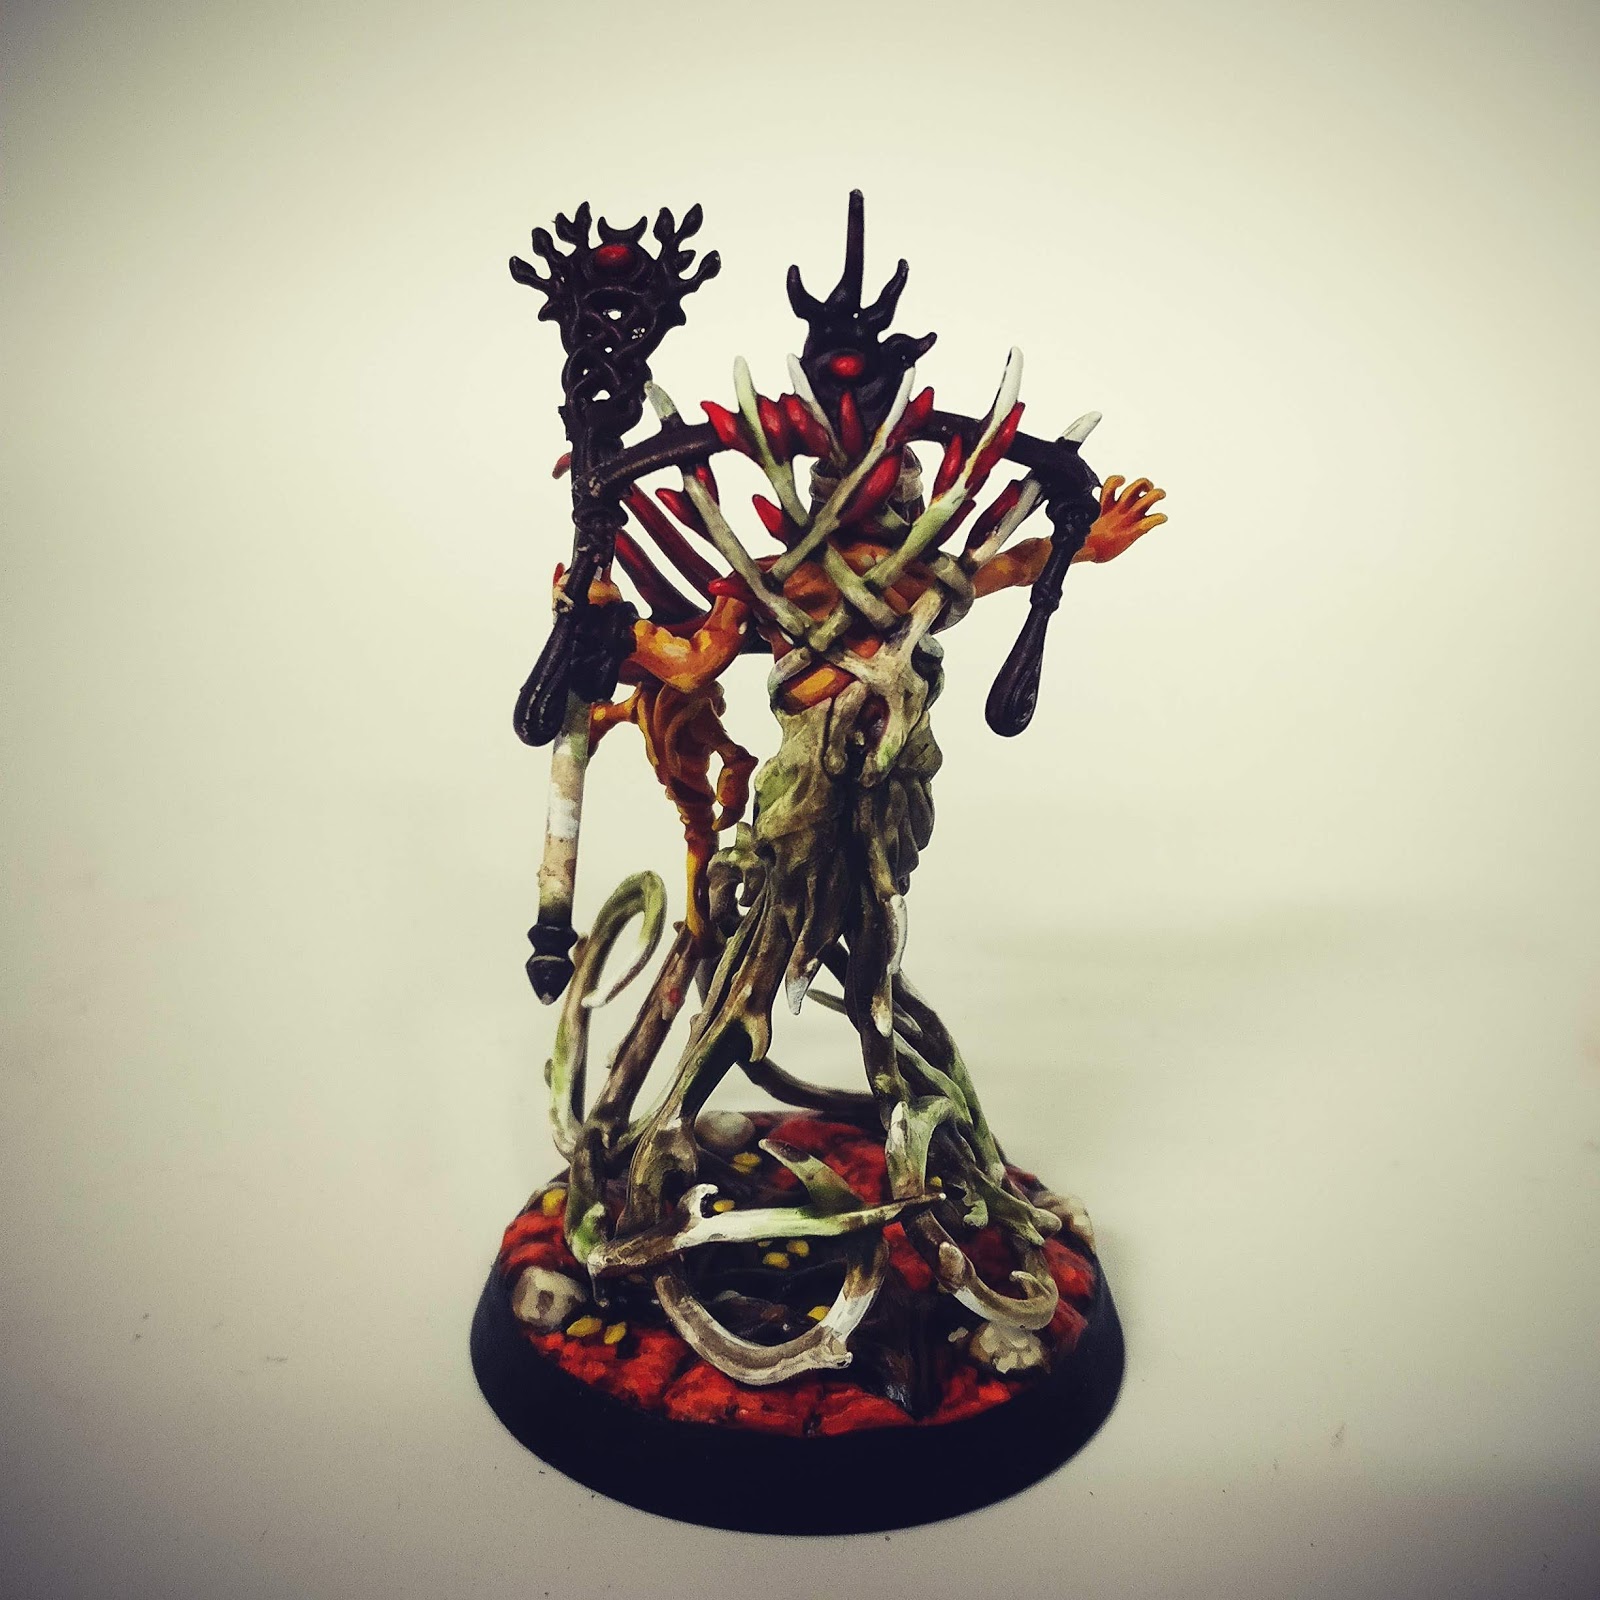
So, there we go, almost done and I can see the end now as things have resolved themselves.

Warhammer Underworlds – Ylthari’s Guardians – Hobby progress at last

Horny dude! With a plan in my head I started to get the bark lighter, this was a pretty big gamble going pure white as there’s no going back from it.

I left the red primer and bone primer visible in some areas – there’s no point zenithal highlighting if you don’t take advantage of it. Although I’ll probably cover it all up with shade washes in the end.

Now at this stage I started to hit the snags with my blog which didn’t inspire me to keep regular records of where I was at. It took a bit of time to reconcile the bases and suddenly I have the orange moss done and went for yellow leaves on the ground… how the hell that fits with the red leaves on the Sylvaneth because usually they go yellow, orange then red before they fall off. But this is all make-believe so maybe in my wood they go red, orange and the yellow when they fall off?

And horny dude progressed a fair bit while I was ‘off grid’. All the skin tones got shaded with Bloodletter glaze, mixed with a bit of soft tone. I also shaded his sword and added Rhinox Hide to break things up a bit.

Leaves got painted red and Strong Tone was applied in places for greater depth, shading and to blend the end of his branches into the leaves.

The other guys got highlighted and skintone done but I haven’t got round to shading the bark. The tree spirit went yellow, to try to capture some of the extra autumnal colours lost in only choosing red for the leaves [I appreciate I was trying to keep the palette of colours down but I’m also trying to capture all of the inspiration].

The halberd got shaded much the same way I see the standard green one done. Plenty more to do with highlights but early days. The haft game out really well and I suspect it’ll be the most Birch-like element when I add in all the bark splits.

I went with the bow being orange, as that’s the ‘heart’ of it but part of me things it might have been better with it white and the fixing orange but nevermind.

Lots of shading to do next to try and stop all the whiteness blending everything together.

Ylthari is a real challenge, her vines don’t fit my design at all and I need to sort out her back thing. I can’t glue her to the base either as then I can’t get inside to paint. Still I’ll get there eventually.

There we go – progress, finally! A good few hours [5 or 6] to get here. I doubt I’ll get them done for this months’ Squad painting challenge but they’ll be ready for the next one.

Warhammer Underworlds – Ylthari’s Guardians – Big Build – TO DONE!

As everything is so disrupted at the moment and I had officially admitted to myself I’d entered a mojo recession I did the only thing I could do – bought more toys! Ylthari’s Guardians have long been on my mind and I thought I needed something to try and kickstart my mojo.

All along I had plans to paint these at autumnal Silver Birch and luckily there are is a lot of art out there to help pin down that look. In fact too much because you can do the leaves yellow, orange, red or clearly a mixture. On top of that the Birch itself can be shaded in all sorts of ways from monochrome, to ivory or even turquoise shades. And that doesn’t even take into account how to treat the ground, or how most of the Sylvaneth in the warband do not have smooth bark to do the little black marks on.

And Spider-Man, into the Spider-verse threw in this inspiration. Not that it helped pin down what I was going to do.
So I just went with what I was familiar with. Army Painter Skeleton Bone Primer zenithal highlight over Red Oxide. 

The bases look like they’re covered in moss, but this will be orange on mine and I decided on red leaves to make them less busy looking. However, that does venture into the realm of Game of Thrones’ God’s Wood trees, but we’ll cross that bridge when we get to it.

All the skin tones will be golden orange/yellow, as that will stand out quite nicely against the white bark I’ll doing and is also the colour of the inside of a birch tree [or at least it was in one picture I googled].

Hair is all red, to match with the leaves, but there will be some Rhinox Hide in places to try and break things up and tie it all together.

I still need to do the little tree sprite holding the arrows here, I’ve no idea what colour to do them but even though they’re all different little critters I’ll do them all the same colour. The bases also got Trollslayer Orange on the moss, but I don’t know what t do with the little puddle area in the middle…

I wanted to do the weapon material the same as his skin tone. Even though that should be ‘soft’ [because it’s skin] I think the heartwood is the strongest part of the tree so it makes sense to also have it for the weapon. I may also paint the thing on his back bronzed flesh too, now that I look at it.

There are still a lot of questions to answer on colour choices so I’ll be working on the horned guy a bit more to feel more confident in the direction before I apply it across the other three, till then BW shot!

 Big Build – TO DONE!

I builds it, I gets the badge!

4th Anniversary of the birth of the Man Cave

It’s the 4th Anniversary of the birth of the Man Cave. Things are still going OK in 40kaddict towers. I did a rejig a month or so back and installed a second shelving unit to help store some figures.

There had been a second oil radiator I never used so I got rid of that giving me the space and somewhere to put my big figure case. I’m hoping it also gives good aeration round the bottom of the shed so it keeps the mold at bay – thankfully that’s not been a problem since that first winter.

I still think a solar powered fan would help improve ventilation and I have a huge tin of Protek waterproofing paint so I can paint it again. There’s enough for another four coats at least which will protect it for many years. The coats I’ve already put on it seem to have worked really well. The product is expensive but as it’s the main thing protecting the wood worth the investment if I want it to last and last. I really just need to find time to paint it again.


Anyway, 4 years ago the Man Cave was born, then I took another 2 months fitting it out! Sometime I can’t believe I ever did all that.

It also means my car is four years old too – those ludicrous wheels!

GW Manchester Battle of the Brush – June – Characters

Following on from May’s Battle of the Brush [or ‘Tale of our Warlords’, as it’s also known], June’s category was Characters. I entered Deathleaper, I wanted to get my assassin done, but it wasn’t meant to be. My goal is just to achieve the 12 entries over the course of the year and as you can see the standard is exceptional each month so the competitive aspect will be tough, hence why I’m just along for the ride.

This Inquisitor Scale Eisenhorn [oh my!] and ‘Deadpool’ Assassin took the top honours.

Smash Captain was 2nd.

A third of the Fellowship came third!

Custodes took the ‘most inspiring award. The rest were all inspiring too…

Robo-ambull

Abaddon was popular

Close-up.

Kharadron geezer.

Slaughterpriest [?] and Locus.

A Knight from the May challenge I didn’t get to take pictures of.

alongside Canis Rex.

Alarielle the Everqueen on her gigantic Wardroth Beetle.

This was primed with Retributor armour and everything else was Contrast paints apparently!

More of the amazing Orruk store display, love the tone and details that has been applied to these.

The Giant was amazing, the picture does not do justice to the highlights on his head

And lastly a giant squig chariot.

This month is units again. I have my Chosen Axes to display but I have been trying to get on with these, again as a way to avoid that darn Dark Shroud, however I have a plan to tackle that at the end of the month…

Denied

Over the past couple of weeks I’ve started to notice a number of issues with blogger. Initially when I imported images to posts they would appear fine, but when I returned to the draft it would only show broken image links. Now, as soon as I place an image, I get the little broken pic icon. But this is only an issue for me as I’m certain it is down to the IT policy I have to contend with during my lunch break. Over the past few years it has got progressively stricter, I can’t access Google Drive and I can’t access my blog [or any blog that references ‘games’ – you can see the issue there]. I found some loopholes [that were subsequently plugged] and adopted Google comments so I could still respond to people, but that was ultimately doomed by google itself.

Which bring us to now – either the IT policy has changed, the slight shift by Google to how Photos and Drive interacts has precluded access or I have had my access curtailed [the usual dialog box is short on the usual explanations why I’m denied which feels suspicious].

Anyway, what does this all mean? Writing my blog was a lunch time exercise, something I used to de-stress and re-balance for the remainder of the day. When I write a blog post I import all the images and then go back through adding pertinent commentary above each image, using the image to inform the text. You can appreciate that is challenging if I can no longer see the image I’m trying to take inspiration from. Which means I’m left with a number of options:

Blog without commentary – not my style. The images are important, a record of my achievements and what you the reader is most interested in but the writing is what I have to get out of my head – I’ve said many times this is my ‘hobby pensieve‘. Without the text I’d feel stressed. 

Blog at home – this is the most likely answer, but not without its own challenges. I don’t have a stable setup in the man-cave for internet access – the wi-fi is sketchy. But more importantly if I’m out in the shed I want to be doing the hobby. That was the joy of the current system, blogging when I couldn’t paint. But if I’m to keep the blog going I’ll have to set aside some time do it, how that manifests in regular posts I don’t know. 

Use our ‘standalone’ laptop – feasible, except for the fact I just got a new work laptop [after 6 years] and it would be ridiculous to be getting that out regularly for blogging even if it is my lunch break…

Switch to a different platform – this isn’t really an option but I did have a quick a look at WordPress, just to see if it was more compatible. There seem to be a number of things to help migrate blogger but importing pics from Google Photos only appears to work one at a time, which is no good for me. There would be a lot of work migrating over and I’m pretty sure I’d have to start paying for the service to get some of the things blogger delivered for free.

Blogging at home seems to be the only feasible option, which is incredibly frustrating. I’m currently really struggling with the hobby, my mojo had fizzled out mainly because I couldn’t face that darn Dark Shroud but I finally picked up Y’thari’s Guardians and I’ve had a couple of hours of productive painting. It may not have achieved my vision of autumnal Silver Birch, but I could create that in half a dozen different variations anyway and it’s still early days, so I should wait until it’s complete to judge but the potential is evident.

In conclusion, the blog’s been chopped off at the knees and I’ll do what I can to keep it going but the motivation to do so is in direct competition for the limited motivation/time I have to do the actual hobby I want to write about – something has to give. It’s not dead but after [nearly] 9 years it might have to start taking it easy for a while [I can’t see the policy changing, if indeed that is the cause, but who knows…]. I know everyone will be fine with whatever I post, I’m just frustrated that this situation is out of my hands.

My First Blog Post

Be yourself; Everyone else is already taken.

— Oscar Wilde.

This is the first post on my new blog. I’m just getting this new blog going, so stay tuned for more. Subscribe below to get notified when I post new updates.

Introduce Yourself (Example Post)

This is an example post, originally published as part of Blogging University. Enroll in one of our ten programs, and start your blog right.

You’re going to publish a post today. Don’t worry about how your blog looks. Don’t worry if you haven’t given it a name yet, or you’re feeling overwhelmed. Just click the “New Post” button, and tell us why you’re here.

Why do this?

  • Because it gives new readers context. What are you about? Why should they read your blog?
  • Because it will help you focus you own ideas about your blog and what you’d like to do with it.

The post can be short or long, a personal intro to your life or a bloggy mission statement, a manifesto for the future or a simple outline of your the types of things you hope to publish.

To help you get started, here are a few questions:

  • Why are you blogging publicly, rather than keeping a personal journal?
  • What topics do you think you’ll write about?
  • Who would you love to connect with via your blog?
  • If you blog successfully throughout the next year, what would you hope to have accomplished?

You’re not locked into any of this; one of the wonderful things about blogs is how they constantly evolve as we learn, grow, and interact with one another — but it’s good to know where and why you started, and articulating your goals may just give you a few other post ideas.

Can’t think how to get started? Just write the first thing that pops into your head. Anne Lamott, author of a book on writing we love, says that you need to give yourself permission to write a “crappy first draft”. Anne makes a great point — just start writing, and worry about editing it later.

When you’re ready to publish, give your post three to five tags that describe your blog’s focus — writing, photography, fiction, parenting, food, cars, movies, sports, whatever. These tags will help others who care about your topics find you in the Reader. Make sure one of the tags is “zerotohero,” so other new bloggers can find you, too.

‘nids part 270 – Rippers – Big Build TO DONE!

On to basing up the Rippers I used some cheap filler to blend the ground in a bit more.

Then I got some thin slate and crushed it up to make more of a fractured crust they’ll burst through – more represetative of their tunneling rules.

Now, the red stuff is some Martian Ironearth that i thought I could just paint on and get the fractured earth effect. But the paint had started to dry out and it went on more like peanut butter. I really didn’t think it would crackle, so I panicked and blobbed on the PVA and slate. It obviously did crack and even pulled apart the filler as it shrank! But the slate worked out OK too.

I may even give some of my older Ripper bases a little paint touch up when I get round to painting these – the older ones look a little tired and it wouldn’t take too much effort just to bring them up to current standards, although I’m sure I’ll live to regret considering it…

I final coat of PVA and sand and they’re built

Wait a minute, look what’s just snuck up as well. I couldn’t just leave the Spinemaws in box. I have quite a few spare Infestation Nodes so I thought it would be nice to use une to raise them up. As the Spinemaws are all the same height you have to do something to get variety and for even more I glued the node on top of a 25mm base on the 40mm base. I then filled in some of the space with bits of hardboard and smoothed it all with filler again with a final coating of sand – so ‘stretch goal’ 😉

 Big Build – TO DONE!

I builds it, I gets the badge!

‘nids part 269 – Rippers – Forgeworld inspired conversion

I’m continuing my Big Build theme and finally plucked up the courage to do my next three Ripper bases in the style of the Forgeworld ones. As you can see they got built and are considerably bigger and more representative than my first press-mold prototype.

I had been struggling to work out how to build these up, then I just started gluing chunks of hardboard to a 40mm base with the press-mold Rippers coming out of the base [plus one Warrior face pushing through the ground].

All in I think there are 12 Rippers on the base, 4 of which are the plastic ones.

  The next base I tried to use some of my Ripper side pieces glued to a vertical strut but it looked really odd and I ended up with the three heads running up the spine of the strut to try and hide it. Hopefully it won’t be noticeable that those two halves are different.

I’ll need to blend them in with a bit of ground material as they burst through the dirt. I think there are 14 on this base.

The last one, I think there are 15 or 16 on this, including 4 plastic and one Warrior face again. I pretty much used all my plastic Rippers.

All I have left are the Spinefist Maw variety, the two other upright versions [one with the horn on its head] and a couple of the others, in case I ever need to make any more press molds. It’s unlikely though. The Spinemaw Rippers might make a base but it’s an odd one I don’t really need.

Now to blend them into the ground…

Blog at WordPress.com.

Up ↑

Design a site like this with WordPress.com
Get started